Enroll in my jewelry design and business of craft video tutorials online. Begin with my ORIENTATION TO BEADS & JEWELRY FINDINGS COURSE. There are 18 video modules including handouts, which this is one of.
CHOOSING CLASPS AND CLASP ASSEMBLIES AND SUPPORT SYSTEMS
In Jewelry Design, when we speak of “choosing a clasp,” we are referring to something broader than the clasp itself. We are referring to what is called the “Clasp Assembly”. The “Clasp Assembly” is everything that has to come together in order to attach your beadwork to the clasp. The “CLASP ASSEMBLY” usually consists of several parts. Besides the Clasp itself, there are probably jump rings and connectors, crimp beads, clamps or other jewelry findings. If we had an S-clasp, the clasp assembly would also include 2 soldered rings (one on each side) plus, if using a cable wire, the loop created with the cable wire and crimp bead which attach and secure the wire around the soldered rings.
The “Clasp Assembly” is a more specific term for the more general jewelry-design terminology called a Support System. The Clasp Assembly is the most important support system in any piece of jewelry. In any one piece, there are usually 1 or more support systems. In a bracelet, you might only have the one support system — the clasp assembly. In a necklace you might have three or five. You want your clasp assembly to be able to adjust to your wearer’s movements somewhat independently of how your beadwork adjusts to this movement. Often, you want the clasp to stay in one place, while the beadwork moves to and fro, out and in, up and down, with the wearer’s movements. This only works if you build support systems into your piece. When you see someone whose necklace has turned around on her neck, this is an example of poor Design. This is not natural to necklaces. Usually the poor design has to do with insufficient support systems built into the necklace.
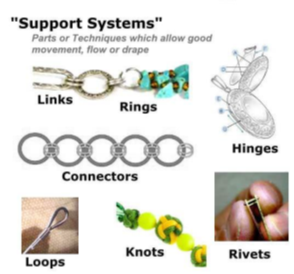
The most obvious support systems or joints are interconnected “rings” and “loops” and “knots.” Other support systems include “hinges” and “rivets” among other concepts. The support systems through a necklace or bracelet play several roles, and are similar to the joints in your body. They aid in movement. They prevent any one piece from being adversely affected by the forces this movement brings to the piece. They make the piece look and feel better, when worn. They keep segments within the piece from getting too stiff or too tight or too rigid. They help absorb excess force placed on your components because of movement, keeping them from cracking, splitting apart or breaking.
With needle and thread bead stringing, one of the more important support system is the knot you tie to secure your beadwork to the clasp. The knot absorbs excess force. It allows the bracelet or necklace to move easily on and with your body. Because of this support function that knots play, it usually is NOT a good idea to apply glue to the knots. This would cause the knots to stiffen up, create lots of tension on the thread, and cause it to break from force and movement. They would lose their support function.
The best clasp is one that has no moving parts. These include toggles, buttons, slides, S-clasps, and hook & eye clasps.
One clasp element that we jewelry designers call a “moving part” is a tongue. If a metal piece is bent into a “V” or “Arch” shape, and is forced to move back and forth as it gets pushed in and pulled out of the basic clasp, we consider this a moving part. When you bend metal back and forth, it breaks. When metal is bent into a V or Arch, and is pushed/pulled, it will break. In any clasp, where you have a metal part that is bent back and forth in use, we call this a moving part.
The clasp should be proportional to the beads used in the piece. The full Clasp Assembly should be proportional to the piece as a whole. If half your bracelet is taken up by the Clasp Assembly, then there’s a problem here.
Don’t forget that you can also use clasps in a way where they can be worn on the front, not just behind the neck. They can be used to sit on the side or on the bottom. Clasps which are very decorative are used in this way.
All clasps work well in necklaces. In bracelets, however, care and consideration should be paid to how difficult or easy it is to secure and undo the clasp — especially if the wearer has to accomplish these steps by her or himself.
In better pieces, the clasp seems as if it is an organic and integral part of the rest of the piece. It does not feel as it were an add-on.
Types of clasps:
I never knew there were so many choices
So many little parts. So many little things. Are you supposed to know what to do with them all? Do you really need that many? I never learned how to use all these things. What are they for?
I thought, when I started, there was just one kind of clasp. Or maybe two. I didn’t even know how to use these things.
When I started stringing beads, I always used my favorite clasp at the time — the lobster claw. I put a lobster claw on everything, and any old lobster claw I could find, no matter what it was made of. The guy-proof special. The student-proof special. The special that always worked and that everyone knew how to operate.
The tricky part, though, was what to put on the other side. It needed a ring, but what kind of ring? If you used a jump ring, the split in it was often difficult to adjust so that there was no gap. Even if you adjusted it so there was no gap, after wearing your necklace a few times, suddenly there was a gap. The string pulled through. Or the lobster claw pulled through. The top of the lobster claw broke or bent out easily. You couldn’t always manipulate and operate the thing. That mechanical mechanism inside was designed for people with very small hands, long and narrow fingers and even longer finger nails.
I never liked the barrel clasps — another very guy-proof special. The threads always stripped on me. Or they would unscrew themselves, as my body moved my necklace, and the necklace moved the clasp. Some had eye-lets, and these would always break — again from moving back and forth, and up and down, and back and forth and up and down. Metal breaks when you bend it back and forth. These broke.
At one point, I graduated to toggle clasps. These were and are considered the best clasps. They are considered the easiest to get on and off and the most secure. But I never really liked them personally because they were always out of proportion to my necklace and bracelet designs. Always too big. Always unsexy. And the less expensive ones broke. Virtually all toggles are cast, and cast pieces break when confronted with excess force. They crumble and break. Especially the cheaper ones.
Most people, however, buy either Toggle Clasps or Lobster Claws.
Over the years, I discovered that there are many types of clasps, and each had pros and cons in terms of usability and durability. My personal favorites are variations on the Hook & Eye Clasp. These don’t compete with my beadwork. You can always find something that coordinates with the beads. They pass the “Guy Test” — guys can figure out how to open and close them. But these are my choices I make for myself. Everyone needs to decide which types of clasps they prefer and under what circumstances.
There really isn’t a perfect clasp for every situation.
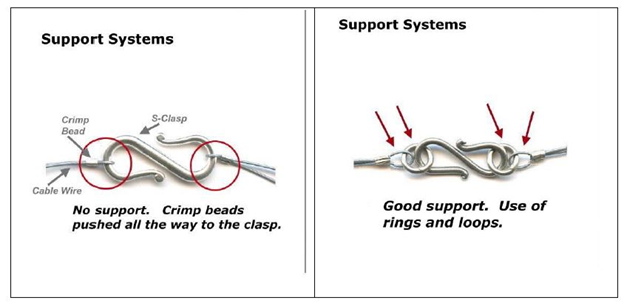
For most clasps, you usually attach your bead work to separate rings on each end (preferably a soldered ring, if this will work), and then attach the rings to either side of the clasp. In a similar way, if using a cable wire, you don’t want to push your crimp bead all the way up to the clasp. You want to allow a small loop in the cable wire between the crimp and the clasp. You want to build in support, jointedness and movement. You want the clasp to be able to rest on the neck (or the wrist), and not move when the wearer moves. You want the beadwork, on the other hand, to be able to move freely and independently of the clasp, as the wearer moves. If there is any resistance to movement in your piece, if things are too stiff, everything breaks — the clasp breaks, the string breaks, the beads break. If you can’t build in sufficient support systems into your piece, you might as well have a mannequin for a client.
Some more clasps:
SPRING RING

This is the cheapest and worst clasp. I really hate these. Its mechanical mechanism breaks easily. Too easily. But, on the other hand, it is also sleek and dainty, and there are few other clasps which are. If you are making a dainty piece, and you know it will only be worn occasionally, you might get away with using this clasp. Otherwise, if you’ve bought a piece with a spring ring clasp, you’ll probably want to replace it before it breaks.
LOBSTER CLAW
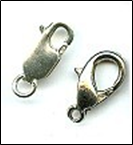
This is a very popular style, but it has some weak design elements. The lip (top curved part) is not designed to handle excess force that comes from tugging or pulling. Its mechanical mechanism breaks easily. Often the levers are difficult to maneuver. However, this clasp does pass the guy test. Guys can figure out how to open and close it. It’s relatively inexpensive. There are many styles of lobster claws, so you usually can always find something which can work with the design and flow of your piece. These clasps are OK for inexpensive to moderate pieces. They are inappropriate for more expensive pieces of jewelry, say over $200.00. When I see lobster claws on expensive pieces of jewelry, this is usually a sign that there are other construction flaws in the piece.
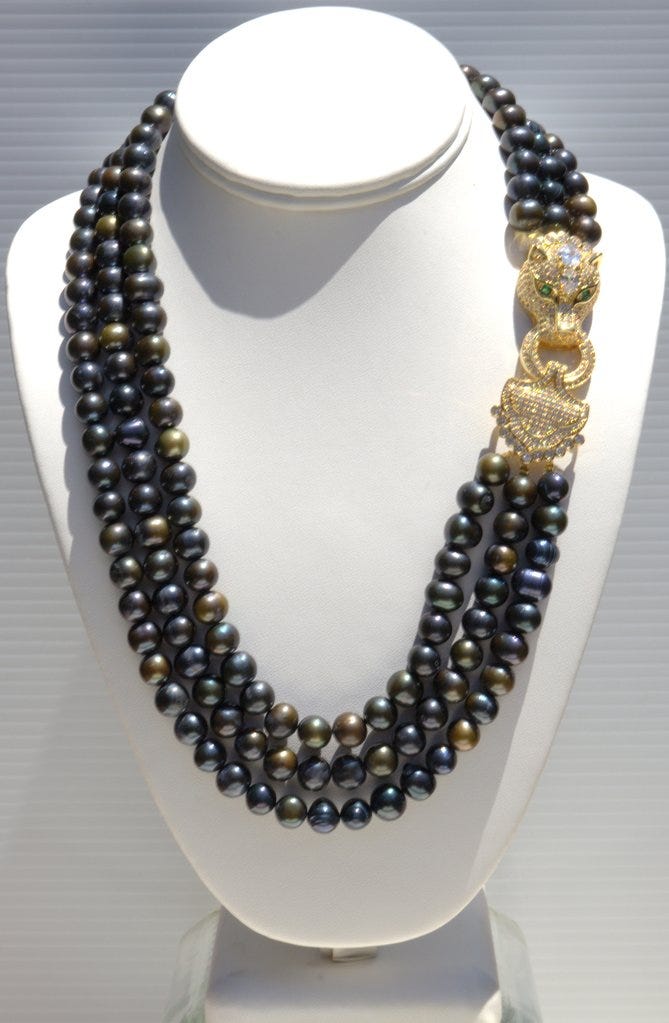
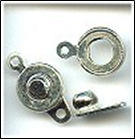
PEARL or SAFETY CLASP
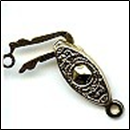
These are clasps that if the hook comes undone, something catches it before the necklace or bracelet falls off. Very popular clasp, and a traditional element in many pieces, such as a pearl-knotted necklace or a Victorian style necklace. In fact, you would be hard-pressed to use an alternative clasp in a pearl-knotted necklace or vintage piece, because people expect to see this type, or similar type of clasp, such as a filigree box clasp. Not a great design, however. The hook element must be bent back and forth many times as it is taken in and out of the clasp. It’s a moving part. This causes it to break sooner than later.
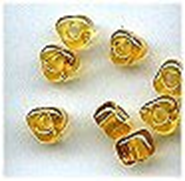
TOGGLE and BUTTON CLASPS
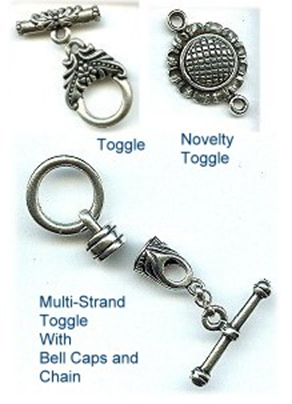
If the Toggle Clasp visually fits with your design, this is considered the best clasp. It is considered the easiest to get on and off, and the most secure. Almost every toggle has been cast, and the ring and the bar are very tightly engineered to work with each other. NEVER mix and match rings and bars. Always use these as a set.
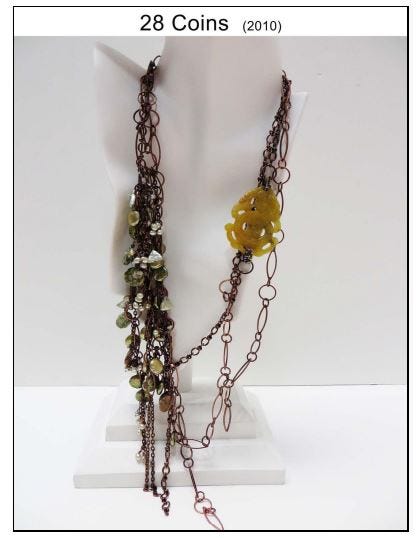
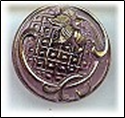
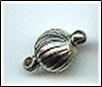
The main drawback, for me, of the toggle clasp, is that they tend to look bulky, often presenting a visual issue for me. They do make novelty toggles, such as the sunflower one pictured above, or a leaf and stem or flower and stem or butterfly and butterfly wing. These work.
Another major thing to keep in mind with toggle clasps is that the last half inch or so of beads on the side of the piece connected to the bar, must be small enough to slip the width of the bar PLUS the width of these beads far enough through the circle part of the toggle, that you can seat the bar correctly, like in a saddle. When using larger beads in your piece, you might need to begin and end your strand with smaller beads.
For multiple strand pieces, you would typically add a string of jump rings or a piece of chain to the bar side, and stagger each strand up the chain. Say you have a 3-strand necklace. You could add a 3-link piece of chain to the bar side. You would attach one strand to the top link; the second strand to the middle link; and the third strand to the bottom link. In this way, when you pull the bar through the ring, you are only pulling 1 thickness of beads plus the bar through the hole — not three multiple thicknesses of beads. You do not need to do this on the ring side, but many people do, for symmetry purposes.
Most people use toggles. What a lot of people don’t know is that you should not mix and match your rings and bars. Toggles should always be used as a set. When you go into a store to buy these, if they sell them mix-and-match, you don’t want to buy there. In a large store like ours, if you’re putting a bunch of toggles on a tray, be sure you know what goes with what. When they get bagged up at the register, be sure there’s no confusion about what goes with what. And store them so that there is no confusion about what goes with what.
You can make your own toggle-style clasps, using buttons or large beads. You have so many more colors, looks, textures to play with, when using buttons and beads, rather than the premade clasps you would find in the store. One side of your piece is a button and the other side is a loop. The button can be a real button, or a large bead. The great thing about button clasps is that you can incorporate the clasp as part of the design of the piece. You can match colors and beads that blend right in with the piece itself.
In a bead strung piece, you would tie off a button or large bead at one end, string your beads on, and make a loop with your stringing material at the other end. You would come back through about 2–3” through the beads in your piece, to anchor off your stringing material. To make this loop attractive, people cover it with seed beads, like size 11/0, 8/0 or 15/0 seed beads. Some designers use 15/0 or 13/0 sized charlottes. Charlottes are seed beads with one facet on one side of each bead. Using charlottes ups the visual perception of the value of the piece, though not the cost of doing so.
For bead-woven bracelets, the button clasp (a form of a toggle) sometimes works better from a design standpoint.
Making the button clasp:
The hardest part in making a button clasp is the button hole. If the hole is too small, it’s hard to get the button or bead in and out. If the hole is too large, the button or bead can slide out and the piece will be lost.
To make the button hole (loop), attach a thread to the piece, preferably a little further back from the end of the piece. Where exactly you locate the button loop depends on your design; however, in most pieces, stepping back from the edge ends up with a better looking and more durable product.
After anchoring the thread to the piece where you want it, now string several small beads — usually size 11/0 or size 8/0 seed beads — until you have a line of beads when looped, will fit snugly over your button or bead. Some designers like to use size 13/0 charlottes to cover the loop. This makes the loop feel like it’s an attractive metal piece.
Bring the needle and thread around and anchor the loop to the piece.
Tie it. Now bring your needle and thread back through the loop, one or more additional times (until it’s getting very tight inside the bead), reinforcing the bead hole.
Now tie it off, and weave the loop end into the piece, hiding the end of the thread.
Now, take your bead or button, and attach it to the other end of your bracelet. Ideally, you want to step the bead or button a bit back from the edge. When choosing a bead, it must be large enough for the loop to be secured underneath it.
Do not attach a bead or button flush to the surface of the piece. Allow enough space for the loop to clasp underneath it. This is easily achieved by placing a size 11/0 or 8/0 seed bead between your piece and the bead or button. Or make a tight loop of beads to connect the surface of the piece through the button shank. When making this kind of loop, usually size 15/0 seed beads work best.
If the bead is elongated, you must anchor it at the center, not through either end. Otherwise, there would be no place for the loop to clasp beneath the bead.
There is not a sure-fire way to measure a loop to fit perfectly over a button or bead. So don’t beat yourself up if you don’t get it right the first time or two. As a general rule of thumb, the length of the loop should be a bit more than twice the diameter of the button or bead. Keep practicing and you will get to a point where it will work by instinct.
So, to repeat, you would preferably locate the loop and the button a little bit back from each edge of the piece. When you start at the edge, this is the weakest part of the piece, and the pulls and tugs on the clasp will start to tear at this edge. Also, if you start at each edge, when you put the loop over the button, you’ll have an area of skin showing. When you set both the loop and button back a ways from the edge, when you put the loop over the button, it draws the two edges together.
If we look at the button from the side of the piece, you would want to put an 11/0 or 8/0 seed bead between the button and the surface of the piece. This accomplishes two things. First, when the loop goes over the button, it will rub on a bead, not the threads. This prevents these threads from fraying. It also turns out that when the loop goes over the button and rests on a bead, it sits it better, thus reducing the amount of back and forth movement that occurs as the bracelet is worn on the wrist.

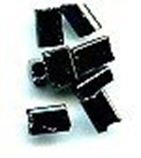
S-CLASPS

From a functional standpoint, this is a great necklace clasp. From a usability standpoint, however, it’s a disaster. Most people don’t know how to use these properly. When you don’t use them properly, they don’t function as well.
The simple S-Clasp Assembly consists of an S-shaped piece and 2 soldered rings (one on each side). These rings are your “support system” or “jointedness”. They allow the S-clasp to maintain its position behind the neck, and the beadwork to move freely, as the wearer moves.
Using these: First you do your beadwork. Then you tie off each end to the soldered rings. Then you position each hook-arm relative to the spine. On one side of the “S”, you should position the hook-arm so the O-ring cannot slide out, as if the arm had been soldered to the spine. On the other side of the “S”, you need to position the hook-arm so that the O-ring can slide out, but only with some resistance by the hook.
Most people are clueless about the need to position the hook-arms, and how you do it. So they end up bending each arm back and forth, and they break off, or they slip off the soldered rings. And the S-clasp doesn’t rest securely behind the neck, or allow the beadwork to move freely as the person moves.
S-clasps come in a wide range of styles and prices.
HOOK & EYE CLASPS

This is a very good clasp for necklaces, but not as functionally good as the toggle or S-clasps. This is the type of clasp that I prefer to use on my pieces. It is very user friendly. These don’t compete with my beadwork as “art.”
The hook and eye clasp consists of two parts — a hook and a ring or figure 8. If you can position the hook so that the O-ring can slide out, but only with some resistance by the hook, you can use this both on bracelets and necklaces. If the hook-arm is a cast piece and will not move, they tend to only work with necklaces.
Always assume your wearer is right handed. When the wearer reaches back behind her neck for the hook, she should be grabbing this with her right hand.
These come in many styles and price points.
People can usually and easily figure out how to use these. They don’t compete with the artistry of your beadwork.
They have a slight functional flaw in that the hook can work itself free from the ring, when the piece is worn. If you can do this with your piece, you want the hook to face up, (not down).
A choker clasp is special kind of hook and eye clasp. These are usually for multiple strand pieces. The “ring” side is a length of chain, so that the hook can attach in more than one place. This makes the length adjustable. I find it useful to build in some length-adjustability into all my pieces. This is easy to do with hook and eye clasps.
MAGNETIC CLASPS
People in general hate clasps, so they love these. These work well in necklaces. While people love these for bracelets, functionally they pose some issues. To open and close a magnetic clasp, you never pull them apart. This weakens the settings for the magnets, and the magnets eventually pop out. Instead, slide the two sides apart, or crack them open like a nut, or as if one side was on a hinge. Never pull. You can see on a bracelet how the wearer might be tempted to pull them open. The bracelet wearer may also pull on the beadwork itself to open the clasp, thus weakening the bracelet.
Always do some extra reinforcement on the two ends of your pieces where they attach to the clasp.
Magnets come in different strengths, but are not labeled as such. You need to test the strength before you use them.
I suggest adding a safety chain to a bracelet. We hear over and over again stories of how people lost their bracelets to the ravages of an all-too-metallic environment. They’ve lost them to the refrigerator door. One woman lost hers to a car door on her visit to the mall. Luckily for her, when she returned to her car — There it was!
SNAP CLASPS
Snap clasps are like the snaps you have on a blouse or pair of pants. These are usually used in bead woven pieces, but they can be used on strung pieces. They are generally easy to get open and closed. They become part of the piece and its design itself, thus not competing with the artistry of the bead weaving. These clasps do wear out, as they are repeatedly opened and closed. There are many manufacturers and brands of these clasps, and variations in styles. The best ones are made of brass or steel, and have the “male” part be as square-ish as possible. If the base is too narrow, the ring slips off easily.
BARREL CLASPS AND SCREW CLASPS
Barrel clasps are very popular with college age and early 20’s. Never use a sterling silver barrel clasp. As the silver softens at body temperature, the threads soften and strip. Barrel clasps have a weak design element on each end where the clasp is to be connected to the ends of the piece. Most barrel clasps use a type of eye pin/head pin, and these break as they get bent back and forth from movement. With barrel clasps, you should always use another intervening ring — a jump ring, split ring or soldered ring — to attach your beadwork to the clasp.
For most types of clasps and other jewelry findings, though not all, you need to use an intervening ring — a soldered ring, a split ring or a jump ring . You attach your beadwork to the ring and the ring to the clasp or finding. Only in this way will you get enough support and jointedness.
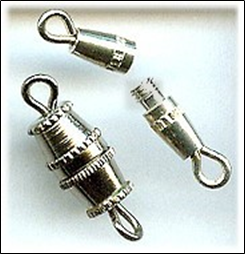
Screw clasps tend to look like a bead with a loop on either side.
Usually, one side, sometimes both sides, screw open. These are very attractive and work very well to maintain the organic flow of your piece. However, the threads strip easily, and it’s difficult to readily figure out how to screw/unscrew the loop out from the bead. Usually the wearer ends up ruining the clasp after a few wearings, since it’s difficult to figure out which way to turn each screw-end — especially while wearing the piece — and the threads strip.
FOLDOVER CLASP
These clasps are found on a lot of jewelry. They are pretty easy to attach. They are pretty easy for the wearer to use them. On one side of the clasp, there is a closed loop. This is attached to one end of the piece, usually with a jump ring. It is fixed. The other end is a tongue that snaps over a base and is held in place by friction. This tongue slips over a ring on the other side of the piece, and then tightly onto its base. After opening and closing this clasp several times, the tongue tends to bend upward, thus losing its friction-based tight close. You can use a chain-nose pliers to push the tongue back and regain the friction. Eventually this tongue breaks off.
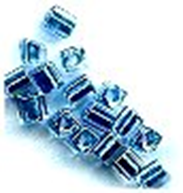
FRICTION CLASP or BAYONETTE CLASP
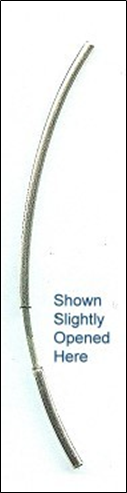
Here a curved metal tube on one side slips into a curved metal tube on the other, and is held in place by friction. Or, in another design, a straight pin is pushed into a rubber tube, where the rubber tube fits snugly around the pin, holding it in place. These come long and sleek, or squat and fat.
The friction clasp pictured above looks great on sleek pieces. For most of these, it’s easy to slip beads or charms over the clasp without having to partially or fully dis-assemble it. These are usually soldered or glued and clamped on to the piece. You need to pay attention to the size of the internal diameter of the opening. You want your cable wire or cord to fit snugly into this opening. Put some glue (any glue except Super Glue, and preferably a jewelers glue like E6000 or Beacon 527) on the cable wire or cord. Stick it in. Use a chain nose pliers to clamp the ends down snug. Don’t clamp them flat. When you clamp them flat, it looks weird and annoying.
NOTE: Super Glue has few uses in jewelry. The jeweler’s version of Super Glue is called G-S Hypo Cement, which takes longer to set. Super Glue dries like glass, so the bond becomes like a piece of glass. Movement causes the bond to shatter like a piece of glass. And the broken bond looks like a broken piece of glass.
The jeweler’s glues, like E6000 and Beacon 527 dry like rubber. The bond acts like a shock absorber.
BOX CLASP

The basic design here is a box where a bent piece of metal (called a tongue) slips into one side of the box, and is held in place by an internal latch. We consider the tongue and the internal latch moving parts, since these move back and forth and can break.
Box Clasps often look great, but they don’t last a long time. The internal latch often wears out. The tongue is bent up and down each time it is place in or removed from the clasp. After too many times, the metal breaks. It’s hard to find replacements. What’s nice about these are that they come in a wide range of prices and styles, and can adapt easily to the organic sensibility of your piece. Great for moderately priced jewelry. Functionally a bit of a risk for more expensive jewelry, but visually may be just what the designer ordered.
Sterling box clasps pose a problem, if the clasp rests on the wrist or neck. Sterling softens at body temperature. When the internal latch softens, it releases the tongue. Jewelry coming out of Mexico is notorious for this happening. Say you have a problematic clasp. You don’t have to throw it away. You can use larger beads on either side of the clasp, so that it never rests on the skin.
LANYARD CLASP
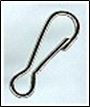
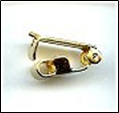
This is a wire that is bent into a clasp shape. One end of the wire overlaps that of the other side, and is “springy”. These clasps will lose their “springy-ness” over time. I like to use these clasps with hemp necklaces. They work well with thick cords. They have a primal feel about them.
From a design theory perspective, the base of the clasp is an interesting element. It is basically an arch pinched at its base. This completely changes the mechanical properties of the arch, turning it into a spring. The spring absorbs all the force of the arm, when the arm is bent back and forth to open and close the clasp. If this arch were a V-shape, bending it back and forth would break it. In the Curved-Shape, bending back and forth will also break it. But pinching it, the movement is accommodated by and the forces absorbed by the clasp.
Lanyard clasps come very functional like that pictured. They come fancier, as well. Some of the fancier ones are good substitutes for lobster claws. Lanyard clasps are widely used in name-badge lariats and necklaces.
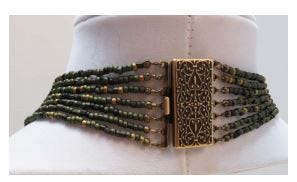
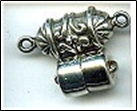
SLIDE CLASP

These are made for multi-strand necklaces and bracelets, from 2-strand to 9-strand. They are basically two inter-fitting tubes with loops soldered onto them. They are very sleek. They come plain and patterned. They don’t compete with your beadwork. They work for bracelets and necklaces. This is one of the only clasps that has been coming down in price over time. The market is telling you that this is a good clasp, and I agree with the market.
I especially like these clasps for bracelets. They have a way of keeping all the strands of a multi-strand piece laying nicely and separately and spread out. With a lot of other clasps, the multiple strands overlap, get entangled, and don’t lay as well as intended. Usually, one person, wearing a bracelet using these slide clasps, can maneuver these on and off without much difficulty. Another plus.
In many flat, wide beadwoven pieces, I often suggest sewing these in place to use as the clasp.
You do not need to use any intervening rings with this clasp.
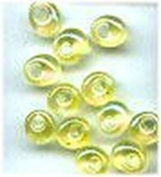
DOOR KNOCKER CLASPS
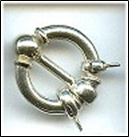
Here we have a loop with a slight opening, with a bar and knob that moves from the base of the loop, over and into the slight opening. These are attractive. They are relatively easy to use. They do lose their friction in holding the knob into the opening. With these, two removable loops hold the beadwork in place, so you could make many strands of bead work, ending each with a soldered ring wide enough to slip the clasp, and use them interchangeably with this clasp. Or you could use this clasp when you want to change the number of strands of beads you want to wear at one time.
_________________________________________________________
Other Articles of Interest by Warren Feld:
The Jewelry Designer’s Orientation To Jewelry Findings: Preparers
The Jewelry Designer’s Orientation To Jewelry Findings: Controllers and Adapters
Cleaning Sterling Silver Jewelry: What Works!
What Glue Should I Use When Making Jewelry?
Why Am I So Addicted To Beads?
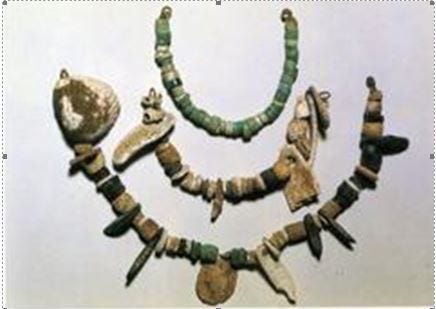
A Very Abbreviated, But Not Totally Fractured, History of Beads
The Martha Stewart Beaded Wreath Project
When Choosing Colors Has You Down, Check Out The Magic Of Simultaneity Effects
The Use of Armature In Jewelry: Legitimate or Not?
Organizing Your Craft Workspace…Some Smart Pointers
You Don’t Choose Clasps, You Choose Clasp Assemblies
Know Your Anatomy Of A Necklace
Mini Lesson: Making Stretchy Bracelets
Mini Lesson: Making Adjustable Slip Knots With Thicker Cords
Mini Lesson: Attaching End Caps, Cones, Crimp Ends
Mini Lesson: Flat Even Count Peyote
Mini Lesson: Right Angle Weave
Everyone Has A Getting Started StoryThe Nature-Inspired Creations of Kathleen
The Jewelry Designer’s Orientation To Glass Beads
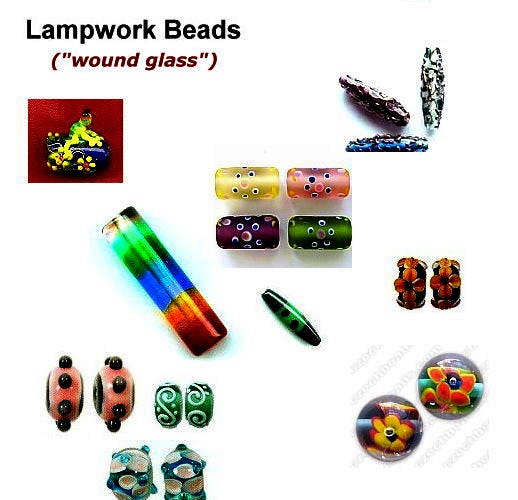
The Jewelry Designer’s Orientation To Lampwork Beads
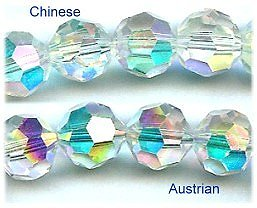
The Jewelry Designer’s Orientation To Crystal Beads
The Jewelry Designer’s Orientation To Seed and Cylinder Beads
The Jewelry Designer’s Orientation To Choosing and Using Clasps
How To Design An Ugly Necklace: The Ultimate Designer Challenge
______________________________________________
Thank you. I hope you found this article useful.
Also, check out my website (www.warrenfeldjewelry.com).
Subscribe to my Learn To Bead blog (https://blog.landofodds.com).
Visit Land of Odds online (https://www.landofodds.com)for all your jewelry making supplies.
Enroll in my jewelry design and business of craft video tutorials online. Begin with my ORIENTATION TO BEADS & JEWELRY FINDINGS COURSE.
Add your name to my email list.