Learn To Bead

At Land of Odds / Be Dazzled Beads – Beads, Jewelry Findings, and More

Posts Tagged ‘Makers’

SELF-CARE: Critical Advice For The Jewelry Designer

Posted by learntobead on January 28, 2022

Warren Feld

Warren FeldJust now·11 min read

Abstract
Balancing work and life is a challenge for everyone, but particularly for creatives. Designing pieces of jewelry involves a complicated process of finding inspiration and translating often-fuzzy images and ideas into aspirations and then finished designs. The designer usually creates each piece of jewelry over an extended period of time, often in solitude and isolation. Moreover, the designer, by the very nature of jewelry, must introduce their pieces to the public, opening the designer to feedback and critique. Balancing work and life can be very stressful, both mentally and physically. If in the business of selling jewelry, then there can be additional financial stresses. Suggested are a series of things the jewelry designer can do to manage the balancing act. These things have to do with acting, organizing, thinking, nourishing, and relating.

SELF-CARE

Finding Work-Life Balance

There is always one more thing to do. One more piece to make. One more component to buy. One more social media post. One more supplier to talk to. One more client to get. One more family’ or friend’s demands to deal with. It’s never-ending and can overwhelm you mentally, physically and financially. There is struggle. Slumps. Getting overwhelmed. Burn-out.

So the problems and resolutions depend on your ability to set boundaries. Limits on the use of your time. Allocations on the use your time. The places where you want to use any of your time. The people you want to interact with and share your time. Work-Life balance is never fully achieved; it’s a continual give and take. More a balancing, than a balance.

This requires a high degree of honesty with yourself. Some facing of the realities of limited resources. Some confronting of your fears to get them out of the way. Some feeding of your soul — your creative self.

We call this self-care. Self-care is a management strategy for managing the ever-present tensions between work and life. Everyone needs a plan and program of self-care for themselves. This can be very formal or informal. It means recognizing when the balance has tilted too far in one or the other direction. It requires a self-care tool box of strategies to employ to correct any imbalances. But you need that balance and a plan and program for maintaining it. You want joy from jewelry creation. You want productivity. You want people to want to wear your jewelry, perhaps buying it. Below I discuss some ideas that you might incorporate into your own self-care routines.

Because creatives love what they do, they may be especially vulnerable to putting in too many work hours. They may isolate themselves too freely or for too long. Yes, you might get a lot of projects finished, but you are also shortchanging yourself. It is not a positive thing to be unbalanced. You need enrichment. You need time to reflect and relax. You need to feel connected to others.

Self-Care Can Be Hard

Self-Care might feel like a long list of to-do’s. Eat. Take breaks. Phone calls, meetings and get-togethers. Time at the gym or salon. Adequate sleep. And so forth. This list might never get done to completion or satisfaction. It might feel burdensome. You might find yourself keep adding things to the list. This list, in and of itself, does not really resolved the tensions between work and life.

Knowing everything you need to do and should do is not the same as doing these. A more selective list where you can see the connections between your wellness and the activity will always make more sense.

Self-care takes work. It uses up time. It is one more thing to keep up with. Exerting effort can feel like a tall order — even when you know you will feel better after doing it. Again, a more realistic set of activities will be more manageable and effective.

For some people, taking time out for self-care generates a sense of guilt and shame. They feel they will be seen as avoiding work, instead of using self-care to enhance their work. Self-care should not be confused with an indulgence.

Handling Stress

One of the greatest challenges jewelry designers have is handling stress. There is the stress of finding inspiration. The stress of translating that inspiration into a concrete design. The stress of finding and selecting beads and other components, as well as colors, patterns and textures. The stress of placing mass within a negative space. The stress of construction. The stress of showing your jewelry to others. If you are selling your pieces, the added stresses of promotion, marketing, pricing and selling. You do not want all these stresses to add up to the point you become paralyzed — unable to start your project, finish your project or introduce it into the creative marketplace.

Stress can be both mental and physical. You need self-care for both.

Mental stress is often associated with doubt and self-doubt. Doubt holds you back from seizing your opportunities. It makes getting started or finishing things harder than they need to be. It adds uncertainty. It makes you question yourself. It blocks your excitement, perhaps diminishing it. You begin to question how to measure your progress and success, perhaps unfairly comparing yourself to other jewelry designers. You begin to fear criticism and rejection, whether real or imagined. While sometimes doubt and self-doubt can be useful in forcing you to think about and question your choices, it mostly holds you back.

Mental stress can be associated with pain. It begins to build and amplify when you think that mental and/or physical pain means you no longer will be able to make jewelry, at least the designs you prefer to make. Put a stop to these thoughts. With tools, physical aids and ergonomic solutions, and a good self-care plan of operation, you will be able to continue to design and make any jewelry you want.

The creative process can result in our feeling vulnerable. Not everything is clear at first. More fuzzy. More experimental. The creative process is messy. Nonlinear. A lot of back and forth iteration. Eventually creative ideas coalesce within a completed piece of jewelry. But this creative process may extend for long periods of time. Living with vulnerabilities is part of any jewelry designer’s daily process. It is something to get used to. It makes having that good support system all that more important.

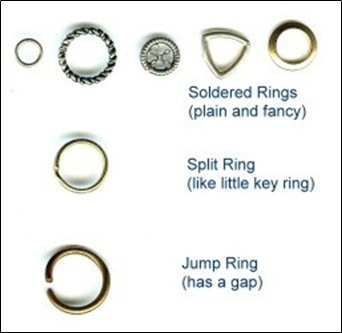
Making jewelry can take a physical toll on your body. Physical stresses begin as occasional pain, but eventually become major flare-ups. You might find yourself using your fingernails as tools, such as opening a split ring, or forcing a closure, or opening and closing a jump ring. After awhile, your fingernails start to split and crack and break. You might be do the same physical operation with your hands over and over again, slowing getting repetitive motion injuries, where your wrists hurt, the joints in your fingers hurt, your elbows hurt, your neck hurts. Your fingers may cramp up. You may be sitting in one position for a very long time, and over time, you begin to develop neck and back problems and knee problems and leg and foot problems. You may hate to wear your eyeglasses when you make jewelry. You forget the maxim: If you need glasses to read, you need glass to make jewelry.

The immediate solution to physical stresses is to stop making jewelry. Give yourself a rest. Take time off. I know you want to be making jewelry, but you need to listen to your body. It is telling you it needs some time for healing.

The long term solution is to rely on tools and ergonomic furnishings. Tools are an extension of your hands (and other parts of your body). They reduce the stress on your hands (and other parts of your body). Ergonomic designs reduce the stresses and strains placed on your body and channel the negative energy elsewhere. There are ergonomic chairs, arm rests, arm rest and pulley systems, and the like. Also be sure seating is comfortable and lighting is good.

When returning to jewelry making, pace yourself. Take breaks. Do finger, arm and leg stretching exercises. Wear braces to support the wrist, thumb and elbow.

Solutions and Resolutions

How You Act

Work-life balance is really a balancing act.

Look for places to pause your work.

Train yourself to be able to put down your work before it is completed without the stress of leaving it unfinished or undone.

Leave the house. Change locations. Take a walk or a drive. Take the day off.

Take time off to relax and disconnect.

How You Organize

Good organization leads to more efficiency and effectiveness and better work-life balance.

Designate one area of your house for your creative work, a different area for business work, and yet another area for thinking, meditating, reflecting and relaxing.

Schedule sufficient times for creativity, times for business, and times for reflection.

Keep your work area neat and generally organized, but not necessarily perfectly organized. Remember: Perfection is the enemy of the Good.

Budget for things to go wrong. Don’t put yourself on such a tight financial rope that any mistake or any supply issue or other business related issue creates panic.

Plan for enough time in your schedule to acquire materials and supplies, learn a new technique if necessary, and communicate and work with clients, if this is part of your practice.

Keep your website (and other promotional venues) up-to-date.

How You Think

Applying your creativity and finding work-life balance are actually sets of thinking routines where you explore choices, narrow them down, and make selections.

Remember that creativity involves more than staying seated in front of beads and other jewelry components in your work space. Creativity also involves looking for inspirations. It involves thinking through all the options for translating those inspirations into aspirations and then into specific design.

Recognize that taking time away from work for self-care is a positive reflection on you. It is not something to hide or be ashamed of.

It is not hard to set yourself up for failure. Set your expectations that are reasonable and realistic for you.

Set attainable goals and objectives. Revisit these often as you work on any project.

Remind yourself periodically why you like to create and make jewelry.

Make sure you have something to get excited about — an activity or event, a book or movie, an exploration about jewelry design, exercising, yoga, whatever.

How You Nourish Mind and Body

A healthy mind and body will keep your creative juices flowing and make that work-life balance easier to maintain.

Don’t skip meals or avoid satisfying any hungry feelings when they occur.

Hydrate often.

It is difficult to make good jewelry design choices when you are tired. Be aware of times when you are overextended.

Exercise. Take frequent breaks to move around a bit.

Do some focused breathing exercises.

Meditate.

Go somewhere where you can let out your primal scream.

Take a nap.

Do something out of the ordinary for you. Make jewelry using your non-dominant hand. Stick your hands into a bowl of mud.

How You Relate

Most jewelry is created in solitude. Feelings of isolation may build up. If not careful, this can negatively affect your work-life balance.

Surround yourself with people who inspire you. Avoid people who are negative and toxic. Don’t isolate yourself for too long a period.

Spend time with real friends. Build up and maintain a supportive social network.

Don’t compare yourself and compete with others. Keep the focus on yourself.

Talk things out. With others as sounding boards and informers, help each other see what matters and what does not.

Attach yourself to a group, say an online jewelry making group, or a local artist community group. But don’t take up residence there. Moderation, moderation.

Detach yourself from the online world for awhile, if you are spending too much time living there.

Don’t take criticisms personally.

If in business, evaluate your pricing, selling and marketing strategies. Is the price you are getting for your jewelry reflective of your worth as a designer? Are your target markets in line with the styles and prices of your pieces?

If in business, keep your clients aware of your progress.

Turn some of your projects into collaborations.

Attend classes and workshops.

Enter juried exhibitions and competitions.

Take part in group art critiques.

_________________________

FOOTNOTES

Alexis, Renee. 7 Self-Care Tips For Artists and Creatives. Your Art Path, May 2021. As referenced in:
https://yourartpath.com/7-self-care-tips-for-artists-and-creatives

Artwork Archive. 7 Counterintuitive Self Care Habit For Artists. As reference in:
https://www.artworkarchive.com/blog/7-counterintuitive-self-care-habits-for-artists

Branch, Allan and Steven Bristol. Chapter 16, Entrepreneur-Work Life Balance. Business Guide: Run Your Business, Don’t Let Your Business Run You. LessEverything, 2018. As referenced in:
http://lesseverything.com/business-advice/entrepreneur-work-life-balance/

Clark, Alicia H., Psy.D. Why Does Self-Care Sometimes Feel So Hard? These 6 common pitfalls could be holding you back. 2/15/20. As referenced in:
https://www.psychologytoday.com/us/blog/hack-your-anxiety/202002/why-does-self-care-sometimes-feel-so-hard

Feld, Warren. Doubt / Self-Doubt: 8 Major Pitfalls For Designers…And What To Do About Them. 9/5/2020. As referenced in:
https://medium.com/design-warp/doubt-self-doubt-8-major-pitfalls-for-designers-and-what-to-do-about-them-fbbf1bec18de

Hammond, Lee. Artists and Self-Esteem: 4 Tips To Overcome Insecurity. Artists Network, n.d. As referenced in:
https://www.artistsnetwork.com/art-inspiration/art-self-esteem/

Horejs, Jason. Working Alone | Breaking the Isolation that Can Surround the Pursuit of Art. Xanadu Gallery, 9/2/21. As referenced in:
https://reddotblog.com/working-alone-breaking-the-isolation-that-can-surround-the-pursuit-of-art-21/#comments

Mayher, Miguel, Director of Education, Professional Artist Institute. How To Handle Stress.

Mindful Art Studio. Overcoming Creativity Block. What Is Creative Self-Care? June, 2016. As referenced in:
https://mindfulartstudio.com/what-is-creative-self-care/

Tartakovski, Margarita, MS. 10 Ways to Overcome Creativity’s №1 Crusher. Psychcentral.com, 3/3/2013. As referenced in:
https://psychcentral.com/blog/10-ways-to-overcome-creativitys-no-1-crusher#1

_______________________________

Thank you. I hope you found this chapter useful.

Also, check out my website (www.warrenfeldjewelry.com).

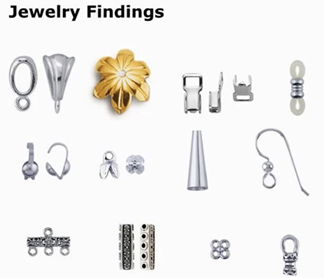
Enroll in my jewelry design and business of craft Video Tutorials online. Begin with my ORIENTATION TO BEADS & JEWELRY FINDINGS COURSE.

Follow my articles on Medium.com.

Subscribe to my Learn To Bead blog (https://blog.landofodds.com).

Visit Land of Odds online (https://www.landofodds.com)for all your jewelry making supplies.

Check out my Jewelry Making and Beadwork Kits.

Add your name to my email list.

My ARTIST STATEMENT

My TEACHING STATEMENT.

My DESIGN PHILOSOPHY.

My PROFESSIONAL PROFILE.

My PORTFOLIO.

_________________________________

Other Articles of Interest by Warren Feld:

Resiliency: Do You Have The Most Important Skill Designers Must Have?

Disciplinary Literacy and Fluency In Design

Backward Design is Forward Thinking

How Creatives Can Successfully Survive In Business

Part I: The First Essential Question Every Designer Should Be Able To Answer: Is What I do Craft, Art or Design?

Part 2: The Second Essential Question Every Designer Should Be Able To Answer: What Should I Create?

Part 3: The Third Essential Question Every Designer Should Be Able To Answer: What Materials (and Techniques) Work Best?

Part 4: The Fourth Essential Question Every Designer Should Be Able To Answer: How Do I Evoke A Resonant Response To My Work?

Part 5: The Firth Essential Question Every Designer Should Be Able To Answer: How Do I Know My Design Is Finished?

Doubt / Self-Doubt: 8 Pitfalls Designers Fall Into…And What To Do About Them

Part 1: Your Passion For Design: Is It Necessary To Have A Passion?

Part 2: Your Passion For Design: Do You Have To Be Passionate To Be Creative?

Part 3: Your Passion For Design: How Does Being Passionate Make You A Better Designer?

Posted in Art or Craft?, bead weaving, beadwork, business of craft, craft shows, creativity, design management, design thinking, jewelry collecting, jewelry design, jewelry making, Learn To Bead, professional development, Stitch 'n Bitch, wire and metal | Tagged: , , | Leave a Comment »

Saying Good-bye! To Your Jewelry: A Rite Of Passage

Posted by learntobead on July 14, 2021

Canyon Sunrise, Necklace by Warren Feld, 2008

One of the most difficult things I have to do as a designer is say Good-Bye! to my pieces. I make something. I put it out there for sale. Someone buys it. I will probably never see it again. Yes, I can make another one, but that’s not the same thing. That’s not the point.

I submitted the necklace piece pictured above to a Swarovski Create Your Style Contest in 2008. The theme was be naturally inspired. My inspiration was this sunrise image of the Grand Canyon.

Grand Canyon at sunrise

I was selected as a Finalist. I was invited to their offices in New York City to attend the awards ceremony. I was so excited.

I had poured my all into this piece. Hours upon hours upon hours perfecting the stitching. Experimenting with using the stitching in a 3-dimensional way. Creating a curvature along the upper sides where normally it would be a sharp edge. Selecting a 5-color scheme and figuring out how to create sharper boundaries between colors when using Swarovski crystal beads. Varying the shape, size and type of beads used within the stitch. Designing a clasp assembly which I hoped looked like a mirror of the rising sun. None of these were easy tasks. Because the fully completed piece took about 100 hours to do and contained over $1500 worth of parts, I did all this experimentation and trial and error using 3″ long samples.

I had to send off my piece to New York prior to the ceremony. And from there, my piece would be flown to Innsbruck, Austria to reside in their Swarovski Museum.

I was proud. Got the big head and paraded it around. Shared my news widely, of course.

But when the day came to pack my piece up, … not a good day.

This day actually dragged on for a week.

First, I started with one jewelry box to place the piece in. Not satisfied. So another box. Not satisfied. And another box. Still not satisfied. I combed my jewelry packaging catalogs, and found 3 more choices I thought would work. I ordered these and had them shipped overnight.

Success. One of the three was perfect.

Next, I had to put this jewelry box into a larger shipping box. Easy to find a box. But my stupid brain could not come to grips with how I wanted to place the jewelry box into the shipping box. How much filler would I need? What type — paper, styrofoam, bubble wrap. Normally, I do not have difficulty making these kinds of choices. But not this time.

I would line the shipping box, sit the jewelry box in one direction, then stop. I would remove the jewelry box, change how I lined the shipping box, replace the jewelry box in another direction, then stop. I would remove the jewelry box, again decide differently how it was to lay in the shipping box, then try to line the box, cover the jewelry box, add some paper work, and seal the shipping box. Plastic tape or paper tape? Another delay while I decided.

I did not want to let go of my beautifully designed piece of jewelry. I let my next choice create a particularly high barrier. Which shipper?

The postal service was less expensive, but less reliable.

UPS was very expensive, more reliable, but what if they weren’t? It was going to New York City. How does any shipper reliability ship to New York City?

FedEx? Maybe, but I was not familiar enough with them.

Insure the package? For how much?

Certified? Signature required?

I struggled considerably over each choice. And I never struggle over these kinds of choices.

Well, at this point, my piece was in its jewelry box. My jewelry box was in its shipping box. My shipping box was sealed. I took my jewelry cum jewelry box cum sealed shipping box to UPS. The clerk had to pull it out of my hand.

And there it went.

Good-bye!

Don’t worry, it arrived safely.

I traveled to New York City for the ceremony. There was champagne and hor d’oeuvres. There were the other finalists mostly from America, but from other parts of the world, as well. There was even the Brazilian consulate general there to represent an artist from Brazil. We were all packed in the very, very bright and sparkly offices of Swarovski.

There was my piece. My Canyon Sunrise. Sitting pretty among the other pieces. Reassuring it was still there. It was in good company. I enjoyed listening to the comments of people as they admired it. I learned a lot from speaking and sharing with the other jewelry designers.

Canyon Sunrise won 4th place.

And, I had a chance to say Good-bye! one more time.

When I returned home, I immediately went to work on recreating my piece, but this time with another challenge. I took the same 5 colors I used in the original piece, and shifted the proportions around. I did not add a pendant drop in the center, nor did I recreate the elaborate clasp assembly in the back. But I had a physical piece — a cousin — to put on display with my other jewelry pieces. I could show people more than a photograph of the original piece. This was very satisfying. I was ready to move on to other projects.

Canyon Twilight, necklace by Warren Feld, 2008

Relinquishing Your Jewelry Design To Others: A Rite of Passage

One of the most emotionally difficult things designers do is saying Good-bye! to their designs as they hand them over to their client or otherwise expose their work publicly. The designer has contributed so much thinking and has spent so much time (and sometimes so much money) to the project that it is like ripping away an integral part of your being.

This is the moment where you want to maintain the conversation and engage with your audience, but look at this from a different perspective. Your relationship with your design is evolving and you need to evolve with it. Its innate intimacy is shifting away from you and getting taken over by someone else.

But you still have needs here. You want that client to ask you to design something else for them. You want the client to share your design with others, expanding your audience, your potential clients, your validation and legitimacy as a designer. And you want to prepare yourself emotionally to take on the next project.

Relinquishing control over your design is a rite of passage. At the heart of this rite of passage are shared understandings and how they must shift in content and perspective. Rites of passage are ceremonies of sorts. Marking the passage from one status to another. There are three stages:

(1) Separation

You pass your design to others. You become an orphan. You have made a sacrifice and want something emotionally powerful and equal to happen to you in return. Things feel incomplete or missing. There is a void wanting to be fulfilled. You realize you are no longer sure about and confident in the shared understandings under which you had been operating .

(2) Transition (a betwixt and between)

There is a separation, a journey, a sacrifice. The designer is somewhat removed from the object or project, but not fully. The shared understandings constructed around the original project become fuzzy. Something to be questioned. Wondering whether to hold on to them or let go. Pondering what to do next. Playing out in your head different variations in or changes to these shared understandings. Attempting to assess the implications and consequences for any change.

These original shared understandings must undergo some type of symbolic ritual death if the designer is to move on. Leverage the experience. Start again. As simple as putting all the project papers in a box to be filed away. Or having a launch party. Or deleting files and images on a computer. Or accepting payment. Or getting a compliment. Or having a closure-meeting with the client to review the process after it has been completed.

(3) Reincorporation

The designer redefines him- or her-self vis-à-vis the designed object or project. The designer acquires new knowledge and new shared understandings. There is some reaffirmation. Triumph. This usually involves a new resolve, confidence and strategy for starting new projects, attracting new clients, and seeking wider acceptance of that designer’s skills and fluency in design.

The designer has passed through the rite of passage. The jewelry or other designed object or project has been relinquished. The designer is ready to start again.

But as a designer, you will always be managing shared understandings. These most likely will have shifted or changed after the design is gone. And new ones will have to be constructed as you take on new assignments.

_______________________________

Thank you. I hope you found this article useful.

Also, check out my website (www.warrenfeldjewelry.com).

Subscribe to my Learn To Bead blog (https://blog.landofodds.com).

Visit Land of Odds online (https://www.landofodds.com)for all your jewelry making supplies.

Enroll in my jewelry design and business of craft video tutorials online. Begin with my ORIENTATION TO BEADS & JEWELRY FINDINGS COURSE.

Check out my Jewelry Making and Beadwork KITS.

Add your name to my email list.

_____________________

Other Articles of Interest by Warren Feld:

The Jewelry Design Philosophy: Not Craft, Not Art, But Design

What Is Jewelry, Really?

The Jewelry Design Philosophy

Creativity: How Do You Get It? How Do You Enhance It?

Disciplinary Literacy and Fluency In Design

Becoming The Bead Artist and Jewelry Designer

5 Essential Questions Every Jewelry Designer Should Have An Answer For

Getting Started / Channeling Your Excitement

Getting Started / Developing Your Passion

Getting Started / Cultivating Your Practice

Becoming One With What Inspires You

Architectural Basics of Jewelry Design

Doubt / Self Doubt: Major Pitfalls For The Jewelry Designer

Techniques and Technologies: Knowing What To Do

Jewelry, Sex and Sexuality

Jewelry Making Materials: Knowing What To Do

Teaching Discplinary Literacy: Strategic Thinking In Jewelry Design

The Jewelry Designer’s Approach To Color

Point, Line, Plane, Shape, Form, Theme: Creating Something Out Of Nothing

The Jewelry Designer’s Path To Resonance

Jewelry Design Principles: Composing, Constructing, Manipulating

Jewelry Design Composition: Playing With Building Blocks Called Design Elements

Contemporary Jewelry Is Not A “Look” — It’s A Way Of Thinking

Posted in Art or Craft?, art theory, bead weaving, beads, beadwork, business of craft, color, craft shows, creativity, design management, design theory, design thinking, jewelry design, jewelry making, Learn To Bead, professional development, Stitch 'n Bitch, wire and metal | Tagged: , , , | Leave a Comment »

ORIENTATION TO BEADS & JEWELRY FINDINGS  A Video Tutorial By Warren Feld

Posted by learntobead on March 17, 2021

https://so-you-want-to-be-a-jewelry-designer.teachable.com/courses/orientation-to-beads-jewelry-findings/lectures/16682282

SCHOOL HOME PAGE: https://so-you-want-to-be-a-jewelry-designer.teachable.com

CLASS HOME PAGE: https://so-you-want-to-be-a-jewelry-designer.teachable.com/p/orientation-to-beads-jewelry-findings

FREE PREVIEW PAGE: https://so-you-want-to-be-a-jewelry-designer.teachable.com/courses/orientation-to-beads-jewelry-findings/lectures/16682282

WHY YOU NEED AN ORIENTATION TO BEADS & JEWELRY FINDINGS

Most people who make jewelry learn the craft in a haphazard way. Taking a course here or there. Watching some video tutorials online. Making a few pieces with some friends.

I have found over the years that, because of this, most jewelry designers are unfamiliar with all the various possible choices of stringing materials, clasps, jewelry findings, beads and the like. And they are unfamiliar with the implications of making one choice over another. They do not have a clear conception of how one part relates to another part or relates to how to execute a particular technique.

Because of this, most jewelry designers do not seem to fully understand quality issues associated with the materials they use. They have a weak understanding of what materials should best be used, and best not be used, and with what projects. They do not know what happens to all these different materials over time as the jewelry is worn. They do not know the required design tricks and strategies for making pieces more durable and more comfortable.

That’s why I developed this very comprehensive ORIENTATION TO BEADS & JEWELRY FINDINGS.

This course reviews the various materials jewelry designers use. I point out the pros and cons for selecting and using these. I go over how these impede or enhance function, movement, and the mechanics of construction.

Some topics covered:

HISTORY, GLASS BEADS, LAMPWORK BEADS, CRYSTAL BEADS, SEED AND DELICA BEADS, METAL BEAD, CLASPS, FINDINGS, STRINGING MATERIALS, TOOLS, ADHESIVES, TYPES OF BEADING AND JEWELRY MAKING, 3 APPROACHES FOR TEACHING BEADING AND JEWELRY MAKING, SUPPORT SYSTEMS AND OTHER ARCHITECTURAL CONSIDERATIONS,

This Series of 18 modules, most around 20 minutes, and totaling a full 5 1/2 hours of introductory materials about all kinds of beads, metals, clasps and stringing materials for the beader and jewelry maker.

And one more thing. For those who take this Orientation, I also have a 75-page article for you to download about getting started in jewelry making. You have a purpose as a jewelry designer: To merge your voice with form. This covers things you will need to know to find that voice.

  • how to channel your excitement
  • what types of jobs are available for those with jewelry making skills
  • how to develop your passion
  • what you need to learn
  • what tools you will need
  • how to cultivate your practice
  • how to define a level of success right for you
  • what it takes to achieve that level of success

FREE PREVIEW PAGE: https://so-you-want-to-be-a-jewelry-designer.teachable.com/courses/orientation-to-beads-jewelry-findings/lectures/16682282

Warren Feld
 
warren@warrenfeldjewelry.com

Posted in Stitch 'n Bitch | Tagged: , , , , | Leave a Comment »

PART 1: THE JEWELRY DESIGNER’S ORIENTATION TO OTHER JEWELRY FINDINGS: PART 1: PREPARERS

Posted by learntobead on March 14, 2021

Continue Part 2: Controllers and Adapters

Enroll in my jewelry design and business of craft video tutorials online. Begin with my ORIENTATION TO BEADS & JEWELRY FINDINGS COURSE. There are 18 video modules including handouts, which this is one of.

Choosing and Using Other Jewelry Findings: 
Preparers

You have to approach the Jewelry Findings with a large measure of respect. “Jewelry Findings” are all the pieces that you use, including clasps, other than stringing materials and beads. They are called “jewelry findings”, because up until about 15 years ago, many of these pieces didn’t exist. People went to sewing notion stores, antique stores, flea markets, hardware stores, cannibalized old jewelry, wherever, and found things and made them work. Because many of these pieces are new, there is not a consensus on what some of these things should be called, so you have a lot of similarly looking pieces that go by different names. I’m sure over time, the name-game will shake out, and there will be more consistency.

Respect these jewelry findings. They are the pieces that get pulled and strained, torn at and squeezed, maligned and misused. These are the pieces that will make or break your piece of jewelry. Understand and respect them.

Many designers fail to make the full range of these pieces available to them. They either don’t know about them, or are afraid of them or think they might use them incorrectly. They too often limit their own design possibilities by relying on the same limited set of findings for everything they make. But the world of possibilities that these jewelry findings open up for us is endless.

Below is a list of other major jewelry findings used in bead stringing. I’ve tried to group them into three categories to make it a little easier to relate to.

PREPARERS:
 Things Which Prepare the Ends of Cords and Stringing Materials:

These kinds of jewelry findings are mostly used with thicker cords, like leather and waxed cotton, but also with cable wires. These enable you to create a “loop end” on each side of the cord or cable.

From the two loop ends you have created on each end of your cord, you then continue to create the rest of your clasp assembly. If the loop is big enough (to give you jointedness), or looks substantial enough (like it won’t break from movement), you can attach the clasp directly to the loop. If not, you will want to attach your clasp/ring to jump or split rings, and these, in turn, to your loop ends.

You usually try to match the size of the interior opening on the jewelry finding to the thickness of your cord or cable. For some of these pieces, this match is more important than others.

You always put some glue on your cord or cable before you stick them into the piece. You use glue because all these cords are oily, and some will sweat, as well. They will slip out of the findings — even with tight crimping or clamping — because they are slippery. That’s why you use glue.

I recommend using a glue like E6000 or Beacon 527. Don’t use super glue. Super glue (or the jeweler’s version called G-S Hypo Cement) dries like glass, so the bond will shatter like glass, because all jewelry moves. Also, after it shatters, the bond looks like a broken coke bottle. E6000 and Beacon 527 dry like rubber, so they act as a shock absorber, when the jewelry moves.

CRIMP ENDS

These come very fancy or plain. They come with a small opening to use with cable wires, and wider and wider openings to use with leather or waxed cotton, or even braided leather.

These pieces have a loop at the end of a tube. The tube has 3 bands. The first and third are decorative. The center band is meant to be crushed and crimped. You put some glue on the cord or cable — any glue except super glue — stick it into the tube, and take a pliers and crush the center band as flat as you can get it.

When you crush the middle band, visually, it looks like it is part of a pattern of beads. It doesn’t look like an ugly crushed piece of metal.

Some crimp ends come with a hook, so that you attach a loop on one end and the hook on the other, to create a hook and eye clasp.

These and clamps (see below) work best for preparing the ends of cable wires and thicker cords. Crimp ends tend to be on the pricier side; clamps are very inexpensive. Both hold well, relying on both the glue and the crimp.

CHAIN/CORD ENDS

These pieces have a loop at the end of a split tube. For chain, these are soldered on. For cords or cable, you put some glue on (again never super glue), stick it into the split tube, and take a pliers and crush snug, NOT flat. What’s holding these on is the glue. If you crush flat, you lose the bond. Should tightly match cord thickness to interior diameter.

We need to crush snug because we want the glue to adhere to all the interior surfaces. If there are any gaps where the glue has not adhered, the bond will break.

These are terrible pieces, because it is difficult to achieve that perfect bonding with the glue.

END CAPS

These pieces come in just a few sizes, but many designs. Those pictured are very industrial looking, but they come very decorative, as well. Some pieces have a hole at the end instead of a loop and are labeled “end caps,” but technically, these should be called either a cone or a bead cap. Usually, the interior opening size of the end cap will be listed, such as ID=6mm or ID=8mm or ID=12mm. You coordinate this with the width of whatever you are trying to slip into the end cap. But because of the shape of the end cap, there still may be fit issues.

These pieces have a loop at the end of a hard metal tube. The loop is either an eyelet or a fixed loop. You put some glue (not super glue) on cord or cable and stick in. The glue is all that holds. Should tightly match cord thickness to interior diameter.

Because it is important, for the bond to hold, to get the glue to adhere to all the interior surfaces, and you cannot crush the ends snug, you need to put a lot of excess glue on the cord when you stick it in. And you need to be prepared to wipe away the excess glue that bleeds back out.

You never attach your clasp directly to these pieces. You need an additional intervening ring — jump ring or split ring or soldered ring — between the end cap and your clasp component.

CLAMPS
 Ribbon or Bar Clamps:

These clamps are folded metal with a loop in the center edge, come in different lengths, and have teeth. These are for ribbons or fabric. You don’t use glue, because the glue will bleed into the ribbon or fabric.

You fold over the end of the ribbon or fabric, making the end pretty, and stick into the clamp, and use a pliers to crush firm. If your material is wider than the clamp you have, you would make several folds in the end, like you would when gift-wrapping a package.

Foldover or Wing Clamps:

These come in a few different sizes, some with square loops, some with round loops. Some have plain backs; some have patterned backs.

These typically are a loop on top of flat metal with two wings that fold over. You put some glue (not super glue) on the cord or cable, sit in the saddle between the two wings, and use a large pliers, and crush the two wings over each other and over the cord. Crush as flat as you can get it. This is not done in one movement because the wings are stiff and strong. You usually take your pliers and move then to one side, then the other, then back, until you get the two wing position over each other, and you can crush them flat.

One mistake people make with this piece is that they crush snug, not flat. Where the wings overlap each other, this leaves an air passage. Again, we want our glue to adhere to all the interior surfaces. If you crush snug, this air passage will weaken the bond, and your cord will pull out. You have to crush as flat as you can get it, to force the glue up into that air passage.

You can use one clamp for multiple strands, if you wish. You can seat multiple strands of cable wire or leather or whatever into the saddle of one clamp.

These and the crimp ends work the best for preparing the ends of cable wires and thicker cords. Crimp ends are pricier; clamps are cheap. Crimp ends have a design impact; clamps are very utilitarian.

COIL ENDS

Coil ends have an open ended loop at the top of a tightly wound coil. I don’t like the way these look after they are crushed onto the cord, and they don’t hold up well. One advantage is that the coil functions as a spring, and absorbs a lot of the excess force place on the piece, that comes from movement.

With coil ends, you put some glue, (but not super glue), on the cord, shove it into the coil. You take a chain-nose pliers and crush the first two rings of the coil onto the cord. If you crush too hard, you’ll slice the cord. If you don’t crush hard enough, the cord will pull out.

The way the loop was designed to work, was that you take a pliers, move the open ring to the side, slip on your clasp or ring, and, using the pliers, move the open ring to a closed position again. DON’T DO IT THIS WAY. When you move the loop back and forth, it breaks off easily. These loops are rather brittle. SO, the way you would use this, is that you would take a jump ring or split ring, and attach this to the loop and your clasp piece. As long as you don’t move this loop wire, it stays strong.

Coil ends come in two sizes in terms of the width of the interior diameter. If your cord is thicker than the smaller size, see if you can make it work with this smaller size, anyway. The larger size is more awkward to use. Say you had leather cord. You can take a single-edge razor blade and cut the end at an angle, put some glue on the cord, and shove it into the smaller piece.

BEAD CAPS

This is a decorative cup-like or bowl-like piece, with a hole in the center. This piece is originally used as a decorative element, to cover one or both sides of a bead, as you string your beads on. However, you can adapt this piece to be an end. You might have multi-strands, where you tie them all off together, and use the bead cap to hide the mess. You might have a bead crocheted rope, and again, use the bead cap to give your piece a decorative end. You glue the bead cap on. Then you take an independent wire or thread, attaching it to your piece about 2–3” from the end, and running it through your piece, through the cap, then finishing off the rest of your clasp assembly.

What’s nice here are that there are hundreds of styles, whereas the more typical jewelry findings look very utilitarian.

BELL CAPS

A bell cap is a bead cap with a loop on it. This is a decorative cup-like or bowl-like piece, with a loop sticking above the center. This piece is originally used to adapt something, like gluing it to the top of a crystal pendant or bead, to be a drop. But it can be adapted to use as a fancy end-cap. Use glue here. Attach the clasp assembly to an additional jump ring or split ring. Again, there are many, many decorative styles in bell caps, so you won’t have to rely on the typical and very plain specialized jewelry findings.

The arms on the bell cap are somewhat independent, and can be pushed into the shape of whatever piece they are attached to. So, for example, you can take a rough stone, position the bell cap at the top, push on the arms to shape them to the stone, then put glue on each arm and attach the bell cap to the piece.

BEAD TIPS (aka, KNOT-COVERS)

These pieces are used to hide knots. One style has a cup with a tongue attached. Another style ends with a loop, not a tongue. The most widely used style — Clam Shell Bead Tip (or double-cup) — has two half cups that close over the knot, and a tongue extending from one end. While some people use these pieces with cable wire, they are primarily designed for use with needle and thread.

These take some practice in learning how to use them. On the first side of your piece, you string on the bead tip, say the clam shell. You tie a bunch of knots in the tail, so your knot is bigger than the hole in the bead tip, and won’t slip out. Cut off the tail. Put a drop of glue on the knot. Here you would use something like superglue. Superglue will make the knot stiff, so it won’t pull through the hole. E6000 will make the knot rubbery, and it will be able to contort and work its way through the hole. Trim the tail. Press the two halves of the clamp together over the knot, so it looks like a bead. Take the tongue, fold it over and through the ring on your clasp, and back to itself, so it forms a loop.

On the other side of your piece, here’s the tricky part. You need to keep your tension on the thread, so the thread doesn’t show when you’re finished. You need to tie a bunch of knots, and complete the rest of the process. This is a 3-hand operation, but you only have 2 hands.

Here you slide the bead tip onto your thread. Use one hand to hold everything tight. Take an awl or a round nose pliers — something where the width graduates into a point, and put the tip where you want your finished knot to end up. Tie an overhand knot over the awl or pliers up high on the wider part of the jaws. Tighten the loop of this knot. Tighten the tension on your thread. Move the loop down the awl or pliers a bit, moving towards the narrow pointed end. Tighten this loop. Check your overall thread tension. Move the loop down a little bit more. Tighten this loop. Check your overall thread tension. When you loop gets to the tip of your awl or pliers, you need to pull your knot tightly, and push the awl or pliers out of the way, AND, you want to maintain the thread tension in your piece. Tie a bunch more knots. Put glue on the knot. Trim the tail. Close the clamp. Loop the tongue into the other part of your clasp. This takes about 5 tries before your body gets that muscle memory to do the task easily and correctly.

When I started in jewelry making, almost every piece used bead tips. I’m not a big fan of this type of piece today. The tongue when bent over to hook and secure the clasp is not jointed enough. It doesn’t leave a big enough loop, so there is tension and these tongues break off. Today, you can tie your piece to the clasp using knots, then slip a crimp cover over the knot, so it looks finished as if there were a bead there. This is both more secure and easier to do.

Some alternatives to tying a globular knot: (1) with needle and thread work, you can tie off an end to an 11/0 seed bead, and have your clam-shell enclose the seed bead, and (2) with cable wire, you can crimp on a crimp bead on the end of your wire, and have your clam-shell enclose the crushed crimp bead.

CONES

Cones come in many shapes and designs, but basically look like a megaphone. These are used to finish off the ends of jewelry, often to hide a lot of messy knots or unfinished ends inside the cone.

One style of cone is called a 3-to-1 cone (also, 2-to-1 up to 11-to-1). This is a flattened cone, with one hole on one side, and 3 holes on the other. This is supposed to help you finish off a 3-strand piece in a decorative way. You pull each of 3 strands through the 3 holes on one side, and out together through the one hole on the other side. For two of the strands, you tie a large knot or double-knot, cut off the excess tail, and let the knot fall back into the box of the cone. I’ve only known one person in my life who could accomplish this, and maintain sufficient string tension so that none of the cable wire showed on the other side of the cone and as part of the bracelet. For the 3rd string, you would continue creating your clasp assembly. This is a good piece in theory, but not practice. Most people end up tying the three strands into this big, globular knot, and then trying to finish off the clasp assembly, only to have the clasp assembly take up 25–30% of their finished bracelet.

Regular cones are used like lampshades to hide some ugliness. With the typical cone style — that megaphone looking piece, the way you are supposed to use this piece is as follows: You take a soldered ring, something small enough so that it will fit far enough back into the cone, that the cone will hide any of the finishing knots or ends. If we start with a 3-strand necklace, you would tie off each strand to one side of the soldered ring. Then you would take a separate, independent cable wire, hard wire or thread, whatever you are stringing with, and tie it off in a knot to the other side of the soldered ring, pull the whole works into the cone, with the stringing material coming out the narrow end. Then you would finish off your clasp assembly.

The soldered ring, in this case, acts as a “support system”, creating jointedness. Otherwise, without this ring or support system, the cone could not support the resulting stress and strain. Since all the pieces are metal — cable wire, cone, clasp, crimp — , and these would be too stiff and would not move easily, and, as you now know very well, when you bend metal back and forth, it breaks.

EYEGLASS HOLDER ENDS

A major category of jewelry are eyeglass leashes. You make an eyeglass leash by attaching an eyeglass holder end to the eyeglasses, making a string of beads, attaching the string of beads to a split ring, and attaching the split ring to the eyeglass holder end. You never attach the beadwork directly to the holder ends. Eyeglass leashes take a huge beating, as they are worn, and you need to create as much jointedness as possible, so you don’t ruin someone’s eyeglasses, have the lenses shift position within the frames, or have the leash break. In fact, we want to use a split ring — about 10mm or 12mm in diameter — that is a little larger visually than you might feel comfortable with.

Eyeglass leash holder ends are made from round rubber thong (usually black or clear), flat vinyl (usually black or clear), or elastic cord (comes in many colors). The round rubber thong is the most durable. Elastic cord is not durable at all. There are various style options. Most come with what is called a “coil center”. When the eyeglass leashes are worn, the rubber, vinyl or elastic cord sweats, both from the humidity found in the air, as well as the wearer’s own body sweat. Coil centers tend to slip, so these don’t work well with narrow arms on eyeglasses. Other eyeglass leashes come with a bead center, usually a 6mm glass roller bead. The beads don’t slip.

The ones with bead centers are a little more expensive than the ones with coil centers. One company bought the ones with the coil centers, slipped these off what is basically a rubber band, and slipped on a 6mm glass roller bead. They took a $0.45 cent piece and sold them for $4.00 a piece. People thought they were magic because the beads didn’t slip, so were willing to pay the premium. You can do the same thing. There are about 300 colors of roller beads, so you can personalize your line.

WATCH BAND COMPONENTS

These pieces are used to adapt watch faces so you can make beaded watch bands off them. They consist of a tube designed to slip over the spring bar on each end of a watch face, and some kind of loop or series of holes that come off the tube. Beaded watch bands have become so popular, that now you can purchase watch faces designed specifically to attach these to them.

CRIMP BEADS, CRIMP COVERS, and HORSESHOE WIRE PROTECTORS

Crimp beads come in many styles, sizes and finishes. These are used to secure cable wires to clasps. The crimping process involves crushing the crimp onto the cable wire, first separating the tail wire from the main wire, then creating a lock, and finally re-shaping it so it looks like a bead again.

Crimp Covers

These are U-shaped beads that slip over the crushed crimp. They are used like a lampshade to hide something that is ugly.

You attach the crimp cover in two steps. First, using the tips of your crimping pliers, you push the two sides of the U together, so you have a pretty bead. These are made of a soft metal, so you don’t want to push too hard, or you will crush them. After you get the two sides to meet, you’ll find that the lip on either side doesn’t meet up perfectly.

So, Second, at this point, you return the crimp cover to your crimping pliers, this time resting it between the top notches (thus, furthest from your hand) in each jaw. This will help preserve the roundness of the crimp cover as you manipulate it. Gently push the jaws to force the lips to meet more perfectly. You can slide crimp covers over your crushed crimps. You can also use these to slide over any knots, to hide the knots.

Horseshoe wire protectors

These serve several purposes. (1) It forces you to leave the correct size loop in the cable wire, so that you have the appropriate support system or jointedness. Without the loop, you would be pushing the crimp all the way to the clasp. This is a No-No. You never push the crimp all the way to the clasp — this creates stiffness with metal parts, and general movement would cause these to break.

(2) The horseshoe also makes the loop more finished looking — better than a bare-wire loop. Most people hate a bare, exposed loop. The horseshoe fools the eye/brain here, making it think that the loop is finished and more organically a part of the whole composition.

(3) The horseshoe prevents the cable wire from folding into a V over a period of time and wear. If the wire were to change from an arched loop to a V-loop, the wire then would more easily bend back and forth and break.

There are many choices to make when selecting crimp beads:

Crimp Beads

tube vs. round 
 no difference in “holdability”, but most people prefer the tubes

THE SILVER COLOR ISSUE: sterling silver vs. silver plated vs. silver plated crimp with sterling silver crimp cover vs. argentium silver crimps
 Silver-plated crimps are usually plated over brass. Brass has a very high degree of integrity as a jewelry making metal. The plating wears off relatively quickly, and your crimps will look black — basically tarnished brass. More recently, these plated crimps have been plated over aluminum, which can break from the force of the crimping pliers.

Sterling softens at body temperature. If your crimp is resting on the wrist or the neck, there is some risk of it softening and weakening. This risk is minimal, however. If you’ve crimped correctly, you shouldn’t lose sleep over this. I prefer to use the sterling silver crimps; they are often made better than the other crimps.

You can also use a silver-plated crimp to crimp, and slide a sterling silver crimp cover over it.

Argentium has the same silver content as sterling but does not soften as easily at body temperature. These are a lot more expensive than sterling.

crushing the crimp and re-rounding it vs. crushing, then using crimp cover

Some people don’ t like the look of the re-rounded crimp, or feel uncomfortable trying to re-round them. The crimp covers add about $0.50 — $1.00 more to each piece.

plain tube vs. twisted tube
 The twisted tubes (sometimes called Tornado or Cyclone crimps) are a little more expensive than the plain ones. When you crush the twisted tubes, they look decorative enough that you don’t have to re-round them. You definitely need to re-round the plain ones.

Regular or long tube vs. short or half tube
 Short tubes or half tubes are primarily used in pieces like illusion necklaces, where you have a cluster of beads, and the cord shows, another cluster of beads, the cord shows, etc. Half tubes are used on either side of the clusters to keep the beads in place. When you crush the half tube, the volume of space it takes up is not noticeable. When you crush the regular sized tube, its volume of space is too noticeable and detracts from the general look of the piece. One mistake people make with the short or half tubes, is that, when they use them to finish off the ends of jewelry, their mind tells them to use 2 or 3 of them so that they will “hold better.” A crimp is a crimp, and if you crimped correctly, there is no difference in holdability between the short and longer tubes. Each crushed crimp you add becomes like a little razor blade. All jewelry moves, so you’re increasing the chances, by using more than one crimp on each end, that one of these crimps will cut through the cable wire. One crimp on either end is enough.

variations on quality/grade of crimp beads
 Basically, you get what you pay for!

Here’s how crimp beads are made: You start with a sheet of metal. You roll the metal into a tube. You buff along the seam where the two sides meet, so that it looks like it’s been soldered together. However, there’s really a seam there.

So often, people come into our shop and tell sad tales of failed crimps and broken bracelets and necklaces. They blame themselves. They blame the pliers. But they never blame the crimp beads. In most cases, the crimp is at fault.

Cheap crimps, usually bought in small packages, usually at craft stores, are not made well. When you crush these, they tend to split along the seam. Sometimes you can see the split. Othertimes, you can’t quite see that the two sides of the tube have started to separate. Your cable wires pull out. Or your crimp edges have cut into the cable wire.

An A-grade crimp, usually costing about 3 times what the cheap crimps cost, can hold up to your initial crushing, as well as another 8 or so clamping down on it during the re-rounding process.

There are heavy-duty or A+ grade crimps. These run about 6–8 times what the cheap crimps do. You don’t have to worry about any splitting, no matter how much you work the crimp bead with your pliers.

using 1 crimp on each end vs. using more than 1 crimp on each end
 Using 1 crimp on each end of your piece is sufficient. Using more than 1 crimp on each end is too risky. Sometimes you mind, or your best friend, thinks that is 1 is good, 2 or more would be better. No! When you crush your crimp onto the wire, it becomes like a little razor blade. All jewelry moves, so your crimp is constantly trying to saw through the cable. Using more than one crimp on each end increases the chances that one will saw through. All you are doing is adding razor blades.

size of crimp

Manufacturers are inconsistent in how they label the sizes of crimp beads. In general:

2mm is the average size For .014, .015, .018, .019 cable wires

1.5mm is small For .010 and .012 cable wires

2.5mm is slightly more than averg For .019 and .024 cable wires

3.0mm is large For .024 cable wires, or thicker cords, or bringing

more than 1 strand thru at a time

4.0mm and larger For thicker cords, or bringing 2+ strands thru

Continue Part 2: Controllers and Adapters

______________________________________________

Other Articles of Interest by Warren Feld:

Cleaning Sterling Silver Jewelry: What Works!

What Glue Should I Use When Making Jewelry?

Why Am I So Addicted To Beads?

A Very Abbreviated, But Not Totally Fractured, History of Beads

The Martha Stewart Beaded Wreath Project

When Choosing Colors Has You Down, Check Out The Magic Of Simultaneity Effects

The Use of Armature In Jewelry: Legitimate or Not?

Pearl Knotting Warren’s Way

Organizing Your Craft Workspace…Some Smart Pointers

You Don’t Choose Clasps, You Choose Clasp Assemblies

Know Your Anatomy Of A Necklace

Mini Lesson: Making Stretchy Bracelets

Mini Lesson: Making Adjustable Slip Knots With Thicker Cords

Mini Lesson: How To Crimp

Mini Lesson: Attaching End Caps, Cones, Crimp Ends

Mini Lesson: Brick Stitch

Mini Lesson: Flat Even Count Peyote

Mini Lesson: Ndebele Stitch

Mini Lesson: Petersburg Chain

Mini Lesson: Right Angle Weave

Jewelry, Sex and Sexuality

Everyone Has A Getting Started StoryThe Nature-Inspired Creations of Kathleen

The Jewelry Designer’s Orientation To Glass Beads

The Jewelry Designer’s Orientation To Lampwork Beads

The Jewelry Designer’s Orientation To Crystal Beads

The Jewelry Designer’s Orientation To Seed and Cylinder Beads

The Jewelry Designer’s Orientation To Choosing and Using Clasps

How To Design An Ugly Necklace: The Ultimate Designer Challenge

______________________________________________

Thank you. I hope you found this article useful.

Enroll in my jewelry design and business of craft video tutorials online. Begin with my ORIENTATION TO BEADS & JEWELRY FINDINGS COURSE.

Also, check out my website (www.warrenfeldjewelry.com).

Visit Land of Odds online (https://www.landofodds.com)for all your jewelry making supplies.

Add your name to my email list.

Subscribe to my Learn To Bead blog (https://blog.landofodds.com).

Posted in Stitch 'n Bitch | Tagged: , , , , | Leave a Comment »

PART 2: THE JEWELRY DESIGNER’S ORIENTATION TO OTHER JEWELRY FINDINGS: PART 2: CONTROLLERS AND…

Posted by learntobead on March 14, 2021

Continue Part 1: Preparers

Enroll in my jewelry design and business of craft video tutorials online. Begin with my ORIENTATION TO BEADS & JEWELRY FINDINGS COURSE. There are 18 video modules including handouts, which this is one of.

Choosing and Using Other Jewelry Findings: Controllers and Adapters

You have to approach the Jewelry Findings with a large measure of respect. “Jewelry Findings” are all the pieces that you use, including clasps, other than stringing materials and beads. They are called “jewelry findings”, because up until about 15 years ago, many of these pieces didn’t exist. People went to sewing notion stores, antique stores, flea markets, hardware stores, cannibalized old jewelry, wherever, and found things and made them work. Because many of these pieces are new, there is not a consensus on what some of these things should be called, so you have a lot of similarly looking pieces that go by different names. I’m sure over time, the name-game will shake out, and there will be more consistency.

Respect these jewelry findings. They are the pieces that get pulled and strained, torn at and squeezed, maligned and misused. These are the pieces that will make or break your piece of jewelry. Understand and respect them.

Many designers fail to make the full range of these pieces available to them. They either don’t know about them, or are afraid of them or think they might use them incorrectly. They too often limit their own design possibilities by relying on the same limited set of findings for everything they make. But the world of possibilities that these jewelry findings open up for us is endless.

CONTROLLERS:
 Things Which Control the Positioning of Pieces or Sections within Your Piece:

SEPARATOR or SPACER BARS

These are multi-hole pieces that are used to keep multi-strand pieces neat and organized. In a bracelet you might use 3–5, spaced evenly along the length of the piece. In a necklace, you might use 5–7, spaced evenly along the length of the piece.. Some of these pieces are very narrow and meant to be “hidden”. Others have a decorative edge that will be seen as part of the overall design. Separators with a broad surface are referred to as Separator Boxes.

END BARS (can also be used for making earring dangles)

These pieces are basically a bar, with one centered loop off one side, and multiple loops off the other. For a 3-loop end bar (which has 4 loops — 1 centered on one side, and 3 on the other) you would finish off a 3-strand piece on the one side, and then use the single loop on the other side to begin your clasp assembly. The bar can be plain, or very decorative. The bar can be straight, curved, or zig-zagged.

On an earring, with the bar positioned horizontally, you can dangle these one from the other, and create a neat cascading effect with dangles.

These come plain, as well as very decorative.

CONNECTORS and LINKABLES

There is a sub-family of jewelry findings originally called “Connectors”, and more recently referred to as “Linkables”. [The word “connectors” didn’t seem to resonate with customers, so they are trying “linkables”, which also doesn’t particularly resonate, because people are unfamiliar with most of these types of parts. That’s unfortunate, because connectors and linkables open up myriad design possibilities.]

Connectors or linkables are pieces that either have a lot of holes in them, or have multiple loops that come off them. They enable the designer to create segments or sections of beads, which are then connected to each other. They enable the designer to re-direct the flow or pathway of the piece, or to start new pathways/directions off the original piece. They allow you to create support systems within your pieces which are very attractive, appealing, and create a higher level of interest on the part of both viewers and wearers.

The most basic connectors or linkables are rings of various sorts.

Jump rings have a gap or split in them. 
 Split rings are like little key rings, in which the wire of the ring goes around twice. 
 Soldered rings or stamped solid rings have no gaps whatsoever.

In making a choice among these, you would first try to use a soldered or stamped solid ring. If this won’t work, because you have to make some kind of jump, your second choice is a split ring. If this won’t work, either functionally or sometimes from a visual-appeal standpoint they are not appealing, you would use a jump ring.

To open and close a jump ring, you move the wire ends, on either side of the gap, sideways just a bit, so that you have an opening wide enough to slip over whatever you need to slip them over on. You never pull the wires out and in, just back and forth. After you have connected your pieces to your ring, you close the ring by moving the two ends side to side until the two ends meet. If you have difficulty doing this with your fingers, or the aid of a chain nose pliers, you can purchase a jump ring pliers. With the jump ring pliers, you close the jump ring as best as you can with your fingers. Then you put the jump ring between the jaws of these pliers, and squeeze to close perfectly.

Bead Attach Rings

These are two rings soldered together, one small and one larger. These are primarily used in beaded charm bracelets. If you strung your charms on with your beads, they would get locked between the beads, and not flow freely. Instead, you string on your beads, and string on (through the smaller hole) a bead attach ring, everywhere you want to place a charm. Then you attach the charms, usually using a jump ring or split ring, to the larger hole.

Rosary and Y-Necklace Components, and other multi-hole or multi-loop pieces (see above) let you segment your pieces, or take the strings in different directions.

Beads

There are some beads that are considered a part of the Connector or Linkable family.

Double beads are either tubes that are soldered together so that the directions of the tubes are different, or you have a tube with one or more rings soldered along its length.

Say you have two tubes soldered together, and one is curved to the left and the other to the right. You take two strings, one through one, and the other through the other tube, add some beads to both, add another 2-tube-double-bead, to twist the strings in the opposite direction, add more beads to each string, another double bead, and so forth. You end up with a bracelet or necklace that looks somewhat like a DNA-strand (double helix).

Say you have a twist tube with two loops soldered to it, one near the top, and the other near the bottom. You can take two of these, and make a long necklace, with one tube+loops positioned on the left side, and a second one positioned on the right side. The wire of this necklace is strung through the tubes. Next, you take another stringing wire from the top loop on the left side and the top loop of the other tube+loops bead on the right side, and make a strand of beads across the chest. Do this again, attaching the lower loops from left to right. You end up with a necklace that also has two strands going across the chest.

Twister beads are round beads that are soldered together, so that the holes go in different directions. Usually these come as two soldered beads or three soldered beads. You place these in 2-strand or 3-strand necklace or bracelet, at each point you want the strands to cross over each other.

The traditional way to make a twist necklace or bracelet is to take two end bars, and attach the strands in the following way:

Twister beads come in handy because problems arise when these multiple strand pieces are done the traditional way and are worn. First, if you flip one of the end bars over to its other side, you lose the twist as you envision it. Second, when people wear these pieces, they often don’t twist at the points you envisioned, either.

By using two twister beads — in this case, a twister bead comprised of 2 beads soldered together — in the example, the piece will always twist in the way the artist envisions.

Tubes with loops.

These are basically a tube with a loop soldered off the middle. You string these on everyone wherever you to add a drop or pendant to your piece.

ADAPTERS: Things Which Help Adapt Something So It May Be Used Within Your Piece:

BAILS

These are basically pieces that enable you to put a loop somewhere along your strung piece of jewelry. You string these pieces on everywhere you want to add a drop or a pendant. Regular bails look similar to tubes or beads with a soldered loop off the end.

Some loops are set horizontally, and some vertically, and this positioning of the loop may affect how useful it is for your piece. PAY ATTENTION to the positioning of the bail’s loop relative to the positioning of the hole on your pendant piece.

Other types of bails: 
 Pinch bail — basically a fancy V-shaped piece. The legs have pointed pinchers at their ends. You push these pinchers into a horizontally drilled drop. Austrian crystal drops, for example, are horizontally drilled. And you end up with a loop to string through.

Pinch bails come in many sizes, and a few different configurations, today. You need to match the pinch bail and its design to the pendant drop you want to combine it with. When you open and close the pinch bail too many times, it breaks. You are basically taking metal and bending it back and forth. When you try to fit the bail onto the drops, often you break the tops of the drops, particularly if your drops are some type of crystal material. A hazard of using these. So, when planning your projects (and also when pricing these), always assume you will need some extra bails and some extra pendant drops.

While not my favorite thing to do, some people put a drop of super glue where each point or beg of the bail enters the drilled hole.

Snap on bail — basically a fancy lanyard clasp. This is used to make your pendant removable. You can snap on the bail over the stringing wire, and then take it off the stringing wire.

Wire bails — basically a triangular shaped jump ring, where the gap is off to the side, rather than at the bottom. The drop or pendant won’t have a gap to pull through, because the gap is on the side. What I like about these is that people often bring things into the shop to have us convert into some kind of pendant drop, and if I can’t find a regular piece to work, I usually can always make a wire bail work.

Donut bail

The donut bail is used to convert a glass or gemstone donut into a drop. You slip one side of the bail through the donut hole, then push the two loops on the end of the bail together. Then you string through the two loops.

Beaver Tail or Beaver Tail Bail

Beaver tails are flat surfaces with a loop or bail loop attached to one end. You glue the flat surface to your piece, say a piece of fused glass, letting the loop or bail loop to stick out over the top of the piece. If a plain loop, you would add a jump ring or similar piece, to finish off the piece.

Leaf or Foldover Bail

This is a long piece of metal with flat, decorative ends on each side, usually a leaf stamping. You carefully fold this over, creating a loop in the middle. Then you glue either flat surface to the surface of your pendant drop, like a piece of fused glass.

To glue the leaf, foldover, beaver tail or beaver tail bail to a piece, first try either E6000 or Beacon 527. If these don’t work, try a 5-minute epoxy that comes in a dual-syringe. If your piece is smooth glass, you might use some sandpaper or a file to rough up the surface a bit before gluing. If you have still having difficulty with a glass piece, try using glass cement.

SCREW EYES

These pieces are a screw-threaded post, with a loop soldered to the top. You put some glue (any glue except super glue) on the post, push it into a bead — they do not screw into anything — , attach a jump ring to the loop and string the bead on to your piece as a drop.

EXTENDER CHAINS

This is a short length of chain, usually with a spring ring clasp on one side, and a bead-drop on the other. You can buy these pre-made, or make your own. These are used to lengthen necklaces. The spring ring clasps onto the existing ring of the necklace; the hook-clasp can clasp into any link on the chain. The bead drop is primarily decorative.

SAFETY CHAINS

These 2 ½” to 3” lengths of chain, have two tiny jump rings, one on each end. These are used to attach to bracelets, to prevent you from losing your bracelet, should the clasp come undone. You can buy these pre-made, or make your own.

HEAD PINS

Head pins are pieces of wire with a flattened or decorative end or head. You put beads on the head pin, and the head stops them from falling off. You make a loop on the other end, and string these on a necklace, or dangle them from an ear-wire or other loop. You need ½” of exposed wire to make a loop. You can make a single loop, a double loop or a triple loop. Each provides a different level of security, a different visual appearance, and a different impact on the resulting silhouette.

Head pins come in different thicknesses (gauges). 
 Regular thickness: 20 gauge
 Extra Thin: 22 gauge or 21 gauge
 Ultra Thin: 24 gauge or 26 gauge

Too many people try to use the longest head-pins they can get. They end up with bent dangles and drops on funny looking necklaces, bracelets and earrings. If you want something “long”, consider making a series of links using eye pins, instead.

When you make your loops on the head pin, make them large enough so that they have sufficient jointedness and support, and will easily slip over the stringing material or finding. I can’t tell you how many times I’ve seen women with earring dangles stuck in a 90 degree angle, because the loops were too small.

EYE PINS

Eye pins are pieces of wire with a loop on one end. These are used to make bead-chains, such as in a rosary. You put one or more beads on the eye pin, then make a loop on the other end. You need ½” of exposed wire to make a loop. These come in different thicknesses (gauges).
 Regular thickness: 20 gauge
 Extra Thin: 22 gauge or 21 gauge
 Ultra Thin: 24 gauge or 26 gauge

You can buy head pins and eye pins pre-made. Or you can easily make your own, using simple wire working techniques.

Continue Part 1: Preparers

_______________________________________

Other Articles of Interest by Warren Feld:

Cleaning Sterling Silver Jewelry: What Works!

What Glue Should I Use When Making Jewelry?

Why Am I So Addicted To Beads?

A Very Abbreviated, But Not Totally Fractured, History of Beads

The Martha Stewart Beaded Wreath Project

When Choosing Colors Has You Down, Check Out The Magic Of Simultaneity Effects

The Use of Armature In Jewelry: Legitimate or Not?

Pearl Knotting Warren’s Way

Organizing Your Craft Workspace…Some Smart Pointers

You Don’t Choose Clasps, You Choose Clasp Assemblies

Know Your Anatomy Of A Necklace

Mini Lesson: Making Stretchy Bracelets

Mini Lesson: Making Adjustable Slip Knots With Thicker Cords

Mini Lesson: How To Crimp

Mini Lesson: Attaching End Caps, Cones, Crimp Ends

Mini Lesson: Brick Stitch

Mini Lesson: Flat Even Count Peyote

Mini Lesson: Ndebele Stitch

Mini Lesson: Petersburg Chain

Mini Lesson: Right Angle Weave

Jewelry, Sex and Sexuality

Everyone Has A Getting Started StoryThe Nature-Inspired Creations of Kathleen

The Jewelry Designer’s Orientation To Glass Beads

The Jewelry Designer’s Orientation To Lampwork Beads

The Jewelry Designer’s Orientation To Crystal Beads

The Jewelry Designer’s Orientation To Seed and Cylinder Beads

The Jewelry Designer’s Orientation To Choosing and Using Clasps

How To Design An Ugly Necklace: The Ultimate Designer Challenge

______________________________________________

Thank you. I hope you found this article useful.

Enroll in my jewelry design and business of craft video tutorials online. Begin with my ORIENTATION TO BEADS & JEWELRY FINDINGS COURSE.

Also, check out my website (www.warrenfeldjewelry.com).

Visit Land of Odds online (https://www.landofodds.com)for all your jewelry making supplies.

Add your name to my email list.

Subscribe to my Learn To Bead blog (https://blog.landofodds.com).

Posted in Stitch 'n Bitch | Tagged: , , , , | Leave a Comment »