


Wax. Wax. Wax.
A really good artist will wax their beading thread (Nymo, C-Lon, One-G) or cable thread (Fireline). Even if the thread says it’s been pre-waxed, you want to re-wax this thread.
We wax our thread to make it strong, less likely to fray, to straighten and stretch it a bit before using, to waterproof and protect the thread from weird body chemistries as well as cosmetics, perfumes and perfume oils and hair sprays, and pollutants in the air, to glide through the beads better, and to fill in the jagged edges of the hole of a bead to make it less likely to cut the thread.
There are different types of threads and conditioners.
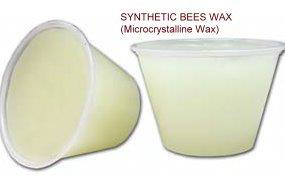
The primary choices are among pure beeswax, synthetic beeswax (also called microcrystalline wax), and a thread conditioner, like Thread Heaven. I suggest you always use beeswax, either pure or synthetic. I do not recommend a thread conditioner.
Thread conditioners reduce the chances your thread will get tangled or knotted up while you are weaving or stringing with it. It reduces the static electricity that builds up each time you pull the thread or cable thread through a bead. But it doesn’t have any of the positive impacts that wax does. It’s an either or choice. So I choose wax.
The synthetic wax is a little more expensive than the pure wax, but I prefer it. The synthetic does everything the pure one does, only better.
Waxing the thread takes very little time, and it can add years to the life of your bead art. Regular bees wax will protect your thread for 150 years. Synthetic bees way many more times this.
When waxing, we pull our thread through the wax two times. Then we take our two fingers, pinching the thread, and slowing moving down the full length of our thread. Our body temperature melts the wax into the thread. Our fingers also knock off any excess wax on the thread. Always pull by the thread, not by your needle, when waxing.
To feel the effects of waxing, try this:
Take an arm’s length (about 6 feet) of Nymo D or C-Lon D Thread it onto a Size #10 English beading needle.
Double it up, so that you now have your length of thread in half, with two equal lengths extending from either side of your needle’s eye hole.
At the needle end, wrap the thread around your forefinger a couple times. When we pull the thread through the wax, we want to pull by the thread, and NOT by the needle.
Wax the thread twice, then take your two fingers and go down the thread, allowing your body temperature to melt the wax into the thread.
Now un-double your thread.
Move your needle up to one end, leaving about an 8–10” tail.
Take your two fingers, pinching the thread, and feel down the length of the thread to find the area that was wrapped around your finger, and did not get waxed. Your fingers will slip.
Now wax two more times from that area on down.
Pinch your thread at one end, moving your fingers down the length to melt the wax into the thread.
Other Articles of Interest by Warren Feld:
Best Way To Thread Your Needle
Bead Stringing With Needle and Thread
Turning Silver and Copper Metals Black: Some Oxidizing Techniques
Color Blending; A Management Approach
Cleaning Sterling Silver Jewelry: What Works!
What Glue Should I Use When Making Jewelry?
When Choosing Colors Has You Down, Check Out The Magic Of Simultaneity Effects
When Your Cord Doesn’t Come With A Needle…What You Can Do
What To Know About Gluing Rhinestones
Know Your Anatomy Of A Necklace
How Does The Jewelry Designer Make Asymmetry Work?
I hope you found this article useful. Be sure to click the CLAP HANDS icon at the bottom of this article.
Also, check out my website (www.warrenfeldjewelry.com).
Subscribe to my Learn To Bead blog (https://blog.landofodds.com).
Visit Land of Odds online (https://www.landofodds.com)for all your jewelry making supplies.
Enroll in my jewelry design and business of craft video tutorials online.
Add your name to my email list.
