Enroll in my jewelry design and business of craft video tutorials online. Begin with my ORIENTATION TO BEADS & JEWELRY FINDINGS COURSE. There are 18 video modules including handouts, which this is one of.
STRINGING MATERIALS
I’m not proud to admit it, but I used to string things on fishing line and dental floss. It was there. I knew about it. I understood it. It was simple. Uncomplicated. Didn’t need directions. Didn’t need a 20-minute explanation about when these were used, and when they were not, or what they were used for, and what they were not.
Then I discovered Tiger Tail cable wire. This seemed magical, somehow. It was something more than fishing line or dental floss. It seemed strong. It was metal. It was masculine. You could swing from trees on it. You could tie up old planks together to secure them. You could string things on easily without a needle. You didn’t need glue. You didn’t need bead tips or knot covers. It tied easily to clasps. And although, it turned out, the Tiger Tail broke rather easily, I’d pretend like it never broke for me.
Luckily, today, beaders have been blessed with an abundance of stringing materials to choose from. Each has it’s pros and cons. Each much better than the choices I had a few decades ago.
When beaders and jewelry makers select stringing materials, they need to ask a lot of questions of the people who sell these products, as well as the people who use them. You’ll get a lot of contradictory advice. But you need a lot of information to help make your choices. For me, I prefer stringing materials that don’t break easily, allow pieces to drape nicely, move freely and correctly with the body, and are relatively easy to use. But don’t we all.
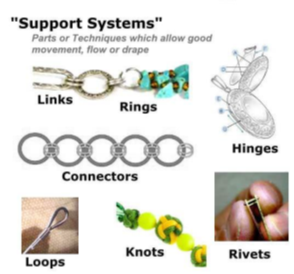
From a design perspective, you typically get your best results with needle and thread. Needle and thread projects always take the shape of your body. So they feel the best, move the best, and drape the best. However, needle and thread are very involved and time-consuming to do. Especially if you’re selling your stuff, it’s difficult to use needle and thread and expect to recoup your labor costs. As long as you know what the ideal is, however, it becomes a little easier to step back from the ideal, and compensate for any weaknesses through various design techniques and devices.
Threads, Needles, and More Threads
I discovered Nymo beading thread, Size #12 English beading needles, and Tiger Tail cable wire. This wasn’t a match made in heaven. I didn’t take to it like a duck takes to water. It wasn’t a piece of cake.
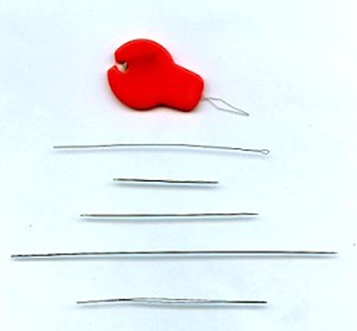
Have you ever seen a beading needle? They’re so thin. They have even thinner eye holes. First you learn that cotton sewing thread is round and sewing needles have round holes. Next you learn that nylon beading thread is flat like a ribbon, and beading needles have rectangular, narrow holes.
The shape of the eye-hole of a beading needle is like a funnel –one side of the hole is bigger than the other. If you are having trouble fitting that thread through the hole, turn the needle around. Try again.
I started with size #12 needles. I find #10 needles to be more useful for bead stringing and both #10 and #12 most useful for bead weaving. Proportionally, the eye holes in the #10 are much bigger than those in the smaller, thinner needles.
Major Beading Threads
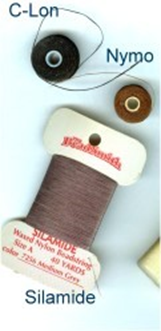
NYMO thread is the granddaddy of them all. It comes in many colors and thicknesses. It doesn’t look like it, but it is one of the strongest things you can string things on. With NYMO, the black is stronger than the white. The white is stronger than the colors.
C-LON thread (also called SuperLon) is a relatively new thread. It’s similar to Nymo, but a little stronger. It comes in a lot of colors, but only a couple of thicknesses. In our store, if you came in for a Nymo product, and there was an equivalent C-Lon product, we would suggest you switch to C-Lon. With C-Lon, the colors and the white are as strong as the black. All are as strong as Nymo black.
ONE-G thread is made by TOHO. This is a premium nylon beading thread, and much more expensive than Nymo or C-Lon. I’m very fond of the strength of the thread, and the feel, give and take of the thread while I’m beading. It has a stretching quality to it that makes it less tiring to use on long projects. It’s my beading thread of choice.
SILAMIDE is a prewaxed thread. Lots of beaders love this. I’m not a big fan of this because it breaks very easily. Some people suggest that you double the thread to deal with the breakage issue, but I find it awkward to use a doubled thread. Even though Silamide is prewaxed, if you purchased it from us, we would tell you to wax it. There’s no waxy buildup on it, and this, we feel, is the major advantage of waxing.
When you use beading thread as your stringing or weaving material, you want to pass through each bead about 3 times. Most weaving techniques do this automatically as part of the step-pattern of the technique.
A Note About Waxing Your Thread
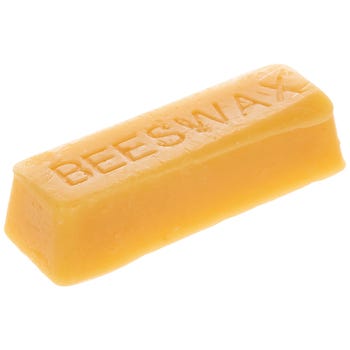
I advise all my students to wax their thread before they use it. The wax has these advantages:
- Protects the thread from chemicals in the environment, including pollutants in the air, chemicals in a person’s sweat, and chemicals in cosmetics and hair sprays. Natural beeswax will protect the thread for 150 years. Synthetic beeswax provides protection for centuries more.
- The hole of a bead looks like a broken coke bottle. The wax will fill in some of the jagged rim, lowering the risk of the hole cutting your thread.
- Helps you maintain a tighter thread tension while you weave or string.
There are products called thread conditions. One brand, now defunct, was called Thread Heaven. When you keep pulling the thread through your beads over and over again, static electricity builds up. This results in the thread getting tangle up and knotted while you work. The conditioner prevents this from happening. Waxing will not.
You cannot use both products. You have to pick one. I suggest always picking the wax.
The Hybrid “Cable Thread”
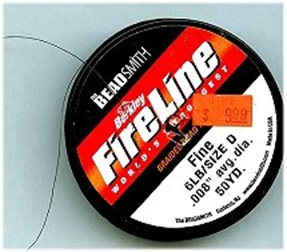
Every year there are many new stringing materials. Many start as advances in fishing lines. One recent advance is what I call the hybrid “cable thread”. These are made from threads that are braided together (instead of braided wires as in a cable wire, see below) and encased in nylon,
Three brands — Power Pro, WildFire, and FireLine are very prominent. I especially like the FireLine.
You use these with needles, but do not have to wax them, though I suggest you do. You don’t have to go through your beads three times, like with the threads. Once is sufficient, though I sometimes go through 2 or 3 times to firm up the way the beads lay on the stringing material, and so the beads don’t wobble.
You don’t necessarily have to wax the FireLine, but a lot of people like to do this. The major advantage of waxing is that the wax protects the integrity of the nylon encasing. Cable threads are strong only to the point the nylon encasing is able to maintain the twist in the braided threads. As soon as the encasing is violated, the thread immediately untwists and breaks. You might pierce the thread with the needle as you are working your piece; the wax will melt into the hole and plug it. A pollutant in the air, or a chemical in someone’s sweat, or cosmetics or hairspray will make the nylon encasing deteriorate. Perfume oils will dissolve it. The wax provides a protective shield to minimize this happening.
If you wax it, this will increase your thread tension considerably. In most projects a tight tension is very desirable. With some very tight bead weaving stitches, like Peyote, cable threads may result in too tight a tension. Usually, I use regular beading thread with the Peyote stitch. With weaving stitches with loose tension, like Right Angle Weave or Ndebele, the cable thread’s tightness is an advantage, giving you more control over managing the thread tension as you work your piece.
Beading thread is flat and shaped like a ribbon. Beading needles have rectangular holes. FireLine, however, is shaped round. To make it easier to thread FireLine into a beading needle, you can flatten the end of the FireLine. I pull the end between two of my fingernails. You can also use a chain nose pliers to flatten the end. Then pop it into your needle. Don’t pull this through your teeth. It will cut into your teeth.
Pieces done with the cable threads lay stiffer and feel stiffer than the threads, like Nymo or C-Lon, but they drape and feel much better than the cable wires.
Many stringers and bead weavers have switched to cable threads.
Bead Cords
For some types of jewelry projects, you don’t want to cover and hide all the stringing material with beads. You might be putting knots between beads, or you might be doing macramé, braiding or kumihimo with beads, or you might be doing something like a Tin Cup necklace, where you have a cluster of beads, then some cord showing, then another cluster of beads, then more cord showing, and you get the idea.
In this case, if we used threads, the raw and waxed threads would be kind of ugly. Most cable wires, if showing, would be ugly. So instead, we use what is called Bead Cord.
Bead Cords are threads which have been braided together to make the stringing material look pretty. However, we don’t wax the bead cord to deal with issues like fraying or stretching. This would ugly it up.
Thus, when we use Bead Cord, we are trading off durability for appearance. If we were going to cover all the bead cord with beads, then this would not be the best choice of stringing material. You would want to use either a thread or cable wire, in this case.
There are many brands and qualities of bead cord.
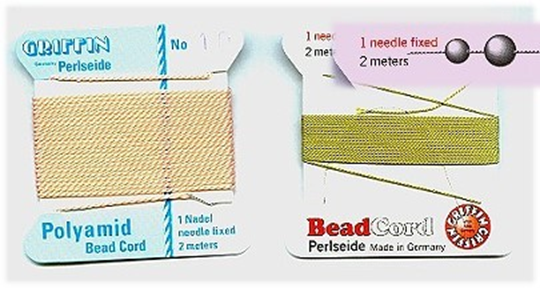
Most people prefer Griffin Bead Cord, which comes on cards, and has a needle fixed to one end of the 2-meter long cord. There are many colors and thicknesses. It is available in Nylon and in Silk. I’d give this cord a grade of a “B”. What people like about this cord is that it comes with a needle attached on one end. This makes it easier to use when you are knotting between beads. It allows you to start with a thicker cord.
I recommend using silk bead cord if your project is all pearls or mostly pearls. I suggest using nylon bead cord if your project is very few pearls or no pearls. Unfortunately, every other type of stringing material, except the silk, will ruin the pearls. These other materials cut into the nacre around the pearl, starting at the hole, leading to cracking and chipping around the bead, thus ruining them. Only silk won’t cut into the pearls. Unfortunately, silk naturally deteriorates in 3–5 years, so anything you do on silk will have to be re-done every 3–5 years.
Nylon doesn’t deteriorate, so that’s why we suggest it for everything else. Now some people tell me things were always done on silk. I tell them nylon wasn’t always. But I can reverse hats. Say you’re selling your pieces. There’s more marketing cache if you say “it was strung on silk”, than if you said “it was strung on nylon.” You can make it your customer’s problem to re-string in 3–5 years.
Basically, at the same level of quality, the pros and cons of nylon and silk are the same. At the same quality level, they fray the same, stretch the same and get dirty the same. It’s just that the silk deteriorates and the nylon does not.
Bead cords are also used in knotting, macramé, braiding, bead crochet and kumihomo.
C-lon or S-lon (same thing, two different brand names) is the A-grade nylon. It comes in 4 thicknesses. It’s excellent.
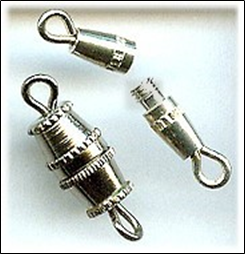
Flexible Cable Wires
When I first started beading and making jewelry, I was not a big fan of thread. I was never one to sew. Needle and thread seemed so complicated. It took so long. The threads seemed to break. They frayed. They stretched. They got tangled up and they got knotted up. It was hard to see and keep in my field of vision a very thin thread on a very thin needle going through some very small beads. I poked myself with the needle. It made me cranky.
I turned to Tiger Tail cable wire. Cable wires are flexible wires that are braided together and encased in nylon. The wire is stiff enough to be its own needle. Stringing beads on a cable wire seemed so perfect. You only had to go through your beads once. The wire was stiff enough to be its own self-needle. Zip, zip. Fast, fast. For years, I made everything on cable wires. Always satisfied, never a complaint.
Today, there are many brands, qualities and distinctions of cable wires. There are easily over 24 choices. Each brand organizes its worst to best wires differently. None of the brands provides sufficient information on their labels to make a fully informed choice. It’s very confusing. It’s virtually impossible to compare across brands. You need to know the materials the braided wires are made of, the thicknesses of the finished wires, and the number of wires braided together within the cable, the material the nylon sheathing is made of, and the thickness of this sheathing.
The true measure of wire strength is called “tensile strength.” This is the amount of force it takes to keep the wire from untwisting within the nylon sheathing. Tensile strength depends on what the wire is made of, what the nylon sheathing is made of, and how thick and nonporous this nylon sheathing is. This information is not found on any of the labels.
On the labels of these products, the manufacturers list the number of strands braided together within the cable. This gives you some information, but not enough information to make a choice. You don’t know what the wire is made of, or it might say “stainless steel”, but there are hundreds of grades of stainless steel. They do not list what the nylon sheathing is made of, or how thick and nonporous it is. Some companies differentiate their lowest from highest qualities based on the number of strands. For example, one company’s low end is 7-strand and its high-end is 49-strand. However, other companies do not differentiate by number of strands. Another company’s 7-strand high end product is stronger and softer than its middle-range 49-strand product. It’s middle range 49-strand product is stronger and softer than that first company’s high-end 49-strand product.
A long time ago, manufacturers put “pound strength” on their labels. It’s on some labels, but not all. The actual pound strength numbers change more often than feels comfortable.
There are no government standards about measuring “pound strength.” Because of this, whenever you see “pound strength” on a label, whatever the product, you need to take this with a large degree of skepticism. First, there are two definitions of how to measure pound strength — (1) how heavy the fish is that the line will support, and (2) how much force the line will support when reeling in a fish of a given weight. But because there are no standards, it is up to the factory to put whatever they want. Most of these wires are made in total or in part in one factory in Taiwan. The person at the factory responsible for labeling pound strength many years ago never got it right, and never got it the same. One batch would show 20#, then the next time it might show 2#, then 5#, back to 20#, down to 10#. Since he could never get this right, the manufacturers asked him to leave this information off the label.
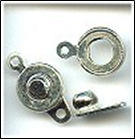
There are many brands of flexible, nylon coated cable wires. These cable wires can be grouped into three levels of quality:
— Craft (Tiger Tail)
— Designer (Flex Wire)
— Professional or Artist
I start people at the Designer (flex wire) quality cable wires. Most craft stores only carry the Craft quality. This is rather useless. Most bead stores carry the Craft and Designer levels, and sometimes the Professional or Artist level as well. The “best” level is extremely expensive, so I feel the beader or jewelry-maker needs to justify the extra expense when moving up to this quality. I’ve rarely seen a situation where the Professional quality was needed.
Tiger Tail was the original cable wire, and today it is the low-end product. It’s the Craft level wire, and all brands carry it. Often you don’t see the word Tiger Tail on the label. You can tell it’s Tiger Tail because it’s very cheap — substantially cheaper than anything else — usually under $5.99 for a 30ft spool. Tiger Tail wire breaks very easily in and of itself. The wire tends to kink. The way you should attach Tiger Tail to the clasp is to tie the wire into a knot or a double-knot. This gives you a very secure connection to the clasp.
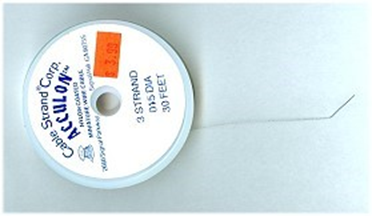
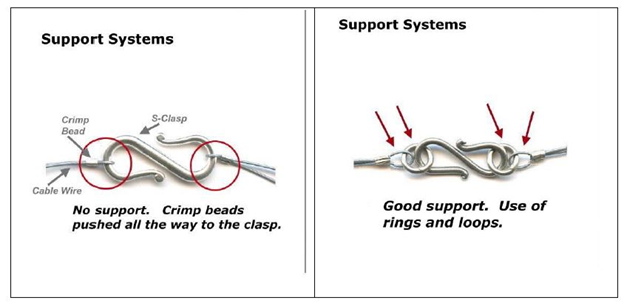
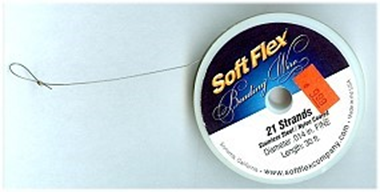
Flex-wire is the Designer Level. Flex-wire (again available in several forms in each of the brand lines) is noticeably more expensive than the Tiger Tail — usually starting at $10.99 — $18.99 and up for a 30ft spool. It does not break easily in and of itself. It does not kink. However, it is very difficult to tie into a knot. So you have to use a crimp bead in order to hold the wire in place and secure the clasp. [I only recommend 2 brands — Soft Flex and Flexrite. These are very supple; the nylon sheathing has a high degree of integrity; they are very strong]
The way you use a crimp bead is that you take the wire and go through the crimp, through the clasp, then back through the crimp. You crush the crimp with a pliers (preferably a crimping pliers) to hold it into place. The major reason to use a crimp bead is to make your piece look more finished, than if you had tied a knot. However, it does make your piece less secure.
When you crush your crimp bead onto the wire, this flattened crimp becomes like a little razor blade. All jewelry moves. So your crimp is constantly trying to saw through your wire. On Tiger Tail, crimps easily cut through the wire, so that is why we suggest tying a knot. If you don’t like the look of the knot, you can either use beads on either end with large enough holes to swallow the knot. Or you can use a piece called a crimp cover and slip this over the knot, squeeze it shut, and it looks like you have a bead there.
With Flex-wire, this wire is so strong that we feel very comfortable recommending that you use a crimp bead on each end. However, and this is a big However, we DO NOT suggest that you use more than one crimp on each end. Sometimes your friends, or your mind, will tell you that if 1 crimp was good, then using 2 or 3 crimps on each end will be more secure. It’s not. All you are doing is adding razor blades. You’re increasing the chances that one of these crimps will cut through the wire.
If you’ve crimped correctly, one crimp on either end is sufficient. It doesn’t matter what the shape or the size of the crimp bead is. It doesn’t matter how heavy the beads are.
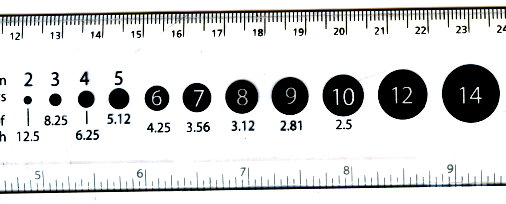
Cable wires come in different thicknesses.
For necklaces, you want to choose the thinnest wire that is the most durable. This is because the major design goal here is to have your necklace drape as best and as comfortably as possible. We suggest something around .014” or .015”. If someone sits at their desk and fidgets with the necklace a lot, then this thinner thickness will break. In this case, since durability is becoming an issue, the .018″ or .019″ will work fine.
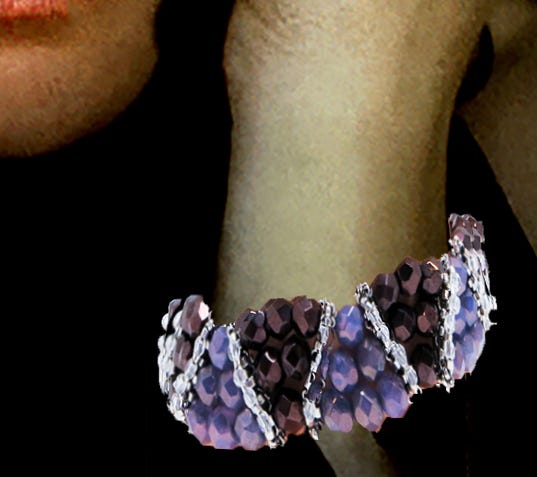
For bracelets, you want to use the thickest wire that is most comfortable. Bracelets take a huge beating on a daily basis. We suggest something around .018” or .019”.
For eyeglass leashes, we suggest .024” or .019”. These take the most beating. You don’t want the leash or the eyeglasses themselves to break.
Cable wires are fast and easy. They are not as involved as using needle and thread. However, with the cable wires, the finished projects tend to be stiff. They don’t lay well. They don’t move well at all. If you make a bracelet with needle and thread, the bracelet, when worn, conforms to your wrist. If you move your wrist to the right, your bracelet also moves in the same direction to the right. If you made that same bracelet on cable wire, the wire takes the shape of a circle. Your wrist is actually oval. If you moved your wrist to the right, the bracelet done on cable wire would actually move in the opposite direction — to the left.
Lots of deep physics here. But the results are obvious, and often embarrassing. This most often happens with necklaces that turn around when worn, bringing the clasp front and off-centered, sometimes making the wearer look somewhat clownish.
Most brands of cable wire I find too stiff. They have major problems of draping and moving with the body. They lay on the body funny. Two brands I find particularly good, and these are the only brands I use, are Soft Flex and Flexrite.
Hard Wire
People use hard wire to make things like ear wires and clasps, earring dangles, chains, rosaries, coils and components, and wire-wrapped settings for stones.
But hard wire is not a stringing wire. You can’t simply put beads on it and attach the ends. The hard wire would bend and distort, but not return to its original shape, like a cable wire would.
There are many kinds of hard wire.
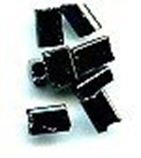
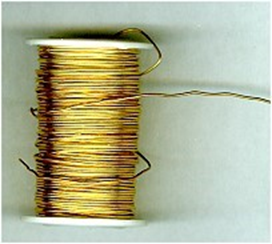
At the low end is called Craft Wire. Craft Wire is plated wire over steel or a brass alloy of steel. Craft Wire is bad for finished jewelry projects. It’s OK for practice. It’s OK for stationary objects like a beaded ornament. All jewelry moves. The plating doesn’t bond at all to steel. So when you bend the steel back and forth, the plating tends to wear off quickly. Also when you bend steel back and forth, it doesn’t take long before it breaks.
Craft wire, no matter the brand, tends to be packaged like the white spool pictured below.
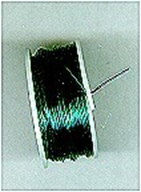
Above Craft Wire is Plated Copper Wire. If you need to work with a plated wire, then Plated Copper Wire is a great product. There are many brands. The packaging varies but it never looks like that of the craft wire above. The plating and enameling bonds well to copper, so it takes a very long time to wear off. Also, when you bend copper back and forth, it takes a very long time to break. It comes in lots of colors and lots of metallics.
Higher in quality than plated wire is called “Raw” wire. In our store, we sell raw brass, raw copper, raw nickel. We sell sterling silver wire, fine silver wire, gold-filled wire and a new metal called argentium silver. Argentium is tarnish-resistant sterling silver.
The sizes of wire are measured by “gauge”. What Gauge means is that somewhere on earth there is a standard sized pipe. Gauge refers to how many wires will fit into the pipe. So, if you can fit 20 wires into the pipe, the wire is 20 gauge. If you can only fit 6 wires into the pipe, that wire is 6 gauge.

When buying wire, another choice to make is how HARD or stiff the wire should be at the start of your project. Wire is usually sold as
“Hard”,
“Half-Hard”, or
“Dead-Soft.
With “Hard” hard wire, you can’t bend the wire. This is useful when making a hat pin or stick pin. You cut the length of wire you want. You take a metal file and file one end into a point. The wire is stiff, so it will easily puncture a hat or a fabric, without bending. However, if you wanted to make a loop on one end of the hard wire, say to make an earring dangle, you could not; it won’t bend.
With “Half-Hard” and “Dead-Soft” wire, you can manipulate the wire. You can twist it, bend it, curve it, wrap it, hammer it. Each time you manipulate the wire, you harden it. If you keep manipulating and manipulating the wire, it eventually hardens to the point where it is “Hard”, that is, unbendable. If you kept going still, the wire would become brittle and break.
Your goal as a wire artist is to find that level of hardness/softness where, after you manipulate the wire the way you want, you’ll end up with wire that keeps its shape, stays in place, or if it is holding a stone in, that the stone won’t pop out.
If I want to make an earring dangle by putting some beads on a wire, and bending one end into a loop so that I can hang it, if I started with “Half-Hard” wire, I would grab the end of my wire with a round nose pliers, twist my wrist to form the loop-shape, and let go of the wire with the pliers. I can trust that the loop-shape will keep its shape.
If I had started with “Dead-Soft” wire, however, and repeated this same procedure, the loop would open up and lose its shape. The wire is too soft. To start at “Dead-Soft”, I probably would have to grab the wire at both ends with vises or pliers, twist the wire until it started to harden, make a loop with a round nose pliers, and perhaps hammer on this loop a bit — all before I could trust that the loop-shape will keep its shape.
Most wire artists and how to books tell you to start at dead soft. Many of my students and customers who follow these directions have their bracelets pull apart, their shapes distort, their stones pop out of their settings. This is because they have not manipulated the dead soft wire enough to get it stiff enough. I suggest, either starting with half hard wire, or to twist the dead soft wire somewhat to stiffen it before you begin to shape it.
Plated Craft and Copper-Core wire typically comes as “dead soft”. It is up to the manufacturer to determine what that means. So, you will find that one company’s dead soft might be stiffer or softer than another’s. Typically, if I start at dead soft, I twist the wire or hammer it to harden it a little bit, before I start my projects.
Some Other Popular Stringing Products
Elastic String: People hate clasps. So they love this material. You put the beads on, tie a surgeon’s or square knot, put a drop of glue on the inside, then the outside of the knot, cut the tails, and that’s it. Comes in different colors, different thicknesses, different textures. Does deteriorate a little over time, and it does lose its memory. There are many brands. Some labels say they don’t deteriorate or lose their memory, but from experience, they all do.

The elastic string which is round lasts a long time. The elastic string which is flat like floss shreds rather quickly.
When using elastic string, you first take some super glue and coat the beginning 3/4″ to 1” of the string. Let it dry. Take a single edge razor blade and cut the end at an angle, so you have a point, and the end becomes a self needle. Put your beads on. Then tie a surgeon’s knot or square knot. As you tie your knot, put a drop of glue on the inside of the knot, pull tight, and put another drop of glue on the outside of the knot. Any glue EXCEPT super glue.
We suggest E6000 or Beacon 527, but, with this product, you can use school glue, rubber cement or elmers glue. Super glue dries like glass, so the bond becomes like a piece of glass. When you pull the string, the bond shatters like glass. Moreover, the broken bond looks like a piece of broken glass. The other glues dry more like rubber, so when you pull on the string, the bond acts like a shock absorber.
Elastic string can deteriorate in about 1–2 years, depending on its exposure to the air and sunlight.
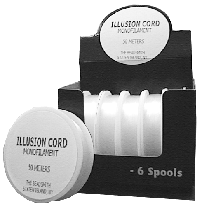
Illusion Cord (monofilament): Basically a thin fishing line. Used to make illusion necklaces. Small crimp beads are used to hold clusters of beads in place. Not particularly durable. Any monofilament will dry out and crack from exposure to ultraviolet light and heat.
Hemp: Used with various macramé, micro-macrame, knotting and braiding techniques.
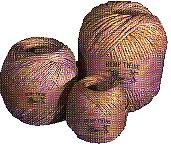
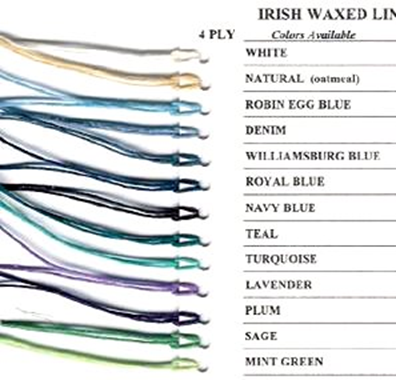
Irish Waxed Linen: Similar to hemp, but a higher quality. Used for more fashion-oriented jewelry that incorporates macramé, knotting and braiding techniques. In jewelry, the waxiness of this product draws dust and dirt to it. You might want to use, instead, an unwaxed bead cord for jewelry.
Leather: Always popular. Greek leather is the highest quality. Don’t shower in this. It makes the leather dry out and crack.

Waxed Cotton: A more durable leather substitute. It doesn’t have that great earthy smell of leather, however. Simply a waxed or glazed cotton wrapped around a nylon monofilament. You can shower in this.

Pearl Cotton #8: Used in making bead-knitted bags. 11/0 seed beads will slip over the Pearl Cotton #8.

Rubber Thong: Another leather substitute and more durable. Very soft to the skin.

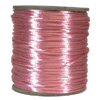
Satin Cord (Rat Tail): A shiny, colorful cord that’s used to hang pendants from. Pretty. Frays relatively quickly. Not durable at all.
Organza Ribbon: The type of ribbon that you would string beads on. Use a Big-Eye needle to get your beads onto the ribbon.

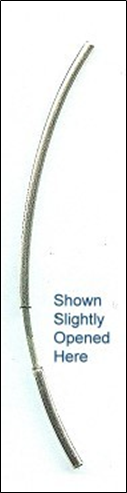
Memory Wire: A stainless steel coil, like a slinky. Cut off some rings, put beads on, then, bend the ends. Caution: Memory wire will ruin all your jewelry tools. If you are using Memory Wire, then use industrial strength tools — things you would find in a wood-working shop.

Other Articles of Interest by Warren Feld:
The Jewelry Designer’s Orientation To Jewelry Findings: Preparers
The Jewelry Designer’s Orientation To Jewelry Findings: Controllers and Adapters
Cleaning Sterling Silver Jewelry: What Works!
What Glue Should I Use When Making Jewelry?
Why Am I So Addicted To Beads?
A Very Abbreviated, But Not Totally Fractured, History of Beads
The Martha Stewart Beaded Wreath Project
When Choosing Colors Has You Down, Check Out The Magic Of Simultaneity Effects
The Use of Armature In Jewelry: Legitimate or Not?
Organizing Your Craft Workspace…Some Smart Pointers
You Don’t Choose Clasps, You Choose Clasp Assemblies
Know Your Anatomy Of A Necklace
Mini Lesson: Making Stretchy Bracelets
Mini Lesson: Making Adjustable Slip Knots With Thicker Cords
Mini Lesson: Attaching End Caps, Cones, Crimp Ends
Mini Lesson: Flat Even Count Peyote
Mini Lesson: Right Angle Weave
Everyone Has A Getting Started StoryThe Nature-Inspired Creations of Kathleen
The Jewelry Designer’s Orientation To Glass Beads
The Jewelry Designer’s Orientation To Lampwork Beads
The Jewelry Designer’s Orientation To Crystal Beads
The Jewelry Designer’s Orientation To Seed and Cylinder Beads
The Jewelry Designer’s Orientation To Choosing and Using Clasps
How To Design An Ugly Necklace: The Ultimate Designer Challenge
Thank you. I hope you found this article useful.
Also, check out my website (www.warrenfeldjewelry.com).
Subscribe to my Learn To Bead blog (https://blog.landofodds.com).
Visit Land of Odds online (https://www.landofodds.com)for all your jewelry making supplies.
Enroll in my jewelry design and business of craft video tutorials online. Begin with my ORIENTATION TO BEADS & JEWELRY FINDINGS COURSE.
Add your name to my email list.