


Take advantage of my online video tutorials, including BASICS OF BEAD STRINGING AND ATTACHING CLASPS.
ONLINE VIDEO TUTORIAL COURSES
and their PREVIEWS:
Orientation To Beads & Jewelry Findings
So You Want To Do Craft Shows…
Pricing and Selling Your Jewelry
Naming Your Business
The Jewelry Designer’s Approach To Color
Basics of Bead Stringing and Attaching Clasps
Pearl Knotting… Warren’s Way
TOOLS AND MATERIALS FOR SILK WRAP
Materials needed:
2 one-foot lengths of thicker cord, like 1–2mm leather or waxed cotton
3 ft of bead cord, about .5–1.0mm thick
Tools needed:
Clip board or bulldog clip
Bic lighter or thread zapper
Glue like G-S Hypo Fabric Cement or Beacon 527 or E6000
Chain nose pliers
SILK WRAP
Sometimes, the ends of your pieces are messy. There may be a lot of knots there. Or glue. Or something else you would like to hide.
You might use one of the jewelry findings called ends to hide and cover this messiness up.
Or you might do what is called a silk wrap, and use a cord to coil over the mess, and make the ends look pretty.
Silk wraps result in a very finished, professional look.

The silk wrap will also provide some extra support there, if you think the ends of your pieces might be weak points of vulnerability, or, you want to make the clasp assembly easier to open and close.

I want to review how to make a 10-coil silk wrap.
NOTE: 10-coil is a good goal, but it can be more or less, depending on how it looks visually, and the actual volume of the space needed to be wrapped.
I am going to make a silk wrap for a 2-strand necklace strung on leather cord.
Where the two cords come together at each end, I have attached my clasp, and, in addition, I have bound the two leather cords together with some thread tied into a bunch of knots. I have put a drop of glue there.
I am going to use some size #18 bead cord, which is a .5mm thick, choosing a bead cord in a complimentary color to the leather, and make a silk wrap to hide the threads, knots and glue.

I start with a 10” — 12” piece of size #18 bead cord.
Step 1:
Make a loop towards one end, leaving a short tail off this loop (about 1 ½”).
This gives you a loop, a short tail and a long tail.
Step 2:
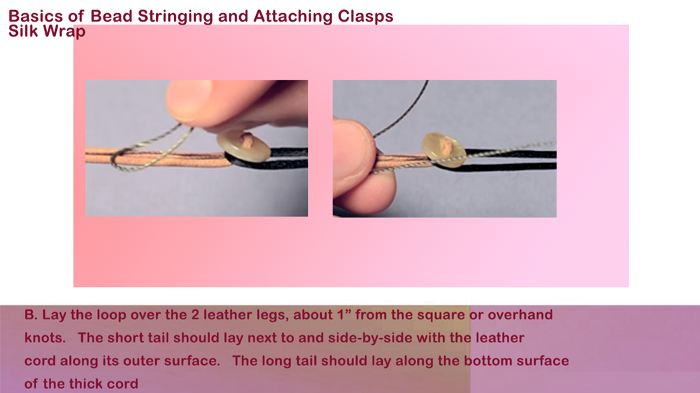
Lay the loop over the 2 leather legs, about 1” from the end of the leather cords where the clasp is attached.
The short tail is the shorter tail off the loop. The short tail should extend past the position where the clasp is connected to the two leather cords.
We are going to call the rest of the 10” silk wrap cord the long tail.
So, the short tail should lay next to and side-by-side with the leather stringing cord along its outer or top surface.
The long tail will run along the bottom surface of our stringing cord.
The end of the long tail is closest to the end of the stringing cord
and the clasp.

Step 3:
We are going to use the long tail to make 10 coils around our 2 leather stringing cords, starting from the clasp end, and working towards the loop we have created with our silk wrap cord.
Your long tail should be below the two leather cords. We are going to coil clockwise.
NOTE: If it is more comfortable, you can coil counter-clockwise.
We want to end up with the coils tightly bumped up against each other, with no gaps between them.
Again, our first coil is closest to our clasp. And we are moving away from the clasp towards the loop end.
So, to begin, let’s make that first coil. Take the long tail, go up, over and around the short tail.
Continue going behind both leather stringing cords, and back down below the leather stringing cords.
Making this first coil wrap is the most difficult. At about the 3rd coil, you can gain a lot of management control, tightening the first three coils, and then continuing to add additional coils.
As you continue making coils, keep the tension tight on your long tail as you do the coiling, so that the coils do not loosen up and unravel.
Step 4:
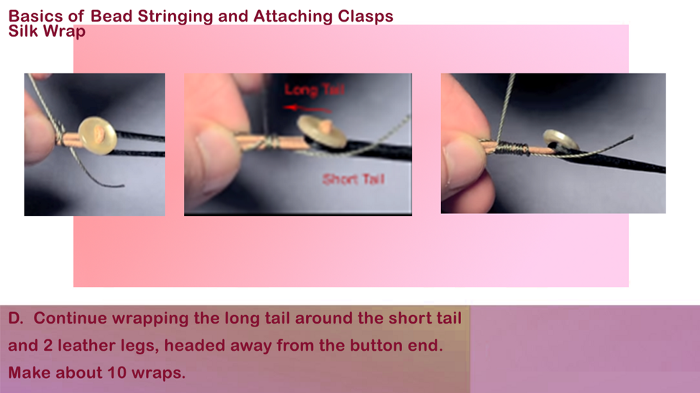
Make the rest of the coils.
Continue wrapping the long tail around the short tail and the 2 leather stringing cords,
headed away from the clasp end.
Make about 10 coil wraps.
Again, be sure the coils are tight.
Compress them (which means close the gaps between any two coils) together with your fingers or use a chain nose pliers to slide along the leather stringing cords and bump up against the coils.

Step 5:
Clamp everything tight between your fingers.
Bring the long tail through the loop, going from front to back, or top to bottom, depending on how you are holding your piece.

Step 6:
We are going to create a knot.
Hold onto the long tail, and pull on the short tail. It might be easier for you to pull the long tail away from you and the short tail towards you.
Keep pulling on the short tail. You want to pull the loop inside the coil wraps,
but not yet all the way.
Bring the loop just under that first coil.
Step 7:
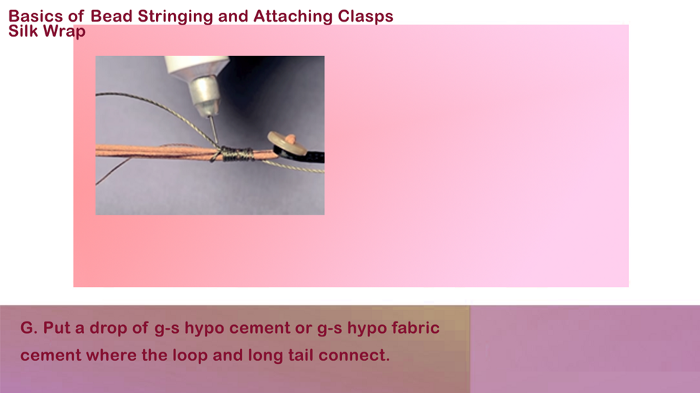
Put a drop of glue, preferably G-S Hypo Fabric Cement, where the loop and long tail connect right at that first coil wrap.

Step 8:
Using your fingers or a chain nose pliers, pull on the short tail and pull the loop all the way into the coil wraps,
To finish off our knot.
Step 9:
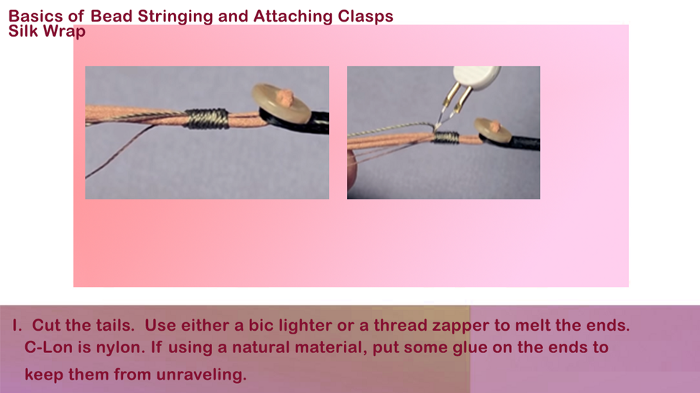
Cut the tails.
In this demonstration, I’ve used a nylon cord. I can hold the ends of the trimmed tails near a flame, like from a bic lighter or thread zapper, and melt the ends.
With other materials, I would use a drop of glue on each trimmed tail end. Preferably G-S- Hypo Fabric Cement.

_______________________________
Thank you. I hope you found this article useful.
Also, check out my website (www.warrenfeldjewelry.com).
Enroll in my jewelry design and business of craft Video Tutorials online. Begin with my ORIENTATION TO BEADS & JEWELRY FINDINGS COURSE.
Follow my articles on Medium.com.
Subscribe to my Learn To Bead blog (https://blog.landofodds.com).
Visit Land of Odds online (https://www.landofodds.com)for all your jewelry making supplies.
Check out my Jewelry Making and Beadwork Kits.
Add your name to my email list.
_________________________________
Other Articles of Interest by Warren Feld:
What You Need To Know When Preparing A Portfolio
Smart Advice When Preparing Your Artist Statement
Design Debt: How Much Do You Have?
An Advertising Primer For Jewelry Designers
Selling Your Jewelry In Galleries: Some Strategic Pointers
Building Your Brand: What Every Jewelry Designer Needs To Know
Social Media Marketing For The Jewelry Designer
Often Unexpected, Always Exciting: Your First Jewelry Sale
Coming Out As A Jewelry Artist
Is Your Jewelry Fashion, Style, Taste, Art or Design?
Saying Goodbye To Your Jewelry: A Rite Of Passage
So You Want To Do Craft Shows: Lesson 7: Setting Up For Success
The Jewelry Designer’s Orientation To Metals, Metal Beads, Oxidizing
The Jewelry Designer’s Approach To Color
The Jewelry Designer’s Orientation To Stringing Materials
Shared Understandings: The Conversation Embedded Within Design
How Does Being Passionate Make You A Better Designer?
Doubt / Self-Doubt: 8 Major Pitfalls For Jewelry Designers
Essential Questions For Jewelry Designers: 1 — Is What I Do Craft, Art or Design?
The Jewelry Designer’s Orientation To Choosing And Using Clasps
Contemporary Jewelry Is Not A ‘Look’ — It’s A Way Of Thinking
Point, Line, Plane, Shape, Form and Theme
5 Tell-Tale Signs Your Pearls Need Re-Stringing
MiniLesson: Making Stretchy Bracelets
Architectural Basics Of Jewelry Design
Cleaning Sterling Silver Jewelry: What Works
What Glue Should I Use When Making Jewelry?
__________________________________
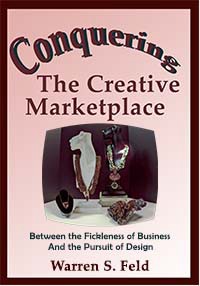
CONQUERING THE CREATIVE MARKETPLACE: Between the Fickleness of Business and the Pursuit of Design
How dreams are made
between the fickleness of business
and the pursuit of jewelry design
This guidebook is a must-have for anyone serious about making money selling jewelry. I focus on straightforward, workable strategies for integrating business practices with the creative design process. These strategies make balancing your creative self with your productive self easier and more fluid.
Based both on the creation and development of my own jewelry design business, as well as teaching countless students over the past 35+ years about business and craft, I address what should be some of your key concerns and uncertainties. I help you plan your road map.
Whether you are a hobbyist or a self-supporting business, success as a jewelry designer involves many things to think about, know and do. I share with you the kinds of things it takes to start your own jewelry business, run it, anticipate risks and rewards, and lead it to a level of success you feel is right for you, including
· Getting Started: Naming business, identifying resources, protecting intellectual property
· Financial Management: basic accounting, break even analysis, understanding risk-reward-return on investment, inventory management
· Product Development: identifying target market, specifying product attributes, developing jewelry line, production, distribution, pricing, launching
· Marketing, Promoting, Branding: competitor analysis, developing message, establishing emotional connections to your products, social media marketing
· Selling: linking product to buyer among many venues, such as store, department store, online, trunk show, home show, trade show, sales reps and showrooms, catalogs, TV shopping, galleries, advertising, cold calling, making the pitch
· Resiliency: building business, professional and psychological resiliency
· Professional Responsibilities: preparing artist statement, portfolio, look book, resume, biographical sketch, profile, FAQ, self-care
548pp.
SO YOU WANT TO BE A JEWELRY DESIGNER
Merging Your Voice With Form

So You Want To Be A Jewelry Designer reinterprets how to apply techniques and modify art theories from the Jewelry Designer’s perspective. To go beyond craft, the jewelry designer needs to become literate in this discipline called Jewelry Design. Literacy means understanding how to answer the question: Why do some pieces of jewelry draw your attention, and others do not? How to develop the authentic, creative self, someone who is fluent, flexible and original. How to gain the necessary design skills and be able to apply them, whether the situation is familiar or not.
588pp, many images and diagrams Ebook , Kindle or Print formats
The Jewelry Journey Podcast
“Building Jewelry That Works: Why Jewelry Design Is Like Architecture”
Podcast, Part 1
Podcast, Part 2
PEARL KNOTTING…Warren’s Way
Easy. Simple. No tools. Anyone Can Do!
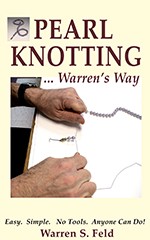
I developed a nontraditional technique which does not use tools because I found tools get in the way of tying good and well-positioned knots. I decided to bring two cords through the bead to minimize any negative effects resulting from the pearl rotating around the cord. I only have you glue one knot in the piece. I use a simple overhand knot which is easily centered. I developed a rule for choosing the thickness of your bead cord. I lay out different steps for starting and ending a piece, based on how you want to attach the piece to your clasp assembly.
184pp, many images and diagrams Ebook, Kindle or Print
SO YOU WANT TO DO CRAFT SHOWS:16 Lessons I Learned Doing Craft Shows
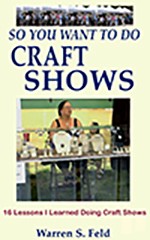
In this book, I discuss 16 lessons I learned, Including How To (1) Find, Evaluate and Select Craft Shows Right for You, (2) Determine a Set of Realistic Goals, (3) Compute a Simple Break-Even Analysis, (4) Develop Your Applications and Apply in the Smartest Ways, (5) Understand How Much Inventory to Bring, (6) Set Up and Present Both Yourself and Your Wares, (7) Best Promote and Operate Your Craft Show Business before, during and after the show.
198pp, many images and diagrams, Ebook, Kindle or Print
___________________________________________


