Learn To Bead

At Land of Odds / Be Dazzled Beads – Beads, Jewelry Findings, and More

Posts Tagged ‘necklaces’

BASICS OF BEAD STRINGING AND ATTACHING CLASPS: The Lariat

Posted by learntobead on February 23, 2023

LARIATS

Materials needed:
.014”/.015” or .018”/.019” cable wire
enough of a mix of seed beads and Czech glass beads (3mm — 6mm in size) to

cover 36” of cable wire
crimp beads
horseshoe wire protectors
crimp covers
end caps or bead caps or cones (2 of them)
head pins (2 of them)
2 decorative beads, perhaps teardrop shaped, about 18mm in size

Tools needed:
crimping pliers
chain nose pliers
flat nose pliers
scissors
side cutters or flush cutters
bead board
ruler
paper
pencil

work surface

A lariat is a long, usually beaded, string, which a person wraps around their neck,
and lets the tails hang.

The tails can be tied in a loose overhand knot together.

Or one tail may have a large loop or ring or donut, through which the other tail slips into.

Or the lariat can be wrapped around the neck once or twice, and the tails allowed to dangle.

With some designs, the part of the lariat which becomes the focal point, can be varied.

Lariats may be all beaded, partially beaded, or not beaded at all.

In fact, this versatility is the popularity of the lariat. You can create many different silhouettes. And you do not have to bother with a clasp.

And you can make a multi-strand lariat, if you want. The design choices are endless.

DESIGN ISSUES

The design issues associated with the lariat include:

1. Stringing material

2. Length

3. Whether to use a fixed connection point

4. Silhouette flexibility

5. Finishing off the ends

6. Maintaining the tension on your beads, while allowing sufficient ease

STRINGING MATERIAL

Many different types of stringing materials will work well with lariats.

You can use:

· Needle and thread.

· Cable wire

· Bead cord

· Leather or waxed cotton

· Leather lace

· Chain

· Even fabric or ribbon
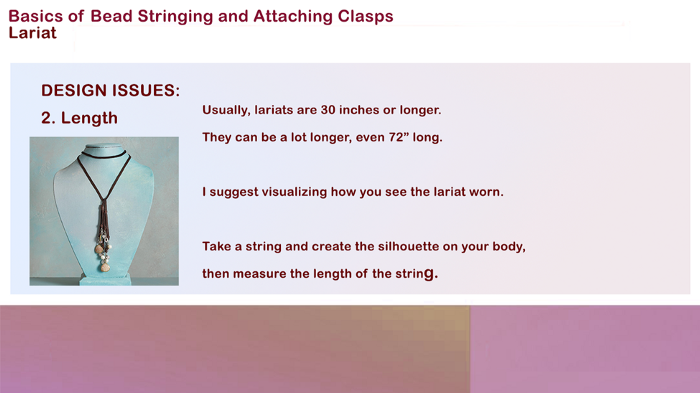
LENGTH

Usually, lariats are 30 inches or longer.

They can be a lot longer, even 72” long.

I suggest visualizing how you see the lariat worn. Take a string and create the silhouette on your body, then measure the length OF THE STRING.

WHETHER THERE IS A FIXED POINT OF CONNECTION, SUCH AS A LOOP OR RING OR DONUT ON ONE SIDE

This is a personal design choice.

Many lariats do not have fixed points of connection.

One option is to fold the lariat in half, and use the bend as the point of connection, and slip the two legs through the bend.

Another option is to tie a loose overhand knot with the two legs.

Still another option is to wrap it around the neck, and, let the legs dangle.

If you have a point of connection on one side, then you need to be sure that the other tail will be able to slip through the opening.

SILHOUETTE FLEXIBILITY

As a designer, you need to anticipate the various ways your design may be worn.

Then ask yourself:

· Will my design be long enough to accommodate the various ways i visualize it getting worn?

· Is the arrangement of beads, given the various silhouettes, optimal?

· Given the various silhouettes, will the lariat drape well and move in place with the person as the person moves?

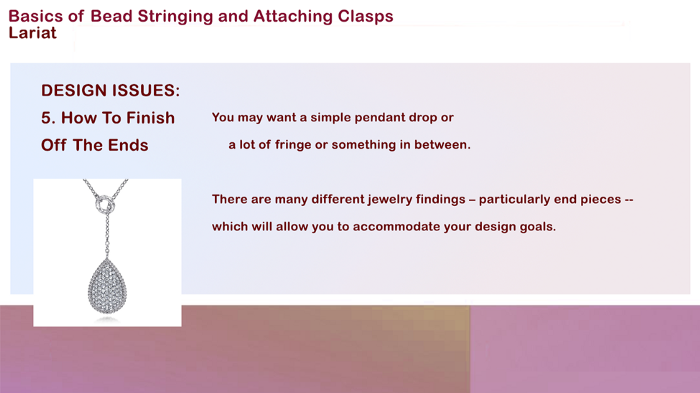
HOW TO FINISH OFF THE ENDS

You may want a simple pendant drop or a lot of fringe or something in between.

There are many different jewelry findings — particularly end pieces — which will allow you to accommodate your design goals.

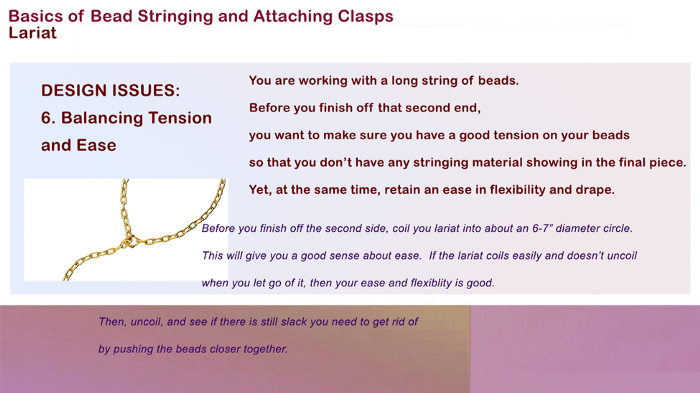
MAINTAINING THE TENSION ON YOUR BEADS, WHILE ALLOWING SUFFICIENT EASE

You are working with a long string of beads.

Before you finish off that second end, you want to make sure you have a good tension on your beads so that you don’t have any stringing material showing in the final piece. Yet, at the same time, retain an ease in flexibility and drape.

Towards this end, before you finish off the second side, coil your lariat into about an 6–7” diameter circle. This will give you a good sense about ease. If the lariat coils easily and doesn’t uncoil when you let go of it, then your ease and flexibility is good.

Then, uncoil, and see if there is still slack you need to get rid of by pushing the beads closer together. If there is slack, you’ll notice a lot of the stringing material showing.

If you need to tighten the tension, do so, then coil again, so that you are finding that optimum tension and ease.

____________________________________

CONQUERING THE CREATIVE MARKETPLACE: Between the Fickleness of Business and the Pursuit of Design

How dreams are made
between the fickleness of business
and the pursuit of jewelry design

This guidebook is a must-have for anyone serious about making money selling jewelry. I focus on straightforward, workable strategies for integrating business practices with the creative design process. These strategies make balancing your creative self with your productive self easier and more fluid.

Based both on the creation and development of my own jewelry design business, as well as teaching countless students over the past 35+ years about business and craft, I address what should be some of your key concerns and uncertainties. I help you plan your road map.

Whether you are a hobbyist or a self-supporting business, success as a jewelry designer involves many things to think about, know and do. I share with you the kinds of things it takes to start your own jewelry business, run it, anticipate risks and rewards, and lead it to a level of success you feel is right for you, including

· Getting Started: Naming business, identifying resources, protecting intellectual property

· Financial Management: basic accounting, break even analysis, understanding risk-reward-return on investment, inventory management

· Product Development: identifying target market, specifying product attributes, developing jewelry line, production, distribution, pricing, launching

· Marketing, Promoting, Branding: competitor analysis, developing message, establishing emotional connections to your products, social media marketing

· Selling: linking product to buyer among many venues, such as store, department store, online, trunk show, home show, trade show, sales reps and showrooms, catalogs, TV shopping, galleries, advertising, cold calling, making the pitch

· Resiliency: building business, professional and psychological resiliency

· Professional Responsibilities: preparing artist statement, portfolio, look book, resume, biographical sketch, profile, FAQ, self-care

548pp.

KindlePrintEpub

SO YOU WANT TO BE A JEWELRY DESIGNER
Merging Your Voice With Form

So You Want To Be A Jewelry Designer reinterprets how to apply techniques and modify art theories from the Jewelry Designer’s perspective. To go beyond craft, the jewelry designer needs to become literate in this discipline called Jewelry Design. Literacy means understanding how to answer the question: Why do some pieces of jewelry draw your attention, and others do not? How to develop the authentic, creative self, someone who is fluent, flexible and original. How to gain the necessary design skills and be able to apply them, whether the situation is familiar or not.

588pp, many images and diagrams Ebook , Kindle or Print formats

The Jewelry Journey Podcast
“Building Jewelry That Works: Why Jewelry Design Is Like Architecture”
Podcast, Part 1
Podcast, Part 2

PEARL KNOTTING…Warren’s Way
Easy. Simple. No tools. Anyone Can Do!

I developed a nontraditional technique which does not use tools because I found tools get in the way of tying good and well-positioned knots. I decided to bring two cords through the bead to minimize any negative effects resulting from the pearl rotating around the cord. I only have you glue one knot in the piece. I use a simple overhand knot which is easily centered. I developed a rule for choosing the thickness of your bead cord. I lay out different steps for starting and ending a piece, based on how you want to attach the piece to your clasp assembly.

184pp, many images and diagrams EbookKindle or Print

SO YOU WANT TO DO CRAFT SHOWS:16 Lessons I Learned Doing Craft Shows

In this book, I discuss 16 lessons I learned, Including How To (1) Find, Evaluate and Select Craft Shows Right for You, (2) Determine a Set of Realistic Goals, (3) Compute a Simple Break-Even Analysis, (4) Develop Your Applications and Apply in the Smartest Ways, (5) Understand How Much Inventory to Bring, (6) Set Up and Present Both Yourself and Your Wares, (7) Best Promote and Operate Your Craft Show Business before, during and after the show.

198pp, many images and diagrams, EbookKindle or Print

___________________________________________

Posted in Art or Craft?, bead stringing, bead weaving, beads, beadwork, craft shows, design management, design thinking, jewelry design, jewelry making, Learn To Bead, pearl knotting, Stitch 'n Bitch, wire and metal | Tagged: , , | Leave a Comment »

BASICS OF BEAD STRINGING AND ATTACHING CLASPS: How To Design, Take Measurements ForAnd Finish Off Multi-Strand Pieces

Posted by learntobead on February 18, 2023

How To Design, Take Measurements For
And Finish Off Multi-Strand Pieces

Multi-strand bracelets and necklaces are always in style and always in demand.

Many designers quickly find out, however, that they are not so easy to construct, and often do not lay on the body the way the designer initially envisioned.

Part of the problem has to do with measurement.

· How long should each strand be?

· How long if the strands are sequential, that is, do not overlap? Here, you will want strands each of a different length.

· How long if the strands do overlap? Usually, if you want overlap, the strands will approximately be the same length.

Related to measurement is some confusion about what you are really measuring — the linear length against a ruler or on a bead board, or, — the circumference length using a person or mannequin or sizing cone.

Actual linear length will vary, based on the diameter sizes of the beads, whether you are dealing with any gradations in bead sizes, and how far apart on the body you want each strand to lay.

Only circumference length will serve you well here. But this means you will be planning and constructing around a curved surface or plane.

Another part of the problem is choosing the wrong clasps and jewelry findings. Different findings work well under differing situations and circumstances.

Or, related to this, part of the problem could be how the clasp assembly was constructed without sufficient support.

How long should each strand be?

Let me re-phrase this question:

How wide do you want the negative spaces to be measuring at the center of each strand?

Usually, your goal is to have a good consistency in the width of the negative spaces between each strand.

A traditional rule of thumb is that you want each subsequent strand to be 3/4″ to 1 1/2” longer than the previous one. I like to start my planning with 1” separations.

So, if the first strand is 16”, which of course, includes the 1–2” length the clasp assembly will add, then the second will be 17”, the third 18”, and so forth.

This rule of thumb is a good starting point for planning your piece. You will have to modify it based on the characteristics and sizes of the actual beads and components you will be using. Larger beads will take up more of the volume of negative space
than smaller beads.

When your beads on the strand are graduated in size, you want to measure and work off your largest bead in each strand.

To get things right, and not get too frustrated, it is easiest to work off of a mannequin or sizing cone or an especially life-size necklace easel.

Working on a flat surface just doesn’t cut it.

You will also only attach things temporarily until you get all the strand lengths and negative spaces widths the way you want them.

I always begin with the shortest length strand.

If I’m working with cable wires, I end each side with a horseshoe wire protector. This lets me secure the beads on the strand pretty well, and gives me the equivalent of a hook to temporarily hook into my clasp. And it lets me remove the horseshoe wire protector if I want to add or subtract any beads on the cable.

I do not secure the clasp to the horseshoe wire protector or do any crimping until I have all the strands on the necklace arranged the way I want them.

I next try to complete the second smallest strand, and temporarily hook it to the clasp.

I work my way down until the longest strand.

When I am satisfied with everything and how it lays, I begin to finish the connection of each strand to the clasp assembly.

I finish off the first and smallest strand, connecting the clasp permanently, and crimping things in place.

Most likely, I will need to do some adjusting with the next strand. Things don’t work out 100% perfectly in the real world.

I do any necessary adjusting, then I connect that strand to the clasp permanently, and crimp things in place.

I go to the third strand. Most likely, I will need to do some adjusting. When I’m satisfied, usually focusing on the width of the negative space, I crimp.

And so forth down the necklace until the last strand.

With some styles of clasps, I like to use a strong, intervening jump ring, connecting the horseshoe wire protector to the fixed rings on the clasp.

All my jump rings will be the same size.

So, when I am testing things out, I hook the wire protectors (without the extra intervening jump rings) into the fixed rings on the clasp.

When I am ready to make things permanent, I crimp the crimp bead under the horseshoe, then attach the horseshoe to the jump ring and the jump ring to the clasp.

Say you are using a single strand clasp for a multi-strand necklace.

One approach:

You attach a large intervening ring to the clasp, and then attach each string to this large intervening ring.

The size of the ring should allow enough support or jointedness so that the multiple strands do not put too much stress or strain on one another at this point of connection.

Again, another strategy when using a single strand clasp for a multi-strand necklace,
is to use some kind of end piece, like a cone or end cap with a hole.

In this case, you would attach each strand to a soldered ring — that is a ring with no gaps in it. The size of the ring would have to coordinate with the interior diameter of your end piece.

You never pull all the strands through the end pieces. This would put too much strain at that point where they exited the end piece, and attached to the clasp assembly.

You need this soldered ring to work as a support system and absorb and self-adjust to this strain, so your strands won’t break.

So, you attach all the strands to one side of the soldered ring. Then you take another piece of stringing material to the other side of the ring. You pull everything through the opening of the end piece, all the way back so your mess of knots doesn’t show. And you then construct the rest of your clasp assembly.

The soldering ring is your support system. Either the crushed crimps with the required loops, or the series of knots, depending on your stringing material are ugly. Your end pieces act like a lampshade hiding the mess, and making your piece visually appealing.

Still one more strategy is to use an end bar on each side of your piece, which has the number or rings on one side equal to the number of strands in your multi-strand piece,
and a single hole on the other side.

You do the rest of your clasp assembly off the one ring on each end bar.

Be sure to use an intervening ring off each single end bar ring, before connecting the clasp.

Let’s say you have a 5-strand necklace, but only a 3-strand clasp.

It is ok to attach more than one strand to a single ring on the clasp. Just be sure this is sufficient support or jointedness.

If not, use a larger intervening ring, like a jump or split ring.

_______________________________

Thank you. I hope you found this article useful.

Also, check out my website (www.warrenfeldjewelry.com).

Enroll in my jewelry design and business of craft Video Tutorials online. Begin with my ORIENTATION TO BEADS & JEWELRY FINDINGS COURSE.

Follow my articles on Medium.com.

Subscribe to my Learn To Bead blog (https://blog.landofodds.com).

Visit Land of Odds online (https://www.landofodds.com)for all your jewelry making supplies.

Check out my Jewelry Making and Beadwork Kits.

Add your name to my email list.

_________________________________

Other Articles of Interest by Warren Feld:

What You Need To Know When Preparing A Portfolio

Smart Advice When Preparing Your Artist Statement

Design Debt: How Much Do You Have?

An Advertising Primer For Jewelry Designers

Selling Your Jewelry In Galleries: Some Strategic Pointers

Building Your Brand: What Every Jewelry Designer Needs To Know

Social Media Marketing For The Jewelry Designer

Often Unexpected, Always Exciting: Your First Jewelry Sale

Coming Out As A Jewelry Artist

Is Your Jewelry Fashion, Style, Taste, Art or Design?

Saying Goodbye To Your Jewelry: A Rite Of Passage

So You Want To Do Craft Shows: Lesson 7: Setting Up For Success

The Jewelry Designer’s Orientation To Metals, Metal Beads, Oxidizing

The Jewelry Designer’s Approach To Color

The Jewelry Designer’s Orientation To Stringing Materials

Shared Understandings: The Conversation Embedded Within Design

How Does Being Passionate Make You A Better Designer?

Doubt / Self-Doubt: 8 Major Pitfalls For Jewelry Designers

Essential Questions For Jewelry Designers: 1 — Is What I Do Craft, Art or Design?

The Bridesmaids’ Bracelets

The Jewelry Designer’s Orientation To Choosing And Using Clasps

Beads and Race

Contemporary Jewelry Is Not A ‘Look’ — It’s A Way Of Thinking

Point, Line, Plane, Shape, Form and Theme

Jewelry, Sex and Sexuality

5 Tell-Tale Signs Your Pearls Need Re-Stringing

MiniLesson: How To Crimp

MiniLesson: Making Stretchy Bracelets

Architectural Basics Of Jewelry Design

Cleaning Sterling Silver Jewelry: What Works

What Glue Should I Use When Making Jewelry?

__________________________________

CONQUERING THE CREATIVE MARKETPLACE: Between the Fickleness of Business and the Pursuit of Design

How dreams are made
between the fickleness of business
and the pursuit of jewelry design

This guidebook is a must-have for anyone serious about making money selling jewelry. I focus on straightforward, workable strategies for integrating business practices with the creative design process. These strategies make balancing your creative self with your productive self easier and more fluid.

Based both on the creation and development of my own jewelry design business, as well as teaching countless students over the past 35+ years about business and craft, I address what should be some of your key concerns and uncertainties. I help you plan your road map.

Whether you are a hobbyist or a self-supporting business, success as a jewelry designer involves many things to think about, know and do. I share with you the kinds of things it takes to start your own jewelry business, run it, anticipate risks and rewards, and lead it to a level of success you feel is right for you, including

· Getting Started: Naming business, identifying resources, protecting intellectual property

· Financial Management: basic accounting, break even analysis, understanding risk-reward-return on investment, inventory management

· Product Development: identifying target market, specifying product attributes, developing jewelry line, production, distribution, pricing, launching

· Marketing, Promoting, Branding: competitor analysis, developing message, establishing emotional connections to your products, social media marketing

· Selling: linking product to buyer among many venues, such as store, department store, online, trunk show, home show, trade show, sales reps and showrooms, catalogs, TV shopping, galleries, advertising, cold calling, making the pitch

· Resiliency: building business, professional and psychological resiliency

· Professional Responsibilities: preparing artist statement, portfolio, look book, resume, biographical sketch, profile, FAQ, self-care

548pp.

KindlePrintEpub

SO YOU WANT TO BE A JEWELRY DESIGNER
Merging Your Voice With Form

So You Want To Be A Jewelry Designer reinterprets how to apply techniques and modify art theories from the Jewelry Designer’s perspective. To go beyond craft, the jewelry designer needs to become literate in this discipline called Jewelry Design. Literacy means understanding how to answer the question: Why do some pieces of jewelry draw your attention, and others do not? How to develop the authentic, creative self, someone who is fluent, flexible and original. How to gain the necessary design skills and be able to apply them, whether the situation is familiar or not.

588pp, many images and diagrams Ebook , Kindle or Print formats

The Jewelry Journey Podcast
“Building Jewelry That Works: Why Jewelry Design Is Like Architecture”
Podcast, Part 1
Podcast, Part 2

PEARL KNOTTING…Warren’s Way
Easy. Simple. No tools. Anyone Can Do!

I developed a nontraditional technique which does not use tools because I found tools get in the way of tying good and well-positioned knots. I decided to bring two cords through the bead to minimize any negative effects resulting from the pearl rotating around the cord. I only have you glue one knot in the piece. I use a simple overhand knot which is easily centered. I developed a rule for choosing the thickness of your bead cord. I lay out different steps for starting and ending a piece, based on how you want to attach the piece to your clasp assembly.

184pp, many images and diagrams EbookKindle or Print

SO YOU WANT TO DO CRAFT SHOWS:16 Lessons I Learned Doing Craft Shows

In this book, I discuss 16 lessons I learned, Including How To (1) Find, Evaluate and Select Craft Shows Right for You, (2) Determine a Set of Realistic Goals, (3) Compute a Simple Break-Even Analysis, (4) Develop Your Applications and Apply in the Smartest Ways, (5) Understand How Much Inventory to Bring, (6) Set Up and Present Both Yourself and Your Wares, (7) Best Promote and Operate Your Craft Show Business before, during and after the show.

198pp, many images and diagrams, EbookKindle or Print

___________________________________________

Posted in Art or Craft?, art theory, bead weaving, beads, beadwork, color, craft shows, creativity, design management, design theory, design thinking, jewelry design, jewelry making, Learn To Bead, pearl knotting, Stitch 'n Bitch, wire and metal | Tagged: | Leave a Comment »

Worldwide Tour of Jewelry Exhibits

Posted by learntobead on March 31, 2009

Jewelry Exhibits Around The World:
Let’s Web Surf

I don’t have the money nor the time to go visit every museum with ongoing or special exhibits on jewelry.   So thank God for the internet.   I can get my cultural fix.

WIRE KNOTTING WITH LOREN DAMEWOOD
New York City 92nd st Y
surf1

http://www.golden-knots.com/

Loren describes himself as “I’m a middle aged guy with a red face and not much hair, at least for now. I was born in the early fifties, observed the hippie generation mostly from the sidelines, and managed to survive the Viet Nam war by dint of becoming a technician instead of a killing machine. The former might not pay as well, but it’s a more marketable skill. That’s what I’ve been doing ever since, anyway, up until the end of 2006, when I retired from the aerospace industry.”

Many of his pieces are based on what he calls the Turk Head Knot.   See the ring above.

surf2

GIA MUSEUM
Carlsbad, California
http://www.gia.edu/research-resources/museum/index.html

surf4

The GIA Museum’s current focus is building the Historical Collection, a sophisticated collection of jewelry, objets d’art and gemstones of known provenance from earlier cultures and periods.


surf3

Barbara Paganin and Patricia Lemaire

Galerie Orfeo

Luxembourg, Luxembourg

http://www.galerie-orfeo.com/ausstellung.html

surf8

Founded in April 1992 by Susy Ciacchini, the Orfèo Gallery is the meeting point of the Art of contemporary jewellery in Luxembourg.
surf9

Link to other jewelry artists which the gallery represents:

http://www.galerie-orfeo.com/kuenstler_e.html

surf51

surf6

surf7


LUCCA PREZIOSA
Contemporary Jewelry
Toscany, Italy
Group Jewelry Artist Showing

http://www.luccapreziosa.it/index.php?option=com_content&view=article&id=205&Itemid=62&lang=en

surf12

surf101

surf11

Posted in jewelry design | Tagged: , , , , , , , , , , | Leave a Comment »