


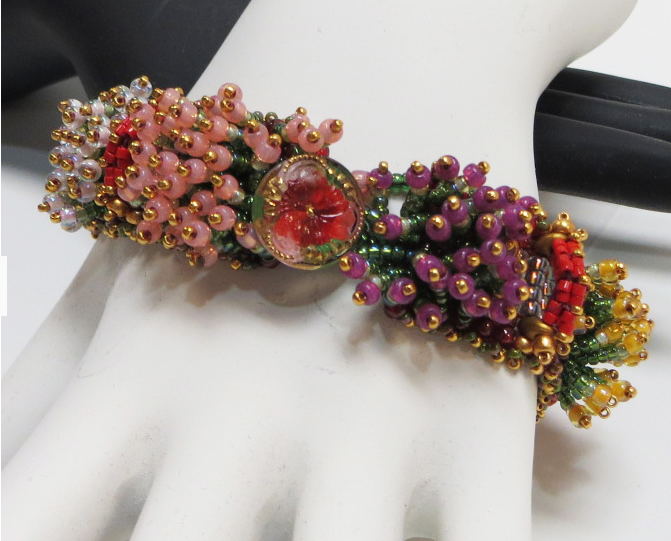
JAPANESE FRAGRANCE GARDEN BRACELET
PLANNING YOUR PROJECT
Thinking about the types of choices made for this project
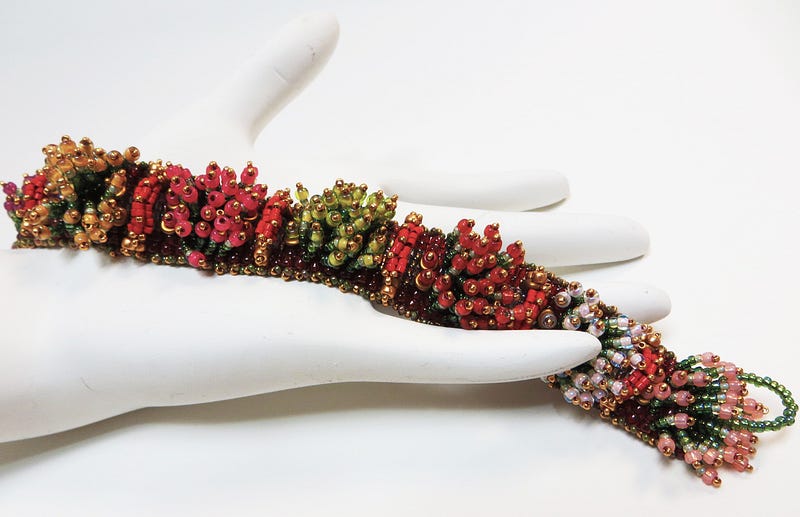
The Japanese Garden Bracelet is a fun project that students love. It is for students who have some familiarity with bead weaving. I had been experimenting with various strategies for bead weaving an “arch” shape (parabolic arch) which can keep its physical shape while the bracelet is worn. Not an easy task. It has required hours and hours of trial and error. The final choices here were influenced by the architecture of Antonio Gaudi, building a column in segments, and then forcing it into a tight arch configuration.
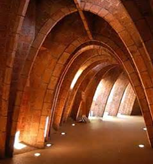
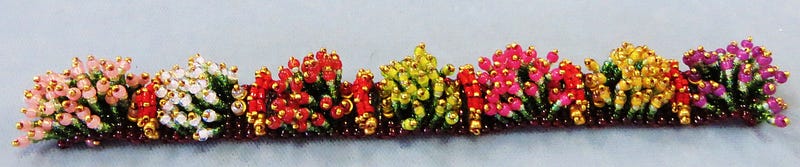
This project is also a good example of how you can use a natural setting for inspiration. This setting influences color choice, color positioning, as well as shape and its placement. This is the image that inspired this piece.
In this fragrance garden landscape, we see the red moon bridge over a glistening pond of water. Commonly used Japanese garden plants that unfurl flowers include peony, chrysanthemum and, near water features, Japanese water iris. Flowering shrubs include azalea, camellia and hydrangea, all of which provide strong winter interest.
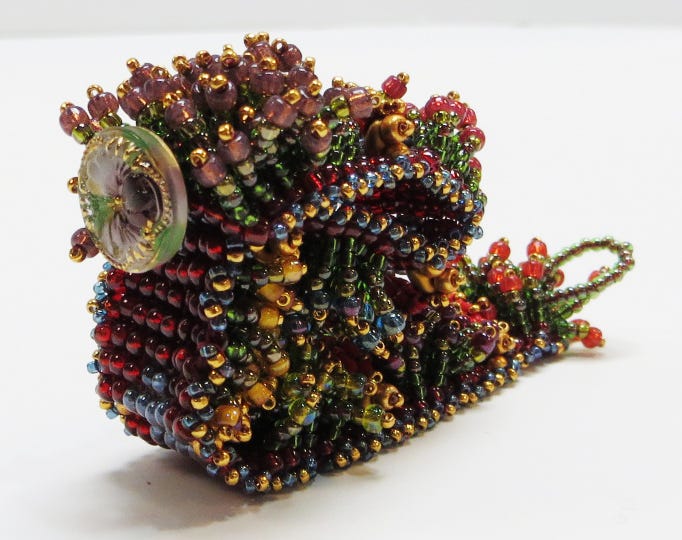
We feel that each plant, walkway, stone and other related elements have been deliberately placed, some shaped and others allowed to grow at will. Japanese gardens are designed to express their cultural values and philosophies. The gardens express the fragility of existence as well as time’s unstoppable advance. I believe the Japanese Fragrance Garden Bracelet captures all this.
It is important, I believe, for a contemporary piece of jewelry to have a sense of dimensionality, movement, and a strong use of color. In contemporary pieces, we also want some sense of the violation of straight lines and flat planes.
MANAGING SUPPORT SYSTEMS AND OTHER ARCHITECTURAL ISSUES
Whenever you create a piece of jewelry, it is important to try to anticipate how your choice of techniques and materials might positively or negatively affect how the piece moves and feels when worn, as well as your piece’s overall durability.
Towards this end, it is important to redefine your techniques and materials in architectural terms. The important term or concept we think about when we begin our piece is called a “Support System”. A support system is anything that gives your piece “jointedness”, that is, allows the piece to move easily when worn, and allows the piece to adapt to the negative forces any movement places on your piece, making your piece feel more comfortable to wear and more durable.
The bridges are basically parabolic arches.

Antonio Gaudi is a famous architecture from Barcelona, Spain. Much of his fantastical work is organized around and supported by parabolic arches.
The arch is made up of a series of stacked stones, each fitted together, then shaped. They way these segments are pieced together supports the shape, and this shape supports the weight of the structures resting on them. I tried to mimic his architectural/construction ideas with bead weaving.
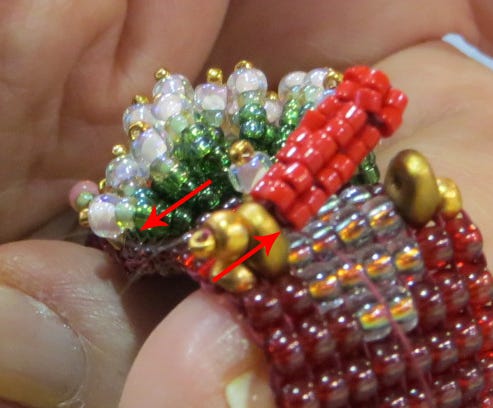
After a lot of trial and error, my “arch” (which is called a “bridge” in this project) is constructed using 2-stack ladder stitch. It is made up of 4 ladder stitched components. Within each component, all the beads need to be very tightly stitched together. Between any two components, the stitched connection needs to be looser. When the bridge is attached to the foundation of the bracelet, a 15/0 seed bead is wedged between each of the 4 ladder stitched components to force that arching shape, and keep that arching shape, no matter the stresses or strains put on the bracelet when worn.
The Ladder Stitch and the Bridge Construction
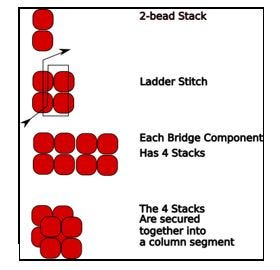
The bridge is constructed using a 2-drop ladder stitch. “2-drop” means that we pick up 2 beads at a time, and treat them as “one”.
Each 2 beads or drops is referred to as a “stack”.
The ladder stitch is used to connect stacks.
The bridge consists of 4 connected stacks.
The 4 connected stacks are, in turn, connected together into what is called a “Column Segment”.
Each bridge consists of 4 connected Column Segments.
All the beads in any one column segment should be tight enough to “move as one”.
The connection between any two column segments is looser, so they can move somewhat independently, and thus be able to bend into an arch.
STEP:Making the Bridge
Column Segment Component 1 of 4

Start with 3–4’ of thread. Wax your thread.
Pick up 4 COLOR Q (11/0 delicas).
Slide these beads down to one end, leaving 6” tail.
STEP: Create 2 Stacks
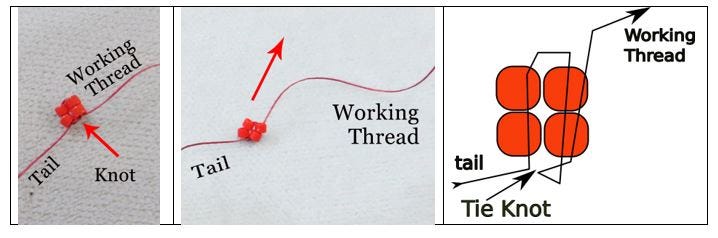
Return through the first bead added, and continue through the other three beads to make a circle.
DOUBLE CHECK that you still have your 6” tail.
With your fingers, push beads together so that you have 2 stacks of 2 beads side by side.
Take the tail and the working thread and tie an overhand knot. This will make getting started to create your column segment easier to manage.
Take your needle through 1 stack so it is exiting the opposite side from the tail.
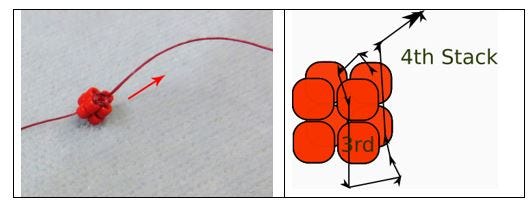
STEP: Add 3rd Stack, Column Segment One
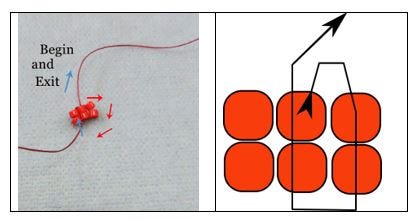
Pick up 2 more COLOR Q.
Make a “circle” by returning through the opposite side, exiting where you started.
STEP: Secure 3rd Stack
Continue your “circle” through the 2-bead-stack you just added.
STEP: Add 4th Stack, Column Segment One
Add 1 more 2-bead-Stack.
Pick up 2 beads.
“Circle” back through the previous Stack.
Return through the new stack.
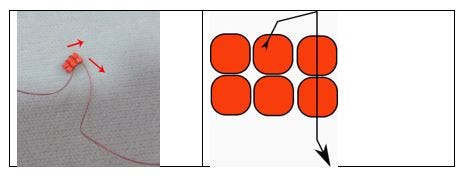
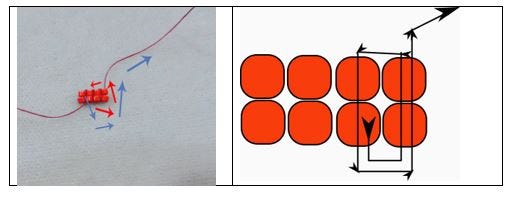
STEP: Connect 4th Stack to the 1st Stack To Finish Column Segment Component
Attach the last Stack to the first to create a column segment.
Fold the stacks so that two stacks are sitting in front of the other two stacks.
“Circle” through first 2-bead stack, back through the last 2-bead stack.
NOTE: If you are not on the opposite side of the tail, keep circling until you are.
Tighten this up.
You are now positioned to add the 2nd column segment to our bridge component.
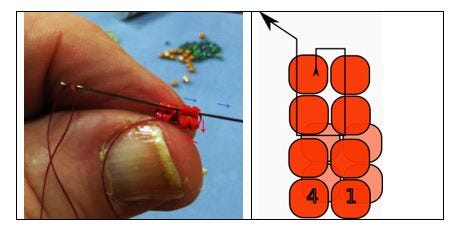
Create Column Segment 2 of 4
STEP: Create 2nd Column segment
Pick up 4Q.
Return back down the previous stack.
[Pick up 4 beads]
[Down 2 beads]
Pull tight.
You should have 2 new stacks sitting on top of 2 existing stacks.
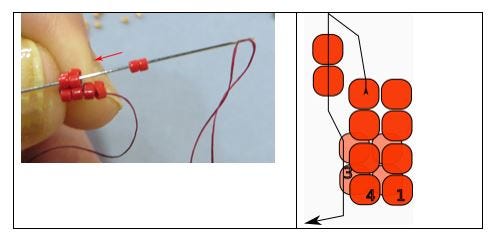
STEP: Return
Return back up the original stack, and the new 2-bead stack.
[Up 4 beads]
STEP: Circle around two new Stacks
Circle around the 2 new stacks, exiting where you started.
[Down 2 beads,
then up 2 beads]
Pull tight.
You can push the new paired stacks towards the first column segment beneath it.
STEP: Add 3rd Stack to 2nd Column Segment
Pick up 2Q.
Return back down through (un-topped) Stack in previous column segment, (in this case, 1st column segment).
[Pick up 2 beads]
[Down 2 beads]
STEP: Return
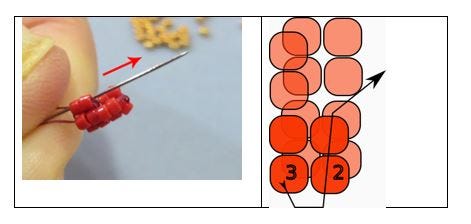
Return up through remaining “untopped” Stack in previous column segment (in this case 1st column segment).
[Up 2 beads]
STEP: Add 4th Stack to Column Segment 2
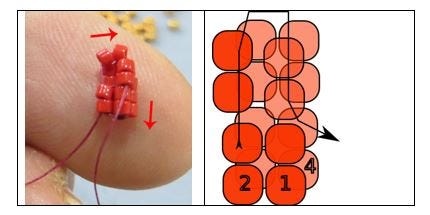
Add 4th Stack to 2nd column segment.
Pick up 2Q.
Return through previous stack in new column segment (in this case segment 2)
[Pick up 2 beads]
[Down 2 beads]
NOTE: Do NOT travel all the way down through column segment one.
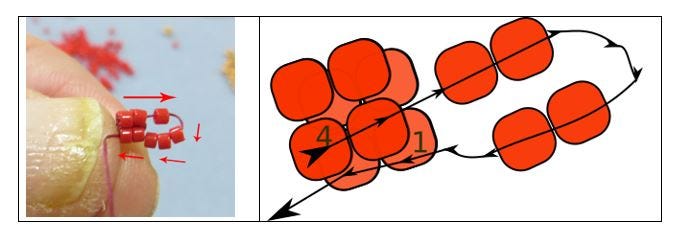
STEP: Secure Stacks
Your thread is exiting the bottom of a 2-bead stack.
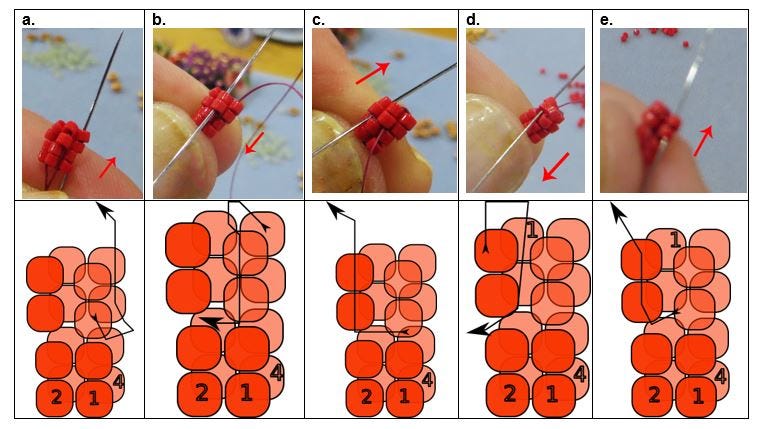
a. Return back one more stack to the previous stack. Come up this stack.
b. Come forward one stack. Go down this stack.
c. Go forward and up the next stack.
d. Continue forward, going down the next stack.
e. Return back one stack. Go up this stack.
[BACK ONE, FORWARD THREE, BACK ONE:
Return back one stack.
Up 2.
Go forward one stack.
Down 2.
Go forward one stack.
Up 2.
Go forward one more stack.
Down 2.
Return back.
Up 2
]
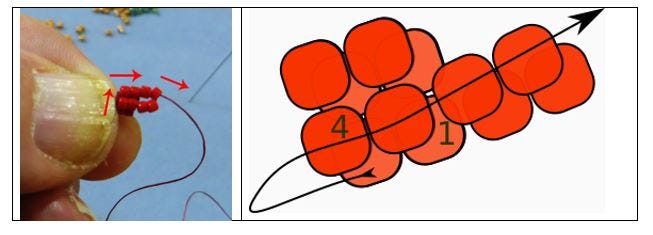
- *REALITY CHECK:
If you created the thread path correctly, all 4 stacks in new segment (in this case segment 2) should be connected.
You cannot push any stack aside like you would opening a curtain drape.
STEP 29: Add 3rd and 4th column segments
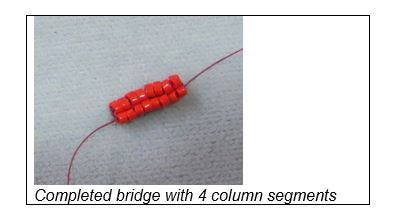
Completed bridge with 4 column segments
Repeat the pattern in STEPS 22–28.
NOTE: Remember: You are securing the new column segment to the previous column segment only.
NOTE: So, when adding 3rd column segment, you begin by picking up 4Q, returning back down 2-bead stack in column segment 2.
DO NOT go all the way back through column segment 1.
Other Articles of Interest by Warren Feld:
Mini Lesson: Making Stretchy Bracelets
Mini Lesson: Making Adjustable Slip Knots With Thicker Cords
Mini Lesson: Attaching End Caps, Cones, Crimp Ends
Mini Lesson: Flat Even Count Peyote
Mini Lesson: Right Angle Weave
I hope you found this article useful. Be sure to click the CLAP HANDS icon at the bottom of this article.
Also, check out my website (www.warrenfeldjewelry.com).
Subscribe to my Learn To Bead blog (https://blog.landofodds.com).
Visit Land of Odds online (https://www.landofodds.com)for all your jewelry making supplies.
Enroll in my jewelry design and business of craft video tutorials online.
Add your name to my email list.
This Japanese Garden Bracelet is available as a kit from Land of Odds online.
