How Do You Clarify What You Do
In Your Practice As A Jewelry Designer?
Building that relevance into your work
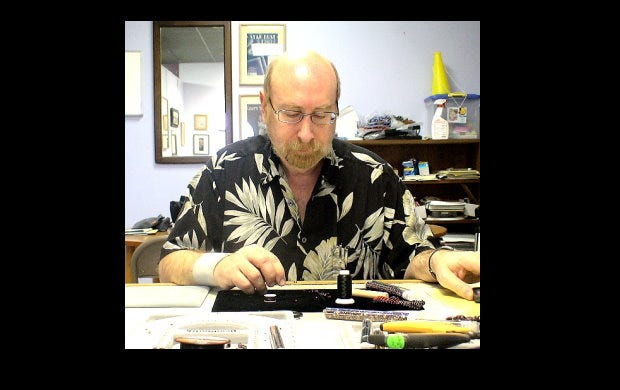
What do you (or will you) say to people who ask you what you do for a living? When you say, “Jewelry Designer”, you probably get a “That’s nice” or “Oh, you make jewelry,” and perhaps a far-away look. Most people can’t imagine exactly what you do. Their images and experiences with jewelry and what it can look like, the materials available to use, the techniques applied are somewhat limited. Not everyone knows you can craft jewelry by hand, not just by machine.
It can be difficult to define jewelry design. What you do as an artist and designer may involve several different kinds of tasks. Your process may be conventional or unconventional. And it’s not just the “What do you do” aspect of the question, but the concurrently implied “Can you make a living at this” aspect of the question, as well. It’s almost as if they are about to say, “What do you really do?”
The response you want to come up with is your personal understanding and recognition about your passion for design, and all the things that drive this passion. Your excitement in telling your story will become infectious, and, while they still might not comprehend everything you do or the how and why you do it, they will certainly see that you are a jewelry designer, one who is intent on achieving some level of success within the profession.
Your Practice, and how you define and live and succeed in it depends on gaining some clarity in terms of…,
(1) Having a definition of what success as a designer means to you
(2) Developing a production (and marketing) routine
(3) Creating a consistent and coherent body of work
(4) Being very organized
(5) If selling or exhibiting, taking a multi-venue approach
(6) Developing a Criticality where you are reflecting, evaluating, validating, legitimizing, being very metacognitive
(7) Self-Care and finding balance in your life

(1) Defining Success
Not every designer is going to define success in the same way. In fact, there will be dramatic differences. Some people may want to focus on applying their creative skills. They search for artistic excellence. Others may want to make money. They want monetary gain and, perhaps, financial stability. Still others may want to be a part of a social network of other creative types. They might want a support network, seek collaboration, or find recognition.
Some people want to do this full time, and others part time. Some want to earn enough money to pay for their habit; others want to make money to supplement their income; still others want to make enough money to be self-supporting.
Success is all about you. What do you want? How much effort and organization will it take to match your ambition and goals? How much time and money do you want to invest in your education and development? Are you aiming to be a crafter, an artist, or a designer?
Success depends on many factors. But key to all, and foremost, is that you brainstorm with yourself, be brutally honest, and list the goals you prefer and want to achieve. Prioritize these. More successful designers find some balance among creativity, business, and recognition. But your ambitions may be different, and just as legitimate in finding success.
Know that achieving any level or definition of success will take time and effort, often sacrifices. The jewelry designer should set expectations and work strategies accordingly.
(2) The Day-To-Day Routine
While everyone has their own process and their own flow, more successful designers establish some kind of work routine. They allocate a specific work space within which to create. They keep their inventory of parts and finished pieces very organized. And, key here, they set up a schedule for (a) researching ideas and inspirations, (b) working in a production mode, c) presenting or marketing their work to others, (d) reflecting on their practice.
Periodically, evaluate your process. Are there things you can do to improve your efficiency or effectiveness? Can you better manage your productivity? Do you work better at a certain time of day, or day of the week? Have you programmed in breaks? Is there a comfortable balance between work time and break time? Would it be helpful to take the last 15 minutes of your day to set up for tomorrow?
Plot out your weekly schedule on a calendar or spreadsheet. Set some objectives about how many pieces you want to finish per week or per month. If interruptions, say from friends or family, get too annoying, make them aware of your schedule and ask them to help you protect your creative time and space.
It is important to note here that there is a fundamental tension between productivity and creativity. The former tries to put you in a box. The latter tries to keep you from getting stuck in a box. This can be frustrating.
Yet artists and designers, overall, who are able to provide some structure to their creative time tend to be more successful in their practice. These artists and designers set a routine and schedule for both making jewelry time as well as thinking about designing time. They also structure in time for introducing their ideas publicly as well as reflecting on the efficiency and effectiveness of everything they do — tangible and otherwise.

(3) Creating A Consistent and Coherent Body Of Work
Jewelry designers are free to create whatever they want. And usually, novices would be wise to try out a lot of different techniques, and use a lot of different materials, and create a lot of different designs. Think of this as play and experimentation. It’s how you learn to be a designer.
But as you develop more as a designer, it makes more sense to set some limits and begin to define a personal style, coherency and brand identity.
Your style reflects what you are passionate about. It may focus on a particular technique, material or design. Or it may focus on integrating and combining several things. But with all the things you do, there is some coherence to it. It becomes more associated and identified with you and you become more recognized with it. The consistency ties you to your work.
This doesn’t limit variation and creativity in your work. It primarily means that wearers and buyers and collectors of your jewelry can sense the artist’s hand, that is you, reflected by the pieces you create.
Coherency has several dimensions to it. The designer achieves a level of coherency in how the majority of these dimensions, not necessarily all dimensions, are reflected in any one piece. Thus, the designer still has a lot of room for variation in their work and style.
These dimensions of coherency about which designers are selective include,
– The choice of materials
– The choice of techniques
– How pieces are presented, displayed, organized, situated with other pieces
– How pieces and collections are named
– Packaging
– Color palettes
– The use of forms and themes
– Personalization, differentiation and originality
– The use of negative vs. positive space
– The use of point, line, plane and shape
– Arrangements, placements, distributions of design elements within the piece
– Control over light, shadow, bright, dull
– The marriage and resulting tradeoffs between aesthetics and functionality
– Silhouettes
– Quality in materials, quality in craftsmanship, quality in finish, quality in presentation

(4) Organization
Good organization involves
(a) Inventory (how you organize, track and replenish it)
(b) Work space (how you create productive areas for creative work, business and creative reflection)
c) Bookkeeping and accounting (how you manage your finances)
(d) Business logistics, such as researching venues, getting to venues, tracking your pieces, shipping, marketing, web-presence and social media management (how you manage the other business aspects of what you do)
Good organization will help you avoid a lot of frustration and disarray. Learn to use spreadsheets and apps. These will save you a lot of time and minimize a lot of grief and worry. You’ll have more time to create, and need less time to keep things organized and up-to-date.
Think of and treat your inventory of materials, and all that it takes to achieve a satisfactory level of quality in your pieces, as investments, rather than costs. It gets more productive to reflect on What Is Your Return On Investment (ROI)?, rather than on What Does This Cost? This will go a long way in clarifying for you what is important, and what is less so, and how to prioritize things in the face of limits on time and other resources.
Your workspace might be a part of a room, it might be an entire room in your home, or even a complete studio space outside your home.
Divide your “work space” into three distinct areas: where you create, where you handle all the business things, and where you relax, think and reflect.
As you develop your work and related spaces, you should try to anticipate what it will take to scale each of these up, as you get more established as a jewelry designer. Are your spreadsheets and computer apps robust enough to grow with your developing career and business, as well?
(5) A Multi-Venue Approach Towards The Creative Marketplace
Successful jewelry designers are able to get the visibility and legitimacy they want and deserve. They know what to expect when exposing their work publicly within the creative marketplace.
They are good at communicating their ideas and their value, when approaching art and craft show vendors, stores and boutiques, galleries, and buyers and collectors, or applying for art grants or doing demonstrations. They are able to get articles written about them in blogs, newspapers, magazines and jewelry editorials. And, very importantly, they use a multi-venue approach (diversification) when introducing their jewelry into the marketplace. At a minimum, this multi-venue approach will include both an on-line strategy and a bricks-and-mortar strategy.
Legitimacy as an artist requires massive exposure, most often in diverse locations and venues. It is unusual for a single venue or location, whether you are looking for exhibitions or for sales, to be sufficient for a designer to become successful. You will need to have your jewelry pieces in many venues. There are many online directories and other resources to help you find the wide variety of venues useful to the further development of your jewelry design career.
What To Expect When Exposing Your Work Publicly
No jewelry designer works in a vacuum, and no piece of jewelry is complete until it has been shared with an audience.
No wearer or purchaser of jewelry is going to see the piece as merely an object of adornment. They will interact with the piece in a much more intimate way, and very much so influenced by the jewelry creator and all the choices made in design.
Part of the jewelry designer’s development as a professional involves an ability to anticipate and understand how various audiences express desire and how various audiences judge a piece of jewelry to be finished and successful. Jewelry is here to amaze and intrigue. It is here to entice someone to wear it, purchase it, show it around. It is here to share the inspiration and prowess of the designer with those who see, feel, touch and inhabit it.
The more successful designer takes the time to explore how an audience is engaged with the piece. The designer learns insights in how any piece of jewelry evokes emotions and resonates with others. The designer is very sensitive to the experience people have at the point of purchase or gifting. Finish and presentation are very important. Acquiring jewelry is special and unique a process. Jewelry is not something we must have to meet some innate need; rather, it is something we desire because it stirs something in us.
Approaching Stores and Galleries
Although some jewelry designers may feel uneasy mixing art with business, for most it is a necessity. You do not have to sacrifice wonder for reality. Most designers sell their pieces, so recognizing the things about coordinating art with business become very important.
Typically small stores and boutiques, websites and online sales platforms, and galleries will sell your jewelry, either outright, or on consignment. Their goal is to turn a profit, and they are at greater risk than the artist. It is the venue that displays, promotes, prices, trains employees to talk about your jewelry to customers, and keeps the pieces clean. Available selling-space is always limited. When your jewelry takes up space in these venues, it is an opportunity cost to the business — they lose the opportunity to carry someone else’s work which might be more appropriate to the setting, or might sell better.
There are different types of stores, websites and galleries. Each satisfies a different market niche for jewelry. Each has a different level of understanding about what jewelry really is, and all the choices the jewelry designer has made to design and create each piece.
When approaching stores or galleries to display and sell your pieces, it is critical that the artist understand how each specific venue functions, who their audiences are, and what the attendant risks to them are, should they decide to exhibit and/or sell your pieces.
The first step is to be your authentic, passionate self. Your jewelry will not speak for itself. So, in spite of any feelings of vulnerability you might have when approaching stores and galleries, you will need to talk about yourself and your jewelry. You do not want to feel “salesy” when speaking with business or gallery owners and representatives. You do not want to feel pushy. Or desperate. But you want them to get to Yes.
You speak to them on their terms. They want to know the real you. What excites you. The history behind the design choices you make. Your understanding of yourself as an artist, and your understanding of your virtual client, her desires, wants and motivations. How do you connect to your audience through your jewelry?
o Who are your best customers likely to be?
o How would you describe them: demographics, shopping behaviors, wants and desires?
o Why are they attracted to your work?
o How and where do they find out about you and your work?
o What is your Getting Started story?
o How would you go about persuading someone to buy a piece of jewelry you made — what’s in it for them? How does it connect with them emotionally? How would it make their lives better?
Do some research ahead of time. The internet has a wealth of information you can pull up. Before you meet with them, get an understanding of the types of jewelry artists and their materials they carry in their venues. These venues are always on the lookout for new talent. They are most likely to say Yes to a jewelry designer whose style and materials fit in, but do not duplicate, what they already are showing.
Also research who their customer base is. They are most likely to say Yes to a jewelry designer whose audience either mirrors their existing customer base, or incrementally adds to and expands it at the margin. They most likely will not want to spend resources (and add risk) by going after a completely new and different customer base.
One more thing. You can either push your way in, or use pull to get in. For most of us, particularly when we are getting started, have only push at our disposal. We might cold call, or set up a formal interview, or initiate a conversation with someone at a gallery opening or art show.
But pull always works better. Here we leverage something or someone to get to the right place or person at the right time. An established designer or academic might set up an appointment for you with one of their contacts, for example.
Influencers
In today’s world, there is a manic competition for attention. Then, also, a frenetic effort to retain and manipulate that attention. Attention creates value. Often, it is difficult for the individual jewelry artist to get a leg up in this world without some significant help. Again, as mentioned above, if you can use pull, you’ll go farther, faster than if you have to rely on push.
Influencers are one of the backbones of internet culture and one way to use pull. Their business model centers on ways to shape everything we do in our lives from how we shop to how we learn to how we dress. Influencers are part micro-celebrity and part entrepreneur. They are opinion leaders and have been able to garner a large audience. They have proven themselves to be able to exploit how people distribute their time and attention.
Influencers typically work on a quid-pro-quo basis. In exchange for some products you give them, they promote them. Sometimes a fee may be involved. They take photos, they interact with audiences, they get your message out on different platforms, they sponsor content.
The Value of Collaboration
It can be so easy for any jewelry designer to get so wrapped up in creating things that they isolate themselves. But this is not the ideal situation.
At a minimum, it is very helpful, and very healthy, to have a support group. People you can talk to and talk things out with. People who can give you good feedback.
It is also very invigorating to collaborate on a project with someone else — A2A, that is, artist to artist. You can get an infusion of new ideas, sensibilities and strategies. You can get challenged. You become more self-aware of your own styles and preferences. You come up with new ideas about coordinating your own authentic, creative self with that of someone else.
Maintaining A Client Base
Much of any jewelry designer’s success comes down to maintaining a high level of visibility. Regularly keeping in touch with your client base is extremely important here.
Keep good documentation about who bought your pieces, when, why, for how much, and their address, email, phone numbers.
Maintain a web presence, either as a unique website, and/or a presence on social media platforms.
Create a mailing/emailing list, and use it frequently.
Have business cards handy at all times.
Do promotions to expand your mailing/emailing lists. Call to actions are very effective, such as offering a ‘discount coupon good for the next 7 days’. Or directing them to see your new pieces online by clicking a link.
Keep them up-to-date about where your pieces may be found, and what you are working on now.

(6) Criticality
Criticality is something you want to build into your Practice. It is not something to avoid or minimize.
Criticality is about making choices. It is about separating and confronting and going beyond your piece in order to build in that relevance jewelry needs as it gets exposed to the public.
Criticality helps you close the distance between the jewelry you create and the person it has been created for.
Criticality aids you in revealing the implications and consequences of all your choices. About materials. About techniques. About colors and patterns and textures and forms. Each form of jewelry requires endless and constant adjustments, and you should be very critically aware of what, why and how.
Criticality is necessary for you to continue to grow and develop as a professional jewelry designer.
Criticality is not a put-down of the artist. Rather it is a way of reflecting, evaluating and being very metacognitive of all the choices made in design and construction, and a lot of what-if envisioning and analysis of possible alternative choices. It is an exploratory thing. It adds understanding and comprehension.
Criticality assists in creating a dialog between artist and all the various audiences with whom the artist interacts. Towards that end, it is helpful to actively bring others into that criticality discussion, where we now have the prospects of many voices merging into a form. It can be difficult to be objective about your own work. And you may not be aware of how the quality of your work stacks up with others, and where it needs to be.
Legitimacy
Your legitimacy as a jewelry designer, your reputation, your visibility, your opportunities, to some degree, flow from this process of criticality. Legitimacy comes from both local and more general validation. Validation results from these processes of critical observation and analysis of your work and of how you conduct yourself within your practice.
Your various audiences that view your work critically, in turn, bring your work in contact with the external world. They look for a high level of coherence within the design and its execution. They describe it critically as to its qualifications for matching desire, establishing appeal, having personal or general value and meaning. For successful jewelry designers, this contagion continues, diffuses, and grows.
Legitimacy engenders a deeper level of confidence among artist, wearer and viewer. The relationships are stimulated, enriched, given more and more value. Jewelry is more than a simple object; it is a catalyst for interaction, for relationships, for engagement, for emotion. Legitimacy results in trust and validation.
With globalization and rapid technological changes, the jewelry designer is confronted with additional burdens, making the effort to achieve legitimacy ever more difficult. That is because these larger forces bring about more and more standardization of jewelry. They rapidly bring fashions and styles to the fore, only to scrap them, in the seemingly blink of an eye, for the next hot thing. They channel images of jewelry pieces around and around the world taking on a sameness, and lowering people’s expectations to what jewelry could be about.
If the products around the world are essentially the same, then the only thing the customer will care about is price. They won’t care who made it. They won’t care about quality.
Innovation begins to disappear. With its disappearance, the role of the jewelry designer diminishes. The jewelry designer becomes more a technician with no professional identity or concerns. The jewelry simply becomes the sum of its parts — the market value of the beads, metals and other components. There are few, if any, pathways to legitimacy.
That’s not what we want. And that makes it ever more important that jewelry designers see themselves as professionals, and develop their disciplinary literacy — fluency, flexibility and originality in design. Aspects of design which cannot be globalized. Or standardized. Or accomplished without the work, knowledge, skills, understandings and insights of a professional jewelry designer.
(7) Finding Balance — Self Care
Making jewelry and living a creative life can wear and tear on both your physical, as well as mental, health. It’s important that you have a plan of self-care and balance that you have thought about and structured ahead of time.
Take breaks. Play. Experiment. Take walks. Don’t isolate yourself. Develop a support system.
Exercise. Take good care of your hands, finger nails, wrists, arms, neck, back and eyes. If you need to read with glasses, then you need to make jewelry with glasses. There are lots of different tools specific to different situations — use them all. Elastic wrist bands, thumb-support gloves, elbow bands do great to preserve your fingers, wrists and elbows. There are lots of ergonomic tools and chairs and lighting. With a lot of metalsmithing and lampworking, you’ll need goggles, perhaps special lenses to filter out the glare of torch flames. Make these your friends.
There will be creative aspects to what you do, and administrative aspects to what you do. Find some balance between your right brain and your left brain.
Spend a lot of time feeding your creative well with ideas, inspirations, motivations and a deep appreciation for what artists do well.
Take some time to explore new materials, techniques and technologies.
There will be slow times and seasonal ups and downs. Plan ahead of time how you will occupy yourself during slow periods.
There will be times you will have designer’s block. You will be stuck, usually difficulty getting started, or if your piece is getting developed over a long period of time, some difficulty staying motivated. Develop strategies you can refer to on how to stay motivated, and on how to stop yourself from sabotaging your progress. It is important to know what you can and cannot control.
Train yourself with a mindset for rejection. Not everyone will like what you do. Not everyone will want to wear or buy the pieces you’ve invested your heart and soul in. That’s not your problem. It’s their problem. Don’t make it yours.
Get involved with your profession.
Other Articles of Interest by Warren Feld:
The Jewelry Design Philosophy: Not Craft, Not Art, But Design
Creativity: How Do You Get It? How Do You Enhance It?
Disciplinary Literacy and Fluency In Design
Becoming The Bead Artist and Jewelry Designer
5 Essential Questions Every Jewelry Designer Should Have An Answer For
Getting Started / Channeling Your Excitement
Getting Started / Developing Your Passion
Getting Started / Cultivating Your Practice
Becoming One With What Inspires You
Architectural Basics of Jewelry Design
Doubt / Self Doubt: Major Pitfalls For The Jewelry Designer
Techniques and Technologies: Knowing What To Do
Jewelry Making Materials: Knowing What To Do
Teaching Discplinary Literacy: Strategic Thinking In Jewelry Design
The Jewelry Designer’s Approach To Color
Point, Line, Plane, Shape, Form, Theme: Creating Something Out Of Nothing
The Jewelry Designer’s Path To Resonance
Jewelry Design Principles: Composing, Constructing, Manipulating
Jewelry Design Composition: Playing With Building Blocks Called Design Elements
Contemporary Jewelry Is Not A “Look” — It’s A Way Of Thinking
How To Design An Ugly Necklace: The Ultimate Designer Challenge
I hope you found this article useful. Be sure to click the CLAP HANDS icon at the bottom of this article.
Also, check out my website (www.warrenfeldjewelry.com).
Subscribe to my Learn To Bead blog (https://blog.landofodds.com).
Visit Land of Odds online (https://www.landofodds.com)for all your jewelry making supplies.
Enroll in my jewelry design and business of craft video tutorials online.
Add your name to my email list.