There are two ways to thread a needle. The logical way, the way your mind and brain and eyeball and heart and gut all say to do is this:
– Take the thread in one hand, and the needle in the other. Push the needle onto the thread. Keep poking the thread with the needle until the thread meets the hole and slips through. Then pull on the thread.
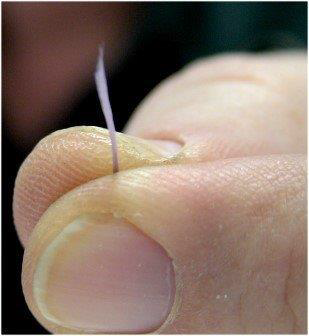
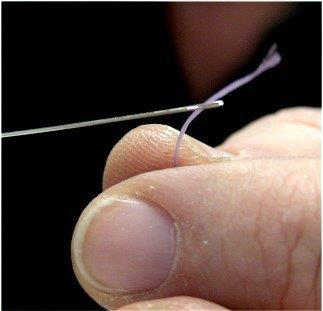
The illogical, but more correct way, is to pop the thread into the needle:
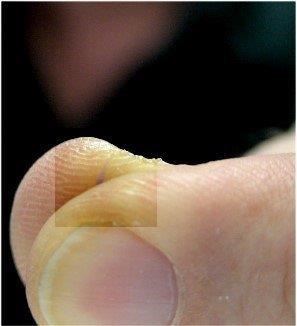
Put the thread between your thumb and fore-finger, and pinch it. Pull it down between your fingers so that the end slips just below the top surface of your fingers. Place the needle over your fingers, lining up the eye hole just above the gap between your two fingers where the thread is hiding, and keep the needle from moving. Squeeze your thumb and forefinger together, so that the thread pops straight up and into the eye-hole. Voila! Magic. Then pull on the thread.
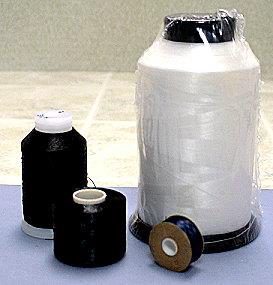
When cutting your thread off the bobbin or spool, if you cut at a slight angle, it makes it easier to get the thread through the eye hole of the needle.
Another trick: Rather than wet the top end of your thread with spit by placing the thread in your mouth, wet the eye hole of your needle. The water that gets trapped in the eye hole will draw up the thread, as you put it to the hole.
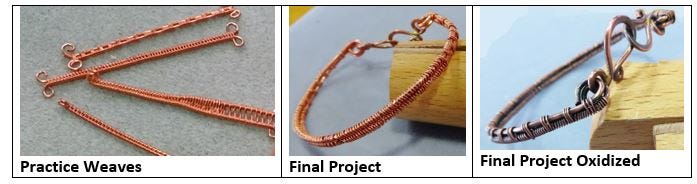
OXIDIZING TECHNIQUES (Use bare wire, if you intend to oxidize it; this means it has no protective lacquer finish on it to prevent it from tarnishing)
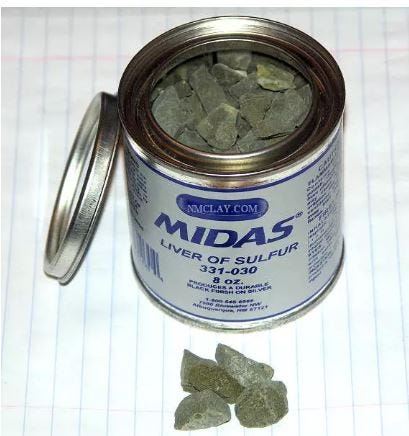
Liver of Sulfur solid form
1. USING LIVER OF SULFUR
Step 1 Preferably work outside when using Liver of Sulfur (LOS). Make sure you wear gloves and designate glass or ceramic containers that will be used solely for this purpose.
Step 2 Clean the silver before you begin. Any polishing residues, wax or fingerprints could affect the consistency of the oxidation. Hot soapy water and an old toothbrush work well.
Step 3 Make a neutralizing bath. You will use this later to neutralize the silver once you have finished oxidizing.
Step 4 To make the neutralizing bath: Using one Mason jar, mix two teaspoons of baking soda in one cup of cold water.
Step 5 Stir solution until the baking soda is dissolved. Set aside for later.
Step 6 Prepare your workstation. You need two mason jars with one cup of hot water in the LOS solution, the neutralizing bath you just made, Liver of Sulfur, the silver you wish to oxidize, a pair of gloves, a plastic spoon and some paper towels. (Hot water (not boiling): 30 seconds in microwave) (Use glass jars, not plastic)
In the one with the piece you wish to oxidize, if you use hot water, oxidation will occur very quickly. If you use room temperature or even ice water, the oxidation will take longer to occur. With silver, this will give you an opportunity to control what color tone the final piece will have. But with copper, the metal darkens extremely fast.
Step 7 Drop the silver into the water (hot, room temp or cold) of one Mason jar.
Step 8 In the other Mason jar add 1 pea sized lump of LOS to the hot water. The hotter the solution, the faster the oxidation. Alternative: Room temperature LOS solution, and put silver in ice-cold water. A greater temperature difference slows patina process, and can get more variation in colors with blues and golds, not just blacks.
Liver of Sulfur gel form
Liver of Sulfur gel can be brushed on using a small paint brush, or you can make a solution. To make a solution, coat half a teaspoon with the gel and allow the excess to drip off. Then dip the spoon in a container of hot water and allow to dissolve.
Step 9 Mix thoroughly.
Step 10 Remove the silver from the water and carefully place the silver into the LOS solution trying not to splash.
Step 11 Leave the silver in the LOS solution until it reaches the desired color, stirring occasionally to get an even finish. [This can happen within seconds, within 5 minutes, within 15 minutes, or within 1 hour, depending on the piece and how dark you want it, and the differences in solution temperatures.]
Step 12 Remove the silver from the LOS solution and place the silver in the neutralizing bath. This will stop any further oxidation of the silver.
Step 13 Remove the silver form the neutralizing bath and dry slightly with the paper towel.
Step 14 You can either tumble the silver to polish and seal the oxidized finish or you can use a polishing cloth. You can try rough paper towels. You can try 0000 steel wool. Be careful not to completely rub off the oxidation.
Step 15 Put two teaspoons of baking soda into the LOS solution to neutralize it.
Step 16 Loosely seal the Mason jar that contains the LOS solution and leave the jar out doors, out of the reach of children or animals. The LOS will degrade and eventually turn clear. Once it is clear it is no longer toxic and you can dispose of it by diluting the solution and flushing it down the drain.
Black Max (liquid)
2. USING BLACK MAX (Contains hydrochloric acid and tellurium)
The result from Black Max is a bit shinier black finish than Liver of Sulphur, which is more matte. With liver of Sulphur, oxidation does not wear off as fast. Can’t get the range of oxidations colors with Black Max, as you can with LOS.
For silver, immerse in or apply Black Max with a cloth or applicator until the desired finish is obtained (20–30 seconds is the norm). Enough solution in jar to cover your piece.
Do not heat solution or piece.
Otherwise, you will follow similar steps as with LOS, including the baking soda solution to neutralize the reaction.
3. USING HARD BOILED EGG (using Sulphur to oxidize silver or copper)
Boil the egg, and peel the shell. Put the peeled egg inside a zip lock bag. Use your fingers to crush the peeled egg inside the bag. Put your piece of silver inside the bag and into the crushed egg pieces. Check every 15 minutes to see if it is sufficiently oxidized for you. Can easily take 1 hour. Rinse with warm water and some dish detergent. Use paper towel or 0000 steel wool to brush off any excess oxidation.
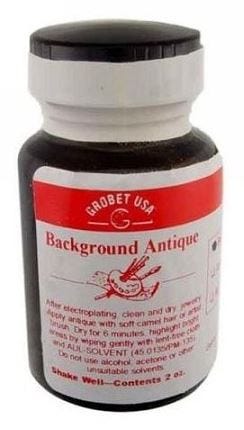
Antiquing Solution
4. ANTIQUING or VARNISH SOLUTION
Another thing you can do is to buy an antiquing solution, or use a dark color varnish.
You paint this on, and then rub it off with a soft cloth. Let it dry for about 20 minutes, and repeat, if you need the antiquing to be darker.
This leaves a glossy black finish. Here, again, you usually want to leave some gradations of color on the metal, so that the top surfaces are shinier than the crevices.
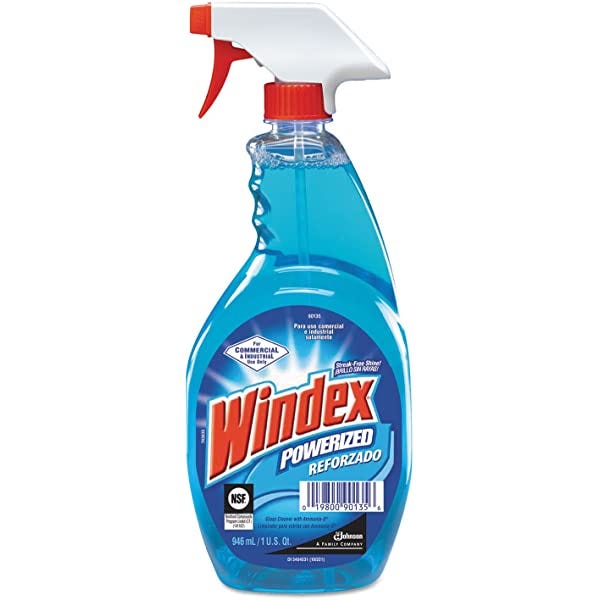
Anything with ammonia in it
5. AMMONIA
If you want to speed up the tarnishing process, but do not want to turn your product black, spray your metal with Windex with Ammonia.
The ammonia will turn the silver black, and the low amount of ammonia in this product will make the process very gradual. With more ammonia concentration, the faster and the blacker it will turn.
6. OTHER CHOICES
You will find online a wide range of patina’s. These typically are in liquid form. Different patinas work with different metals. Different patinas have different final coloration results. You can get ones that do blues or purples or golds or rainbow effects.
Steel Wool
FINISHING YOUR PIECE OFF AFTER YOU OXIDIZE IT
After you have oxidized and patina’d your piece, you probably want to let some of the higher areas get a little shinier again, leaving the recessed areas dark.
Easy to do.
Take some steel wool (#0000) or a rougher paper towel, or a soft bristle toothbrush, and gently rub over the surface. Like an artist, you will control where you want highlights and where you want lowlights.
Think you went to far? Then oxidize again. Not a problem.
How many people throughout time have heard the sound of a dropped bead on the floor?
Or the sharp whoosh of air that comes from the cutting of a cord?
Or the dull oomph you hear when you crush a metal clasp into place?
Or the feel of the tug and pull of the thread as the needle is pulled through the cloth?
Or the resistance of the tensile strength of the wire as it is bent into a shape?
Did they see a sudden flash of light, a sudden recognition of artistic achievement? Probably not.
But it meant something to them. Subtle. Unconscious. The exercise of the hand in craft often taps into some sense of self-expression or –awareness. Creativity rewards you. It reaffirms who you are. Your worth, your value, your artistry. It is fulfilling, fun, happy, reassuring, exciting, introspective.
The exercise of your hand in craft, art and design often reconfirms that you are part of some larger group or culture, as well. You have a shared sense of what expression and awareness mean. You repeat the same steps in creation. You choose similar parts or design compatible patterns. People recognize your creative efforts when they see or wear your pieces.
Hand Craft. The feel on the fingertips and on the palm of your hand. The pattern of light that registers on your eye and then gets translated by your brain. The anticipated weight and movement of the piece as it’s worn.
The shared implications of all this, and the full range of possibilities are understood by everyone. This mutual understanding helps you cement relationships with other groups or individuals. Relationships and meanings are extensions of your hand in craft.
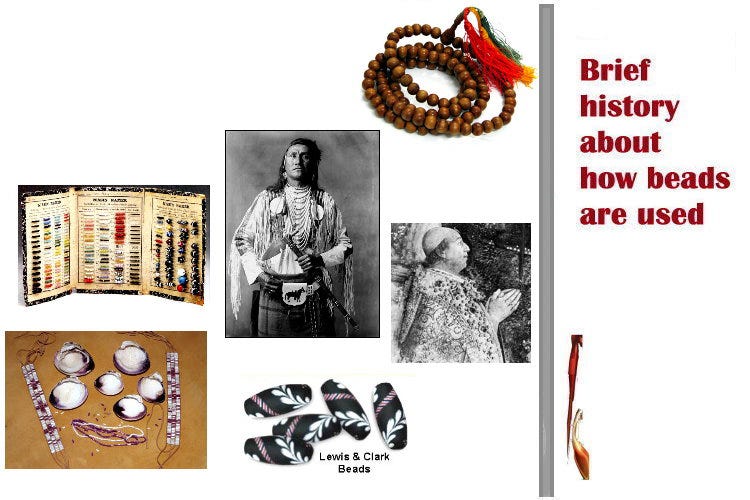
Hand Crafts. Beads and Jewelry. Beads and Jewelry. Beads and Jewelry. Beads and Jewelry as Hand Crafts. Beads and Jewelry have been used all throughout time. They appear in every culture in the world. Although they are not always used in the same ways or for the same reasons.
Wampum
SOMETIMES BEADS ARE USED INSTEAD OF MONEY
Sometimes beads are used instead of Money. When people look at beads, they have an intrinsic value that people seem to recognize and share. In many cultures, people place more confidence in using their beads as their Money, instead of their own coins and currency.
And in our own world, this is often true as well, as we go to bead swaps, or swap one piece of jewelry for something else of value. We barter with beads. We do this all the time. Beads and beaded jewelry have a monetary life all their own. “I’ll give you this______ , if I can have the beaded bracelet you are wearing.”
And so many times, people will come in the shop and ask to work for beads. And we have plenty for them to do.
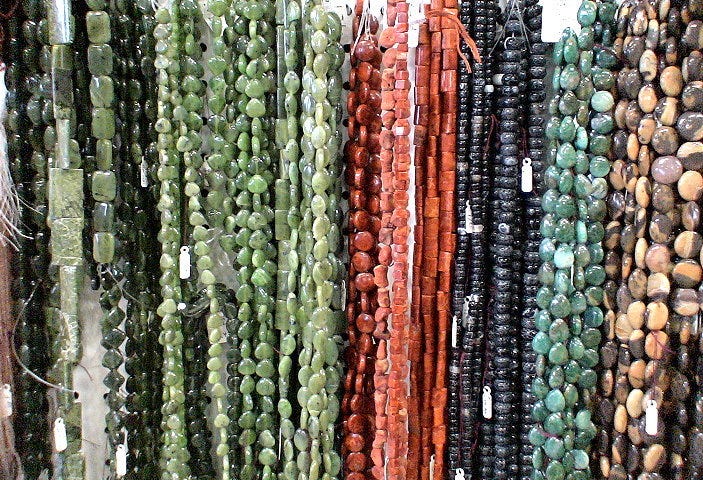
Trade Beads
BEADS WERE USED IN TRADE
In a similar way, beads were used in Trade. This is more true historically than today, but a little bit today. When two groups want to trade with each other, it’s hard to come to terms. Because people, for whatever reasons, seem to be able to come to agreement on the value of beads, beads were used in various ways during the negotiation process.
Global Trade Routes
About 300, and 400 and 500 years ago, explorers set out from various European countries, and visited far-away places like China and India and Africa, and North and South America. When they set off on their explorations, they brought with them what we call Trade Beads. These were glass beads that were made in Venice, Bohemia and the Netherlands.
In Europe at this time, the folks looked down on glass beads. They used them in projects involving bead embroidery and mimicking tapestries where they could get a more 3-dimensional look with the beads than they could with the fibers.
But they shied away from glass beads in jewelry. Too cheap. Too low class. Glass was trash. For jewelry, they preferred the high test octane beads made from gemstones and precious metals. But those darn glassmakers in Venice and Bohemia and The Netherlands kept churning glass beads out. I think there were some technological improvements that occurred at this time, that made it easier/cheaper/ more efficient to make glass beads, but I don’t know this for a fact. Still, no one really wanted them.
The explorers took these glass beads with them, and at first gave them away as gifts. They assumed that people from other, “less sophisticated” cultures, would dismiss these glass beads as well. But alas and alack, these other “less worldly” men and women did not. They liked the glass beads. They liked them a lot. Some cultures even saw spiritual qualities in these glass beads.
It wasn’t long before the explorers started trading these beads, instead of giving them away. Some of the trade beads made in Europe were very generic; others were more specialized designs, colorations or etchings specific to certain countries or regions, like Africa or Persia.
When these explorers came to North America, the Indians here, at first, wanted blue beads. You see, they couldn’t easily make a blue color with the natural materials they were using — stones, shells, antler and wood. The explorers were thrilled about this. Blue was the cheapest color to make. So, the explorers found this trade to be very profitable. It wasn’t too long, however, before the Indians met their needs for blue, and started asking for yellow and red. You see, it takes real gold to make the colors yellow and red. And the trading became nearer and dearer for the explorers.
These French Traders continued their explorations down the Missouri and Mississippi Rivers. They discovered the freshwater pearl cultures of the Mississippi Indians in the area around Tennessee, and traded beads for these pearls which they sent back to Europe. These freshwater pearls soon earned the name “Royal Pearls”, and were restricted for use and wear by the royalty across Europe.
Even today, royal families continue to import Tennessee freshwater pearls. They have these sewn into their undergarments. After all, it’s widely believed that wearing a pearl against your skin ensures your future wealth.
And, I always wondered if you could speculate why the Indians sided with the French in the French and Indian Wars, against the British. Could it have been that the French supplied them with beads, and the British did not?
People With The More Beads Have The More Power!
ANOTHER WAY PEOPLE USE BEADS IS FOR POWER
Another way people use beads is for reasons of Power. People with the more beads have the more power. When you get into beading, you learn this very quickly. Who has the most beads? The most Reds? The most Purples? The most delicas? Beads, in this sense, define social relationships, who’s more important than whom, and pathways of success.
Ogalala Sioux Indian Reservation Lands
About 400 years ago, among the Oglala Sioux Indians in the Dakotas, there was a big women’s movement. The women of this tribe wanted greater say and control over tribal matters, they saw an opportunity to assert themselves, which they did, and they won. This whole incident was oriented around beads.
So what happened four hundred years ago? You had French traders traveling through Canada, and coming down into the Dakotas. They brought with them these glass Trade Beads, and traded them for pelts. One of the major roles of women in Indian tribes was to make beads. They would spend all day, every day, making beads out of stones and wood and antlers and shells. When these French traders came with these pre-made beads, it freed up a lot of time. And in this one tribal group, the women took advantage of this free time, asserted themselves, and won.
Sioux bead embroidery
One of the things the women did to mark their success was to change the costuming of the men. Before the movement, men wore beaded embroidery strips tacked down linearly along their sleeves. After the movement, the women tacked down only part of the embroidery strips — the rest allowed to flow out like ribbons. So when the men went off hunting or fighting or whatever they did, they wore the mark of the women — their ribbons would flow.
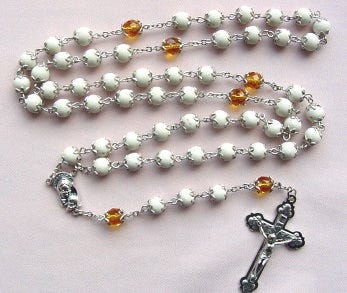
Rosary
SOMETIMES BEADS ARE USED FOR SPIRITUAL AND RELIGIOUS REASONS
Sometimes, beads are used for Spiritual and Religious Reasons. You can picture a rosary in the Catholic Church. By touching and moving your hand along this bead chain, it helps you feel closer to God. It helps you feel more spiritual. It helps you remember the rituals. In Buddhism, they use something like a rosary. In Confucianism in China they use something like a rosary called Immortal Beads.
The threatened Pope
During the Middle Ages in Europe, only priests were allowed to wear rosaries and have beaded adornments. Priests had their parishioners make them rosaries and beaded this and beaded that. After awhile, the priests with the more rosaries and the more elaborate rosaries, gained higher status. So they kept accumulating, and accumulating, and accumulating, until, at one point, one of the Popes felt very threatened. Many priests were becoming as adorned as he was. So the Pope issued an edict that said everyone could wear rosaries and have beaded adornments.
The fact that you can wear beaded jewelry today, instead of making them for your priest or minister or rabbi or imam or whatever, goes back to the insecurity of one of those Popes.
Zulu Beadwork
LAST, BEADS ARE USED FOR PURPOSES OF COMMUNICATION
Last, beads are sometimes used for Communication. They are used symbolically. Different colors have different meanings. Different patterns have different meanings. Different shapes have different meanings.
Among the Zulu Tribes in South Africa during Apartheid, you had some Zulu tribes who adopted Christianity and identified with the colonialists. And you had other tribes that did not. Among the tribes that did not, they developed a very elaborate communication system using beads. Besides what colors were next to each other, they used a lot of triangles in their patterns. It was important if the triangle faced down, or up, and again what the colors were.
SPEAKING WITH BEADS. Zulu Arts from Southern Africa. by J. (photographs), E. Whyte. Morris New York , 1994
These folks might bead a necklace, or a loin-cloth. They might do a beaded doll, or a hat, or a blanket or tapestry. Something beaded. They would come out during the day, and flash the results of their secrecy, plotting and chicanery. They might say something very general with their beadwork, like “I’m mad at the world today”. Or they might get very specific, such as “I’d like to get together with you tomorrow night at 8:00, but not before I’ve met with your brother.”
These Zulu tribes kept up this communication system for about 70–80 years — all during Colonialism and Apartheid. When Apartheid ended, no one carried on the tradition. Not a complete surprise.
Today Zulu beadwork is very fashionable, particularly in Europe. But no one knows what they are saying. They are just doing pretty patterns.
Beading in the United States Today
A Social Movement Dating Back to the 1960s
Today, beading in the United States has been part of an ever-growing social movement that began in the 1960s, and, whether you know it or not, you are caught up in it, even unto today.
In the early 1960s, two new stringing materials were developed and introduced to beading. The first — NYMO Thread — was a nylon thread created by the shoe industry to attach the bottom of the shoe to the top of the shoe. This is widely used in upholstery. The second was called Tiger Tail. This was a flexible, nylon-coated cable wire. Cable wires are wires that are braided together and encased in nylon.
Before the 1960s, there really wasn’t a durable stringing material. People mostly used either cotton or silk thread, or nylon fishing line. Cotton and silk thread naturally deteriorate in about 3–5 years, so anything done on these has to be re-done every 3–5 years. Fishing line dries out and cracks when exposed to ultraviolet light and heat, that is, sunshine.
Because there was not a durable stringing material, beading, for the most part historically, was viewed as just a home craft. It did not attract artists. It did not attract fine craftspersons. It did not attract academics. It did not encourage people to experiment and push the envelop with the craft.
While occasionally in history, if you look back, you do see elaborate bead work, such as Russian bead embroidery during the 1800s and French beaded purses in the 1920’s, — this intricate beadwork was most often done by people who were slaves, or serfs or indentured servants. When they were freed, their beadwork stopped or diminished. So, when the Czar was deposed at the turn of the century, there began a major decline in Russian bead embroidery. Or when France passed labor laws in the late 1930’s, there were no more beaded purses. A rational person doesn’t want to spend all that money on beads, and take all that time making something, if it is going to fall apart.
With the introduction of Nymo and Tiger Tail in the 1960s — materials that do not break down easily — beading began to attract academics and artists and fine craftspersons. This movement began in Southern California, and gradually spread across the country. The first bead society was founded in Los Angeles in the 1960s. Today there are over 200 bead societies across the United States. The explosion in the availability of bead magazines didn’t begin until the latter part of the 1990s. The fact that you can get very excited about beads today, even thinking about selling jewelry made with them — 40 to 50 years ago, you wouldn’t have had those thoughts.
Beading has a very different energy and dynamic than a lot of other crafts, because it is only very recently begun to be thought of as an art form.
Abstract: Creativity isn’t found, it is developed. Creativity is a phenomenon where both something new and, at the same time, somehow valuable is created. While some people come to creativity naturally, in fact, everyone can develop their creative ability. Thinking creatively involves the integration and leveraging of three different kinds of ideas — insight and inspiration, establishing value, and implementing something. We work through creative thinking through divergence (that is, generating many possibilities), and convergence (that is, reducing the number of these possibilities). There are ten attributes associated with creative problem solving: fluency, flexibility, elaboration, originality, complexity, risk-taking, imagination, curiosity, assessment, and implementation. Last, different strategies are discussed for enhancing creativity and overcoming creative blocks.
CREATIVITY ISN’T FOUND, IT’S DEVELOPED
Kierkegaard — and I apologize for getting a little show-off-y with my reference — once described Creativity as “a passionate sense of the potential.” And I love this definition. Passion is very important. Passion and creativity can be summed up as some kind of intuitive sense made operational by bringing all your capabilities and wonderings and technical know-how to the fore. All your mechanical, imaginative and knowledge and skills grow over time, as do your abilities for creative thinking and applications. Creativity isn’t inherently natural. It is something that is developed over time as you get more and more experience designing jewelry.
You sit down, and you ask, what should I create? For most people, especially those getting started, they look for patterns and instructions in bead magazines or how-to books or websites online. They let someone else make all the creative choices for them. The singular creative choice here is picking what you want to make. And, when you’re starting, this is OK.
When you feel more comfortable with the materials and the techniques, you can begin to make additional choices. You can choose your own colors. You can make simple adaptations, such as changing out the bead, or changing the dimensions, or changing out a row, or adding a different clasp.
Eventually, however, you will want to confront the Creativity issue head on. You will want to decide that pursuing your innermost jewelry designer, no matter what pathway this takes you along, is the next thing, and right thing, to do. That means you want your jewelry and your beadwork to reflect your artistic hand. You want to develop a personal style. You want to come up with your own projects.
But applying yourself creatively is also work. It can be fun at times, but scary at others. There is an element of risk. You might not like what you end up doing. Your friends might not like it. Nor your family. You might not finish it. Or you might do it wrong. It always will seem easier to go with someone else’s project, already proven to be liked and tested — because it’s been published, and passed around, and done over and over again by many different people. Sometimes it seems insurmountable, after finishing one project, to decide what to do next. Exercising your creative abilities can sometimes be a bear.
But it’s important to keep pushing on. Challenging yourself. Developing yourself. Turning yourself into a bead artist or jewelry designer. And pursuing opportunities to exercise your creative talents even more, as you enter the world of design.
What Is Creativity?
We create. Invent. Discover. Imagine. Suppose. Predict. Delve into unknown or unpredictable situations and figure out fix-it strategies for resolution and to move forward. All of these are examples of creativity. We synthesize. Generate new or novel ideas. Find new arrangements of things. Seek out challenging tasks. Broaden our knowledge. Surround ourselves with interesting objects and interesting people. Again, these are examples of creativity.
Yet, creativity scares people. They are afraid they don’t have it. Or not enough of it. Or not as much as those other people, whom they think are creative, have. They don’t know how to bring it to the fore, or apply it.
But creativity shouldn’t scare you. Everyone has some creative abilities within themselves. For most people, they need to develop it. Cultivate it. Nourish it. They need to learn various tools and skills and understandings for developing it, applying it and managing it. Creativity is a process. We think, we try, we explore, we fall down and pick ourselves up again. Creativity involves work and commitment. It requires a lot of self-awareness — what we call metacognition. It takes some knowledge, skill and understanding. It can overwhelm at times. It can be blocked at other times.
But it is nothing to be scared about. Creativity is something we want to embrace because it can bring so much self-fulfillment, as well as bring joy and fulfillment to others. Creativity is not some divine gift. It is actually the skilled application of knowledge in new and exciting ways to create something which is valued. Creativity can be acquired and honed at any age or any experience level.
For the jewelry designer, it’s all about how to think creatively. Thinking creatively involves the integration and leveraging of three different kinds of ideas — insight and inspiration, establishing value, and implementing something.
(1) Seeing something out of nothing (perception). Technically, we talk about this as controlling the relationship of space to mass. You begin with a negative space. Within this space, you add points, lines, planes and shapes. As you add and arrange more stuff, the mass takes on meaning and content. The designer has to apply creative thinking in finding inspiration, choosing design elements, arranging them, constructing them, and manipulating them.
(2) Valuing something (cognition). Connections are made. Meaning and content, when experienced by people, result in a sense of appeal and value. We refer to this as desire and expression. Value can relate to the worth or cost of the materials, the intuitive application of ideas and techniques by the artist, the usefulness or functionality of the piece, or something rare about the piece. Value can center on the power to leverage the strengths of materials or techniques, and minimize their weaknesses. The designer has to apply creative thinking to anticipate how various audiences will judge the piece.
(3) Implementing something (acceptance). Jewelry design occurs within a particular interactive context and dialog. The designer translates inspirations into aspirations. Aspirations are then translated into design ideas. Design ideas are implemented, refined, changed, and implemented again until the finished product is introduced publicly. The design process has to be managed. When problems or road-blocks arise, fix-it strategies and solutions need to be accessed and applied. All this occurs in anticipation of how various audiences will respond to the jewelry, and convey their reactions to the artist, their friends, family and acquaintances, and make choices about wearing it and buying it and displaying it publicly. The designer has to apply creative thinking in determining why anyone would like the piece, want the piece, buy the piece, wear the piece, wear it publicly, and wear it again and again, or give it as a gift to someone else.
Types of Creativity
Creativity has two primary components: (1) originality, and (2) functionality or value.
The idea of originality can be off-putting. It doesn’t have to be. The jewelry, so creatively designed, does not have to be a totally and completely new and original design. The included design elements and arrangements do not have to be solely unique and never been done before.
Originality can be seen in making something stimulating, interesting or unusual. It can represent an incremental change which makes something better or more personal or a fresh perspective. It can be something that is a clever or unexpected rearrangement, or a great idea, insight, meaningful interpretation or emotion which shines through. It can include the design of new patterns and textures. It can accomplish connections between seemingly unrelated phenomena, and generate solutions. It can be a variation on a technique or how material gets used. It can be something that enhances the functionality or value of the piece.
Creativity in jewelry design marries that which is original to that which is functional, valued, useful, worthwhile, desired. These things are co-dependent, if any creative project is to be seen as successful. For jewelry designers, creativity is not the sketch or computer aided drawing. It is not the inspiration. It is not the piece which never sees the light of day, because then it would represent a mere object, not jewelry. Creativity requires implementation. And for jewelry designers, implementation is a very public enterprise.
What Does It Take To Be Creative?
Creative people tend to possess a high level of energy, intuitiveness, and discipline. They are also comfortable spending a great deal of time quietly thinking and reflecting. They understand what it means to cultivate emotions, both within themselves, as well as relative to the various audiences they interact with. They are able to stay engaged with their piece for as long as it takes to bring it to completion. They fall in love with their work and their work process.
Creativity is not something that you can use up. To the contrary, the more you use your creativity, the more you have it. It is developmental, and for the better jewelry designer, development is a continual, life long process of learning, playing, experimenting and doing.
To be creative, one must have the ability to identify new problems, rather than depending on others to define them. The designer must be good at transferring knowledge gained in one context to another in order to solve a problem or overcome something that is unknown. I call this developing a designer tool box of fix-it strategies which the designer takes everywhere. The designer is very goal-oriented and determined in his or her pursuit. But, at the same time, the jewelry designer also understands and expects that the design process is very incremental with a lot of non-linear, back-and-forth thinking and application. There is an underlying confidence and belief, however, that eventually all of this effort will lead to success.
How Do We Create?
It’s not what we create, but how we create!
The creative process involves managing the interplay of two types of thinking — Convergence and Divergence. Both are necessary for thinking creatively.
Divergent thinking is defined as the ability to generate or expand upon options and alternatives, no matter the goal, situation or context.
Convergent thinking is the opposite. This is defined as the ability to narrow down all these options and alternatives.
The fluent jewelry designer is able to comfortably weave back and forth between divergence and convergence, and know when the final choices are parsimonious and the piece is finished, and when the final choices will be judged as resonant and successful.
Brainstorming is a great example of how creative thinking is used. We ask ourselves What If…? How about…? Could we try this or that idea…? The primary exercise here is to think of all the possibilities, then whittle these down to a small set of solutions.
Creative Thinking
Creative thinking first involves cultivating divergent thinking skills and exposing ourselves to the new, the different, the unknown, the unexpected. It is, in part, a learning process. Then next, through our set of convergent thinking skills, we criticize, and meld, and synthesize, and connect ideas, and blend, and analyze, and test practicality, as we steer our thinking towards a singular, realistic, do-able solution in design.
Partly, what we always need to remember, is that this process of creative thinking in jewelry design also assists us finding that potential audience or audiences — weaver, buyer, exhibitor, collector — for our creative work. Jewelry is one of those special art forms which require going beyond a set of ideas, to recognizing how these ideas will be used. Jewelry is only art only when it is worn. Otherwise, it is a sculptural object.
There are 10 aspects to creative thought. Each should be considered as a separate set of skills, both for divergent as well as convergent thinking, which the jewelry designer wants to develop within him- or herself. Initially, the designer wants to learn, experiment with and apply these skills. Over time, the designer wants to develop a level of comprehension and fluency to the point that the application of each of this skills is somewhat automatic.
Fluency: Having a basic vocabulary in jewelry design, and the ability to see how these concepts and design elements are present (decoding) and arranged (composition, construction and manipulation). Divergence: to generate as many possible elements and combinations to increase number of possible designs.
Flexibility: Ability to adapt selections and arrangements, given new, unfamiliar or unknown situations. Divergence: generate a range and variety of possible configurations leading to same solution.
Elaboration: Ability to add to, embellish or build upon ideas incorporated into any jewelry design. Divergence: generate the widest variety of attributes of design elements and combinations which have value-added qualities, given a particular design.
Originality: Ability to create something new or different which has usefulness and value. Divergence: to delineate many ideas and concepts which are both new and have value.
Complexity: Ability to conceptualize difficult, multi-faceted, intricate, many-layered ideas and designs. Divergence: to take a solution and break it down or reinterpret it into as many multiple facets or multiple layers as possible.
Risk-Taking: Willingness to try new things or think of new possibilities in order to show the artist’s hand publicly and stand apart. Divergence: to elaborate the widest possible scenarios for publicly introducing the piece, given various design options, as well as all the ways these potential audiences might interact and use the jewelry, and all the ways these audiences might influence others, as well.
Imagination: Ability to be inspired, and to translate that inspiration into an aspiration. Divergence: to think of many ways an inspiration might be described, interpreted, or experienced physically and emotionally, and to identify the many different ways inspirations might be interpreted into a jewelry design.
Curiosity: Ability to probe, question, search, wanting to know more about something. Divergence: questioning the situation from many angles and perspectives.
Assessment: Ability to anticipate shared understandings, values and desires of various audiences for any piece of jewelry. Divergence: identifying all the possible audiences a piece of jewelry might have, and all the different ways they might judge the piece as finished (parsimonious) and successful (resonant).
Implementation: Ability to translate aspirations into a finished jewelry design and design process. Divergence: delineating all the possibilities an aspiration might get translated into a design, evaluated against all the possibilities the design could be successfully, practically and realistically implemented.
Enhancing Creativity and Overcoming Creativity Block
So, what kinds of creative advice can I offer you about enhancing your creativity? How can you nurture your creative impulses? How can you overcome roadblocks that might impede you?
Here is some of my advice:
Success Stories. While you are fiddling with beads and wire and clasps and everything else, try to be as aware as you can of why your successes are successful. What are all the things you did to succeed? On what points does everyone agree the project succeeds?
Un-Block. Don’t set up any road blocks. Many people, rather than venture onto an unknown highway of creativity, put up walls to delay their path. If they just had the right beads. Or the right colors. Or sufficient time. Or had learned one more technique. Or had taken one more class. Or could find a better clasp. These are excuses. Excuses to avoid getting creative.
Adapt. Anticipate contingencies. It amazes me how many people come into my shop with a picture out of a magazine. We probably can find over half the components, but for the remaining components pictured which we don’t have in stock, we suggest substitutes. But, NO, the customer has to have it exactly like the picture, or not at all. Not every store has every bead and component. Many beads and components are not made all the time. Many colors vary from batch to batch. Many established companies have components especially made up for them — and not available to the general public. The supplies of many beads and components are very limited — not unlimited. Always be prepared to make substitutions and adapt.
Play. Be a kid again. Let your imagination run wild. Try things. Try anything. If the world says your color combination is ugly, don’t listen to them. Do it anyway. Ignore all restrictions. Forget about social and art conventions.
Be Curious. Play “What If…” games. What if a different color? What if a different technique? What if a different width or length? What if a different style of clasp. Re-arrange things. Tweak. Take out a bead board, and lay out beads and findings on the board, and re-order everything — Ask yourself: More or less satisfying?
Embrace the New / Challenge yourself. Don’t do the same project over and over again, simply because you have proven to yourself that you can make it. While you might want to repeat a project, with some variations, to learn more things, too much doing of the same-ole, same-ole, can be very stifling.
Create An Imaginative Working Space / Manage Disruptions and Disruptors. You need comfortable seating, good lighting, smart organization of parts and tools and projects-in-process. Some people like music playing. If family or friends tend to interrupt you, explain to them you need some boundaries at certain times of the day or days of the week.
Evaluate / Be metacognitive. Learn from failures. You have invested time, money and effort into making these pieces. And not everything works out, or works out well. Figure out why, and turn these failed pieces into lessons and insights. Give yourself permission to be wrong. Build up your skills for self-awareness, self-management and self-assessment.
Take a break / Break your daily routine / Incubate it / Sleep on it. And if you suddenly find your productivity interrupted by Bead-Block and Artist-Block and Jeweler’s-Block, put your project down. Take a break. Mull on things awhile. Put yourself in a different environment. Take a walk. Sleep. A period of interruption or rest from a problem may aid creative problem-solving in that it lets us let go of or forget some misleading cues, thoughts, feelings and ideas.
Network / Connect With Other Jewelry Designers and Artists / Collaborate on a Project. Here you want to tap into and absorb someone else’s energy, knowledge and insights. Surround yourself with interesting and creative people. Learn different ways of knowing and doing. Get encouragement. Find a mentor. The fastest way to become creative is to hang around with creative people.
Do something out of the ordinary. Something unexpected. Or something just not done. This will shock your system to think in different ways. To see things in a new light. To recognize contradictions. Robert Alan Black gives great advice. He shouts at the blocked: Break A Crayon. He shouts again: Draw Outside The Lines. And I would add and shout: Stick your hands into a bowl full of mud or jello.
These are all great advice.
Make creativity a habit. Make it routine in your daily life.
– Keep a journal. Write down your thoughts and experiences and insights.
– As you create a new piece, keep a running written log of all the choices you are making.
– Challenge yourself. Change colors, arrangements, sizes and shapes. Create forms and new components. Think of different silhouettes.
– Expand your knowledge base and skills. Look for connections with other disciplines.
-Surround yourself with interesting things and interesting people. Get together regularly. Collaborate. Take a field trip together.
What Should I Create?
The process of jewelry making begins with the question, What Should I Create?
You want to create something which results in an emotional engagement. That means, when you or someone else interacts with your piece, they should feel some kind of connection. They might see something as useful. It may have meaning. Or it may speak to a personal desire. It may increase a sense of self-esteem. It may persuade someone to buy it. It may feel especially powerful or beautiful or entertaining. They may want to share it with someone else.
You want to create something that you care about. It should not be about following trends. It should be about reflecting your inner artist and designer — what you like, how you see the world, what you want to do. Love what you are making. Otherwise, you run the risk of burning out.
It is easier to create work with someone specific in mind. This is called backwards design. You anticipate how someone else would like what you do, want to wear it, buy it, and then let this influence you in your selection about materials, techniques and composition. This might be a specific person, or a type of person, such as a potential class of buyers.
Keep things simple and parsimonious. Edit your ideas. You do not want to over-do or under-do your pieces. You do not have to include everything in one piece. You can do several pieces. Showing restraint allows for better communication with your audiences. Each piece you make should not look like you are frantically trying to prove yourself. They should look like you have given a lot of thought about how others should emotionally engage with your piece.
There is always a lot of pressure to brand yourself. That means sticking with certain themes, designs or materials. But this can be a little stifling, if you want to develop your creativity. Take the time to explore new avenues of work.
You want to give yourself some time to find inspirations. A walk in nature. A visit to a museum. Involvement with a social cause. Participation in a ritual or ceremony. Studying color samples at a paint store. A dream. A sense of spirituality or other feeling. A translation of something verbal into something visual. Inspirations are all around you.
Final Words of Wisdom
We don’t learn to be creative We become creative. We develop a host of creative thinking skills. We reflect and make ourselves aware of all the various choices we make, the connections we see, the reactions we get, and the implications which result.
We need to be open to possibility.
We need to have a comfort level in taking the unknown or unexpected, and bridging the differences. That is, connecting what we know and feel and project to ideas for integrating all the pieces before us into a completed jewelry design. We need to become good translators, managing our choices from inspiration to aspiration to completed design.
We need to be able to hold on to the paradoxes between mass and space, form and freedom, thought and feeling, long enough so that we can complete each jewelry making project. We need to be comfortable while designing during what often become long periods of solitude.
We need to know jewelry and jewelry making materials and techniques inside and out. We need to know how to maximize their strengths and minimize their weaknesses. We need to be able to discover new ways of designing with them. It is critical that we put ourselves on a path towards greater fluency, flexibility and originality.
We must be willing to give and receive criticism.
We must be aware, not only of our desires, goals and understandings, but those of our various audiences, as well.
Be motivated by the design process itself, and not its possible and potential external rewards.
We must be very reflective and metacognitive of how we think, speak and work as jewelry designers.
We need to give ourselves permission to make mistakes.
We must design things we care about.
_________________________________________
FOOTNOTES
Besemer, S.P. and D.J. Treffinger. Analysis of Creative Products: Review and Synthesis. Wiley Online Library, (1981).
Maital, Shlomo. “How IBM’s Executive School Fostered Creativity,” Global Crisis Blog, April 7, 2014. Summarizes Louis R. Mobley’s writings on creativity, 1956.
March, Anna Craft. Creativity in Education. Report prepared for the Qualifications and Curriculum Authority, March, 2001.
Seltzer, Kimberly and Tom Bentley. The Creative Age: Knowledge and Skills for the New Economy. Demos, 1999.
Torrance, E. P. The Torrance Tests of Creative Thinking-Norms-Technical Manual Research Edition- Verbal Tests, Forms A and B-Figural Tests, Forms A and B. Princeton, NJ: Personnel Press, 1966.
Torrance, E. P. The Torrance Tests of Creative Thinking-Norms-Technical Manual Research Edition- Verbal Tests, Forms A and B- Figural Tests, Forms A and B. Princeton, NJ: Personnel Press, 1974.
Turak, August. “Can Creativity Be Taught,” Forbes, May 22, 2011.
The DESIGN PERSPECTIVE is very focused on teaching beaders and jewelry makers how to make choices. Choices about what materials to include, and not to include. Choices about strategies and techniques of construction. Choices about mechanics. Choices about aesthetics. Choices about how best to evoke emotions.
These choices must also reflect an understanding of the bead and its related components. How do all these pieces, in conjunction with stringing materials, assert their needs? Their needs for color, light and shadow. Their needs for durability, flexibility, drape, movement and wearability. Their needs for social or psychological or cultural or contextual appropriateness — an appropriateness that has to do with satisfaction, beauty, fashion and style, as well as power and influence.
This DESIGN PERSPECTIVE contrasts with the more predominant Craft Approach, where the beader or jewelry maker merely follows a set of steps and ends up with something. Here, in this step-by-step approach, all the choices have been made for them. They never learn the implications of using one bead vs. another, one stringing material vs. another or one clasp vs. another.
And this DESIGN PERSPECTIVE also contrasts with another widespread approach to beading and jewelry making — the Art Tradition — which focuses on achieving ideals of beauty, whether the jewelry is worn or not. Here the beader or jewelry maker learns to apply art theories learned by painters and sculptors, and assumed to apply equally to beads and jewelry, as well. Jewelry is judged as it sits on a mannequin or easel. Functionality is subsumed under Appeal. Things like the strap, clasp assembly and bail are merely seen as supplemental to the piece, as a frame is to a painting or a pedestal to sculpture.
The Craft Approach and the Art Tradition ignore too much of the functional and contextual essence of jewelry. Because of this, they often steer the beader and jewelry maker in the wrong directions. Making the wrong choices. Exercising the wrong judgments. Applying the wrong tradeoffs between aesthetics and functionality and context.
The focus of the DESIGN PERSPECTIVE is strategic thinking. At the core of this thinking are a series of design principles and their skillful applications. These principles go beyond a set of techniques. These principles and the strategies for applying them provide the beader and jewelry maker with some clarity in a muddled world.
Learning about Design begins with the belief that there are many different kinds of information that must come together and be applied to make a finished and successful piece of jewelry. Art. Architecture. Physical mechanics. Sociology, Anthropology and Psychology. Some Business. Even some Party Planning. It is impossible to clearly learn and integrate all this information all at once.
When all this knowledge which needs to come to bear in creating and constructing a piece of jewelry is learned haphazardly or randomly, as most people do, it becomes problematic. It becomes more difficult or too confusing to successfully bring into play all these kinds of things the beader or jewelry maker needs to know when designing and constructing a piece of jewelry in the moment.
Thus, the beader and jewelry maker best learn all this related yet disparate information in an developmental, hierarchical order, based on some coherent grammar or set of rules of design. Seemingly disparate skills are learned as interrelated, integrated clusters. By learning within this organized structure and informational hierarchy, the jewelry artist best sees how everything interrelates and comes together. The designer develops the ability to decode expressive information, and to fluently organize and arrange it. This is how disciplinary literacy is developed within the DESIGN PERSPECTIVE.
So, we begin with a Core set of skills and concepts, and how these are interrelated and applied. Then we move on to a Second Set of skills and concepts, their interrelationships and applications, and identifying how they are related to the Core. And onward again to a Third Set of skills and concepts, their interrelationships and applications and relationship to the Second Set and the Core, and so forth.
In the DESIGN PERSPECTIVE, “Jewelry” is understood as Art, but is only Art as it is worn. It is not considered Art when sitting on a mannequin or easel. Because of this, the principles learned through Craft or Art are important, but not sufficient for learning good jewelry design and fashioning good jewelry.
Learning good jewelry design creates its own challenges. All jewelry functions in a 3-dimensional space, particularly sensitive to position, volume and scale. Jewelry must stand on its own as an object of art. But it must also exist as an object of art which interacts with people (and a person’s body), movement, personality, and quirks of the wearer, and of the viewer, as well as the environment and context. Jewelry serves many purposes, some aesthetic, some functional, some social and cultural, some psychological.
The focus of the DESIGN PERSPECTIVE is on the parts and their construction. How do you choose parts? How should they be used, and not be used? How do you assemble them and combine them in such a way that the whole is greater than the sum of the parts? How do you create and build in support systems within your jewelry to enable that greater movement, more flexibility, better draping, longer durability? How do you anticipate stresses and strains? How do you parsimoniously use all these parts, making them resonate and evoking that emotional response from your audience to your style, vision and creative hand that you so desire?
The beader and jewelry maker are seen as multi-functional professionals, similar to an architect who builds houses and an engineer who builds bridges. In all these cases, the professional must bring a lot of very different kinds of skills and abilities to bear, when constructing, whether house or bridge or jewelry. The professional has to be able to manage artistic design, functionality, and the interaction of the object with the person and that person’s environment.
Women don’t just wear pieces of jewelry — they inhabit them.
Buying a piece of jewelry for yourself — a necklace, a bracelet, earrings, a brooch, something else — isn’t a task easily given to someone else. It’s often not a spur of the moment thing either. You just don’t rush off to the local boutique or the local Wal-Mart, grab whatever you see, and go home.
I’m not talking about that impulse buy during your leisurely visit to the mall. I’m referring to purchasing those pieces of jewelry you know will have to do a lot of the hard work to accessorize your wardrobe and help you get the compliments and notice of your family, friends and co-workers you comport with and compete with each and every day.
No, buying a piece of jewelry for yourself is a multi-purposed moment, one which must be thought through carefully and one which must be savored. Lest you buy the wrong piece. That doesn’t really go with what you intend to wear. Or is over-priced. Or poorly made. Or conveys the wrong impression about status. Or is out of fashion. Or something one of your friends already has.
The jewelry you buy has to conform to quite a long list of essential criteria before you could ever think of buying it. It is something you will wear more than once. As such, it is your companion. Your necklace is not merely lying around your neck. Or your bracelet around your wrist. Or your earrings dangling from your ears.
Jewelry can cause you to lose face with others. It can irritate or scratch your skin, or get caught up in your hair. It might weigh you down or stretch or tear your ear lobes. Jewelry can break without warning in the most unexpected and embarrassing of places. It can get caught on things, sometimes hurting you in the process.
Jewelry conveys to the world something about who you really are, or think you are. As such, jewelry is very personal. Your private, innermost, most soul searching choices made very public for all to see.
As you caress it, as you touch the smooth or faceted or creviced beads and metal parts or the clasp or the material the beads are strung on, when you twist and move the piece within your hand, you are confirming to yourself the extent to which your jewelry is doing its job.
When you buy new jewelry, the dilemmas multiply. How will the new compare to the old? Will it be able to handle all these responsibilities — looking good, representing you, fitting in with your wardrobe, meeting the expectations of others? Like divorcing, then remarrying, changing your jewelry can take some time for readjustment.
And you do not want to be seen as noncommittal to your jewelry. This would sort of be like going to a hotel, but not unpacking your suitcase while staying in the room. Conveying some sort of social or psychological distance from your jewelry can be very unsettling for others.
So you need to inhabit it. You need to inhabit your jewelry, wear it with conviction, pride and satisfaction. Be one with it.
Inhabiting jewelry often comes with a price. There becomes so much pressure to buy the “right” pieces, given all the roles we demand our jewelry to play, that we too often stick with the same brands, the same colors, the same styles, the same silhouettes. We get stuck in this rut and are afraid to step out of it.
Or we wear too many pieces of jewelry. The long earrings, plus the cuff bracelets on both arms, plus the head band, plus the hair ornament, plus the 7-strand necklace, plus the 5 rings. We are ever uncertain which piece or pieces will succeed at what, so hopefully, at least some combination or subset of what we wear will work out.
In a similar way, we wear over-embellished pieces — lots of charms, lots of dangles, lots of fringe, lots of strands. Something will surely be the right color, the right fit and proportion, the right fashion, the right power statement, the right reflection of me.
And our need to inhabit our jewelry comes with one more price. We are too willing to overpay for poorly made pieces in our desperation to have that right look. The $100.00 of beads strung on elastic string. The poorly dyed stones which fade in the light. The poorly crimped and overly stiff pieces with little ease for accommodating movement and frequent wear.
It is OK to inhabit our jewelry. In fact, it is necessary, given all we want jewelry to do for us. But we need to be smart about it. We need to learn to recognize better designs and better designers.
To what extent do (and should) business concerns influence the artistic choices bead and jewelry artists make?
I’d say “A Lot!”
But this isn’t what a lot of artists like to hear.
You have to market to audiences. You may have to standardize things to be able to make the same thing over and over again. You may have to work in a production mode and repeat making certain designs, rather than freely create and design anew each time. You have to price things so that they will sell, and you have to price things so that you can make a sufficient profit. You can’t undersell yourself, like offering discounts to family, friends and co-workers.
You have to conform to prevalent styles and colors and forms. You have to make things which will photograph well for sale online. You have to make things that local stores want and are willing to buy or put on consignment. You may end up with a lot of “one size fits all.”
You find that if you want to make your jewelry design into a successful business, you may have to compromise with yourself, your artistic drives and sensibilities. You may have to limit what you offer. In order to make that sale. In order to make a profit. And stay in business.
Business involves: – Putting your artwork on a sound cost/revenue footing – Developing market-driven strategies (as opposed to product-driven ones) – Pricing your pieces for sale – Implementing various selling strategies – Compromising artistic and design choices, in the interest of the business — Understanding how the creative marketplace works
Over and over again, I have seen one jewelry artist after another fail as a business. The reasons repeat themselves as well.
1. A reluctance to learn how to conduct oneself as a business.
Many jewelry artists get so excited after selling their first piece, that they think they don’t have to get too involved with business principles. They understand their “business” as a “necklace-by-necklace” endeavor. Make something, sell it. Doesn’t matter what the price. Doesn’t matter to whom. Doesn’t matter if making the piece in the first place is in line with the resources you currently have to make the piece, or will drive you in debt in order to get those resources.
Artists need to focus on what’s called “Velocity” — the rate of sales, rather than the number of sales. You need to have in place sufficient strategies for keeping the money turning over at a constant rate. If you can’t maintain this rate, you go in the hole. You make something. You sell it. You reallocate the money you just made to reinvesting in more inventory, replacing the inventory you sold, evaluating the pros and cons of the sale that just happened, adjusting accordingly, and strategizing how to keep this velocity going at a constant, or ever-increasing, velocity.
And artists need to keep good records, and implement good accounting principles.
2. Gets Bored.
People who get started are very excited. They’ve made a lot of pretty pieces, and someone has bought some of them. But then you need to leave your creative mode, and enter a production mode. You need to discipline yourself to make the same things over and over again. Many artists quickly lose interest.
3. A fear of marketing your own things
You won’t succeed without marketing. Marketing is more than advertising. It includes all forms of self-promotion. It includes doing research on your markets and market niches, how to reach them, how to get their attention, how to get them to translate this attention into needs and wants and desires, and how to get them to part with some money.
Many artists are shy about self-promotion. Time to train yourself, if this is you, to get over it.
4. Trying to please all audiences
When people get started, they are reluctant to use the “No” word. They want to please everyone. But when you get started, you can’t. It will put you out of business.
Let’s say you have some jewelry that is predominantly purple. Someone at work loves the jewelry, but asks if you can make it in red. If you don’t have an inventory of red beads, and will have to go out and buy them, it may make this sale foolish, from a business standpoint. You can’t buy just one bead at a time; you need to buy strands or packages of these beads. You will have a lot left over.
When you start, you need to pursue a strategy of depth, rather than breadth. You want to buy a limited number of pieces in large quantities to get adequate price breaks. So, initially, your designs will be limited, as well. You need to be able to say No. No to your family. No to your friends. No to the people you work with.
In my experience, such as the situation with red vs purple beads above, when you say No, the potential customer tends to make a face. Pitiful. Angry. Frustrated. Sad. Pleading. If you can wait 60 seconds, in almost every case, the customer stops making this face, and says, “OK, I’ll take what you have in purple.” But so many jewelry artists can’t wait that 60 seconds.
And don’t give these people discounts. They’re already getting it cheaper, than if they bought the same piece in a store. One major way your business will get built up is word-of-mouth. You don’t want some of that information to include extremely low price expectations that will never be self-supporting in your business.
5. Doesn’t do homework on the competition
You need to understand how other jewelry artists you compete with function as a business.
How do they define their markets? How do they price things? What kinds of inventory do they carry? What kinds do they NOT carry? Where do they advertise? How do they promote themselves? How do they define their competitive advantage — that is, all the reasons people should buy from them, rather than from anyone else, like you? Where do they sell things — stores, shows, fairs, online, etc? What seems to work better for them?
You can find a lot of this out by Googling. You can look for jewelry designers. Directories of jewelry designers. You can plug in a jewelry designer’s website, and see where they are listed, and who lists them.
6. Doesn’t Educate Self About The Business Marketplace
You already know that you want to sell your pieces. But why would someone else want to sell them for you?
What’s in it for that gallery or consignment shop or boutique? How do they make money? What’s their customer base? Why do they shop there? What are their preferences? What is the feel and flavor of what the businesses carry in their shops?
Most businesses spend years establishing a reputation and brand. They attract customers who, in turn, are attracted to that brand identify. So they are looking for certain similar things they already carry or fit with the theme or perspective of their business. But, at the same time, they don’t want the exact same things. They already have those things. They want things that coordinate and compliment. If your style is avant garde, and the business style is Victorian romantic, there is not going to be a fit. It won’t work out for you in this location.
“She’s CHEATING ME!” the woman from Rhode Island screamed into the phone. She could hardly catch her breath, the anger overtaking her ability to explain why she was calling.
“I read your article about Pricing and Selling, and I’m not getting my $70.00 for my piece.”
She didn’t have to say anymore. I knew right off the bat she was talking about CONSIGNMENT.
I recognize the anger. The frustration. The feeling that someone put something over on you, and you’re powerless to correct the situation. You don’t know what to do. You know the sweat, time and cost you put into all the pieces you let some stranger have, and now what do you do?
“I put 10 of my pieces of jewelry in her shop in Northern Rhode Island — not a big shop, no sales, except, this one piece sold, not in a major place,” she continued, taking breath after breath, to get it all out, in some way that made sense, and some way that kept her from losing it.
“What do I Do?” “She sold my piece for $70.00, and didn’t give me my money?” “Should she have given me my money right away?” “Should I take my jewelry out of her shop?” “Should I never do consignment again?” She peppered me with questions, not waiting for an answer.
She indicated that the store owner told her that she paid her artists 30 days after a sale. Her customers had 30 days to return something. If the store owner paid before that time, she would be out the money. Store owners can set whatever policies they want, and in this case, I told the woman it was reasonable to wait 30 days, given the policy.
Of course, it had already been 7 weeks.
“Should she call her?” Her husband told her not to call yet. He didn’t want her to make waves, or ruin this opportunity to sell her jewelry.
“Call her,” I said. If the store owner said 30 days, then 30 days it should be.
Consignment may be a necessary evil, especially when you are getting started in the jewelry making business. But consignment is not the best situation to be in. Most stores that accept consignment do not understand the consignment business. As a result, when the time comes to pay the artists, there’s no cash flow.
In Consignment, the store is at greater risk than the artist. The store has to make space available for the pieces, and forgo the opportunity to get something else in that retail-real-estate that might do better. The store has to display the pieces, and keep them clean and presentable. The store has to train its sales staff so that they have sufficient information and motivation to make the sale. And, of course, there’s the tracking and accounting that goes with every consignment piece on sale.
Your best clue to whether a particular consignment situation is a good or better one, is the percentage split between the store or gallery owner and the artist. Given the level of risk each party assumes, the optimum distribution is 60/40 with the store or gallery getting the larger amount. But if the split is 40/60 or 50/50, this would be a acceptable sign as well.
However, when the split is 70/30 or 30/70 or outside this 60 and 40 range, yellow flags should go up. This shows that the store or gallery owner is not aware of the level of risk in their business. You probably won’t get paid on time, and not get paid without a lot of time spent yelling on the phone. Your pieces won’t be maintained. They won’t be displayed in a prominent place. No one will be trained or motivated to sell your pieces.
Just because you confront a potentially bad consignment situation doesn’t necessarily mean that you should walk away. There are a few prominent boutiques in Nashville that offer a 70/30 split between the store and the artist. They rarely pay their artists when the pieces sell. It takes a lot of screaming, “Bloody Murder!” before you get paid. But these are very prominent shops. Letting other stores and galleries know that you have pieces in these shops will open many doors for you. You might view the delayed payments and the effort to get your money as “marketing expenses.”
Other reasons you might settle for a bad situation: – You’re just getting started, and saying your pieces are in a shop anywhere has some marketing cache that goes with this – You can direct customers to this shop. At least you have a place to send people. You might not have a central base from which to work. Your main business might be doing craft shows, and here you can direct people to your jewelry between shows. – This might be the only game in town.
But otherwise, if consignment doesn’t have some added value for you, you want to minimize your consignment exposure.
When you negotiate consignment terms with a shop, try to:
Get a feel for the amount of consignment they do (and how long they have been doing this), the range of artists, the range of types of merchandise on consignment, and the types of customers they have
Get a 60/40, 50/50 or 40/60 split
Work with store or gallery owner on final retail pricing of your pieces.
Get a written contract
Get in writing if possible, but an oral agreement would suffice, to convert the situation to “wholesale terms”, if you pieces sell well. (Be sure to define what “selling well” might mean.)
Determine a specific date when to take your pieces out, or trade them out for new pieces. Usually it’s good to trade them out every 3–6 months.
Determine exactly how and when you will get paid, after any one piece sells. A 30-day waiting period is reasonable.
It always amazes me about how many people (studies show that 25% of the population) think that when their sterling silver jewelry turns black, it’s Dead and they throw it out. So, especially if you are selling your stuff, you always need to educate people about cleaning sterling silver.
Sterling Silver tarnishes from the interaction of silver and sulfides in the air. First the tarnish will take on a golden hue, and eventually, it will turn the piece black. This is a natural process.
Higher sulfide levels are associated with humidity and/or pollution. Remember, the more humid the climate, the faster sterling will tarnish. On a summer day in Miami, Florida, all you have to do is walk out the door and the sterling starts turning black very quickly.
Sterling Silver will polish up by rubbing or buffing it with a soft cotton cloth. The best cloth to use is a piece of denim. Yes, rub it on your pants.
Jewelry stores either sell or give away what is called a Rouge Cloth. This is a little bit gimmicky, in that what is taking the tarnish off is the rubbing, not the rouge. In most cases, denim works better. Both denim and the rouge cloth are 100% cotton. Denim has ridges on it. The rouge cloth is smooth.
The ridges of the denim get inside the links on chains. The ridges get into the crevices in your jewelry. The rouge cloth is terrible for chains. However, if you want the crevices in your jewelry to remain black, the rouge cloth, which is a smooth surface, will work better.
You might also invest in what is called a Sunshine Cloth. Many bead stores and jewelry stores sell these. The Sunshine Cloth has a chemical in it that eats the tarnish but does not harm gemstones. And that’s its greatest selling point — it does not harm gemstones.
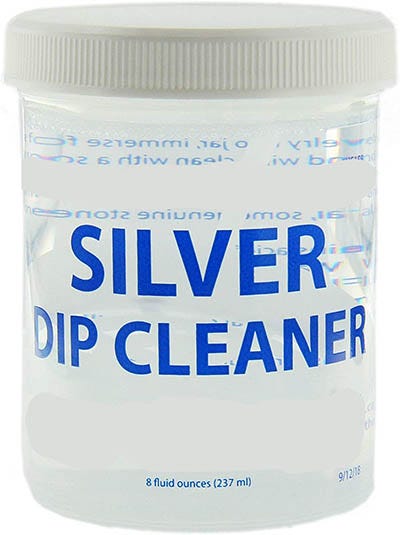
Sterling Silver dips are fast and easy, but are not the best choices here. Ideally you would never use a dip, or only use a dip in an emergency. First, many dips will take the color and the polish off many gemstones. Second, the dips work by pulling silver out your jewelry and creating a silver salt. The salt is usually white, sometimes black. This salt or residue gets caught inside the links of chains. It gets caught in the crevices in your jewelry. It is difficult to pick it out.
If you do have to use a dip, the way you use this dip is that you take your piece of jewelry, and put it in, and immediately take it out and rinse it off. If not clean enough, repeat. Never leave your jewelry in the dip. Then buff your jewelry with a soft cotton cloth. The buffing brings out more of the shine, and helps take off any residue left on the piece.
Most silver polishes do not work well with sterling silver jewelry. Repeated uses usually cut the shine and leave a white color to the sterling silver in jewelry. They primarily are used for silver plated kitchen ware and utensils. One exception, which I like, is Tarni-Shield — a silicon polish. Tarni-Shield will keep the piece of jewelry shiny until the shield wears off. We primarily us this product when we make a lot of jewelry that has to be on display for a long time, such as when we’re selling our pieces at an arts and crafts fair.
There are lacquer dips which coat your jewelry in order to keep the shine. (This is similar to painting clear nail polish on your jewelry). The lacquer, however, wears off unevenly, allowing some places to tarnish and others not. As the lacquer coating loosens in some areas, the silver will tarnish underneath it, but this area will still be inaccessible to your polishing cloth, until that lacquer actually chips or peels off. This can leave your pieces unsightly. If the piece is a chain, or a filigree, the lacquer will form a film within the openings and cracks. This obviously makes the piece ugly.
If you have some heavy duty tarnishing to deal with, then the easiest thing to do is to make a paste of baking soda and warm water, use a soft bristle toothbrush and scrub and rinse.
Even dry baking soda will take the tarnish off. You ruby your jewelry back and forth into a pile of dry baking soda, then use a cosmetic brush to pat the jewelry to get the powder off.
The effects of the baking sod, whether dry or as a paste, are almost instantaneous. You can also use baking powder. You can use baking soda toothpaste. If you have a large tea-pot, you can make a dip instead of a paste.
Some people sell set-ups using baking soda and tin foil, or baking soda and a sonic bath. These are gimmicks. What’s taking the tarnish off is the baking soda. That’s all you need.
Some Additional Advice
Never use a cleaner with ammonia or sulphur in it.
Sterling Silver is best stored in an air-tight, zip lock plastic bag, and in a drawer or somewhere out of the light. When you put the silver into the plastic bag, be sure to push out all the air before sealing the bag.
[Note: Sometimes you can restore that oily polished look on gemstones by rubbing them with men’s black shoe wax.]
Kathryn was so very excited! She had just finished speaking with a reporter for a local arts magazine. He wanted to do a story about her as a jewelry designer. The magazine was 4-color, very substantial and distributed widely in her hometown area. Moreover, the reporter promised he’d include 5 pictures in the article. They made an appointment to meet in the middle of next week. And Kathryn was thrilled!
The reporter met her at her home. She greeted him, somewhat giddy, not sure what to say, or say next. She thought she would let him lead the conversation and interview. She gave him a short tour of her house — her beading room, her den, her living room. The reporter marveled at her collection of Pez dispensers and puppets. A short time later, a photographer joined them.
After 2 hours, the reporter and photographer had left. Kathryn was satisfied that they had seen several of her bead-woven jewelry pieces. She felt that she had given them a good history of how she got into jewelry making. The photographer had taken at least 20 shots of her around the house. The article was to come out in 3 weeks.
Three weeks later, and there it was.
A 4-color article. In a prominent local art magazine. About her wonderful Pez collection. And the long staircase from the street level to the living level in her house. And all her puppets. And information about her moving from Connecticut to Tennessee and having lived in Georgia. And she had three children.
And no pictures of her jewelry.
Or her bead room.
Or her making jewelry.
And no pictures, surprisingly, of her Pez collection or her puppets, given how prominently these were featured in the article.
There was a picture of her staircase. Three pictures of her sitting on a couch or chair. And a picture of a treasured vase, and quite beautiful.
Kathryn had these high hopes — Now Nashville will know about her jewelry making and design prowess.
Until she saw the article.
And knew now she’d be known for Pez dispensers.
The opportunity to get featured in a newscast or newspaper or magazine doesn’t come around often. However, when the opportunity does knock, this can have a big and positive impact on your jewelry making business. But you have to be prepared.
You Have To Remain In Control
You have to remain in control — even if this leads to a little tension between you and the reporter.
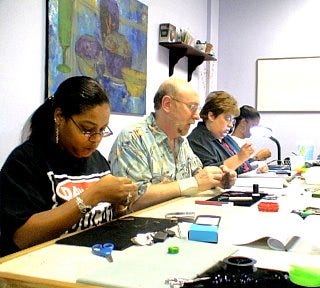
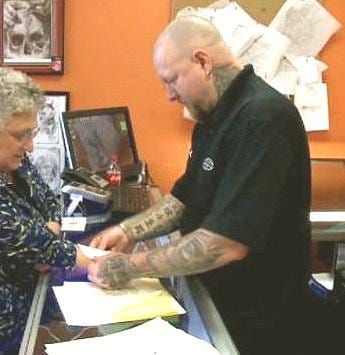
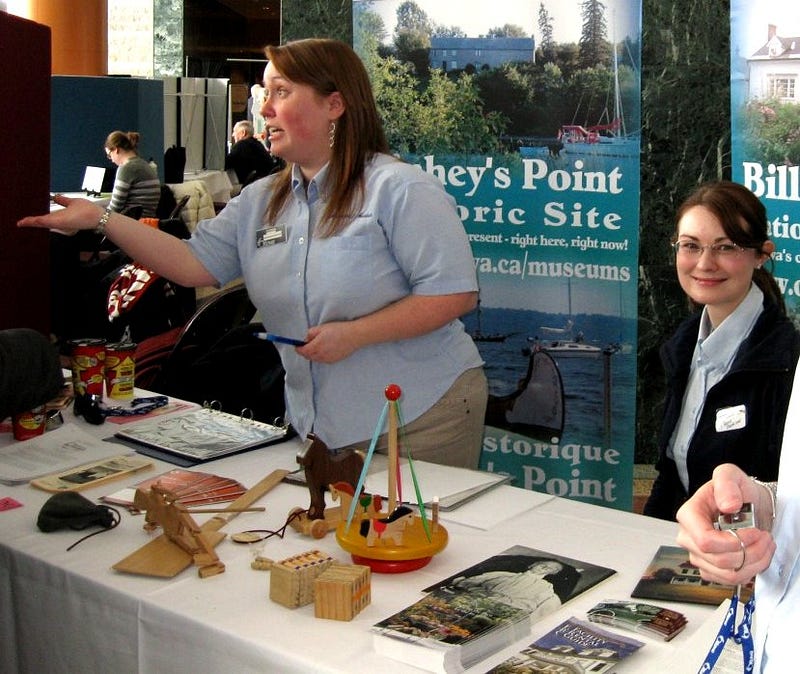
Jewelry Designers At Workshop with Warren Feld, Photo, Feld, 2013
First, pre-prepare.
MAJOR POINTS: Determine the 4 or 5 or so major points you want to make about yourself as a designer and about your jewelry.
No matter what questions the reporter asks, turn the conversation back to your major points. During the interview, keep making the major points. When the reporter returns to his notes to quote you, this will be all the material he has to draw from.
WHAT YOU SHOW AND DON’T SHOW: If you give a reporter a tour of your home, only take him to the design-relevant points of interest. Where you make the jewelry (or other product or project). Where you display your work. Where you have people try on your jewelry or use your products. Where you get inspiration for your designs. And if there’s a photographer or cameraman there, direct and narrow their attention and focus as well.
WHAT PICTURES WOULD BE MOST STRATEGIC: Pre-think what will be the 5 or so most strategic pictures that should be taken. Definitely have an “action” shot that shows you making or manipulating your designs. Perhaps another “action” shot that shows you fitting someone with your product, or them using one of your designs. Have some of your products or projects “staged” so that they are photo-ready, with great background, foreground and pedestal. Don’t wait to take your product out of a box or to boot-up your computer to show your work. If what you design is very detailed or uses very small parts or objects, these might not photograph well. Show the photographer the parts of your work that lend themselves to detailed close-ups.
Make your points. Get your images.
Second, set the stage.
YOU SHOULD BE INTERVIEWING THEM AS MUCH AS THEY WILL BE INTERVIEWING YOU: When the reporter (and photographer or cameraman) arrives, butter them up, and find out how deep and wide their knowledge is about the design work you do. If they only have a shallow understanding, educate them. How do you find the parts? How do you determine how the pieces or projects should be constructed? Do you use specialized tools? How does someone learn to do what you do?
Also, ask them about the “audience.” What kinds of things do they think that their “audience” would most like to know about the design work you do?
Given all the things you have learned from them, you might want to modify parts of your game strategy.
Third, before they begin, ask for tips.
Get them to prepare you so that you look the best, your design work will look its best, your voice will sound the best, and so forth. They are the experts. Use their expertise.
If this is getting filmed, ask about how you should stand, (or sit), the direction you should look at, and any do’s and don’ts, as they see it.
What kinds of things do they like to see/hear in an interview?
Last, when you are done, ask to get a copy.
Be sure you will be sent copies of the written articles, or DVD or video copies of any filming. Don’t assume they will automatically send you something.
Don’t be self-conscious. Don’t think all this will make you seem too pushy.
Remember: Everyone will be happy if the story comes out great!
Often, I have found, creative-types can be shy when it comes to self-promotion and marketing.
If you are a jewelry designer who has ambitions to have your work publicized in books or magazines, or to be accepted into a juried show or exhibit, or to sell your things in a store or gallery, you need to be able to promote your work.
ASK YOURSELF THESE QUESTIONS… Write Your Answers Down On A Sheet of Paper
What insights, from your own experiences, can you offer your fellow jewelry designers about self-promotion?
What kinds of things help you to overcome any fears about marketing your work?
How do you handle criticism and other rejection like getting the dreaded “No”?
From an article I wrote….
Jewelry designers often find a self-satisfaction in working intensely on a project, often in isolation or solitude. But when it comes to tooting their own horns — this is not as easy or satisfying for them. There is a discomfort here. You might want to show your pieces to others, perhaps submitting them for review or a juried competition, or perhaps wanting a store or gallery to accept your pieces for sale.
Then humility kicks in. Or perhaps a lack of confidence in yourself. Or a fear of criticism. Or a rejection. Hearing: No, we don’t want your pieces.
We don’t want to appear desperate for a sale, or too eager for acceptance.
But, if you don’t believe in yourself and your products, no one will. Your fantasy of striking out on your own will never materialize, if you don’t find it within yourself to do some self-promotion.
Promote Your Value
And the first step is understanding and recognizing:
that to promote yourself means promoting your value.
Your jewelry has VALUE to them, why….?
If something has value to someone, then they typically want to know about it. Your jewelry has value to them because it solves a problem for them. It might make them happier, more beautiful, more enriched, more satisfied, more powerful, more socially accepted, more understanding of construction or technique or art and aesthetics. It might be better than other jewelry they see or wear or think about buying.
For a store or gallery, your jewelry might be more saleable, more attractive as displayed, better constructed, more artistic, more stylish or fashionable, a better fit with their customer base, with good price points.
You promote the value of your jewelry to your audience. You do not have to brag. You do not have to be shameless. You do not have to do or say anything embarrassing.
Just speak the truth about value.
Share examples of your work and what you have done, not your ego.
Speaking
And that brings up the second point — speaking.
People who are more comfortable speaking about themselves and their products tend to be more successful in their careers.
Products don’t sell themselves. People need to be nudged.
This “speaking-about-themselves and their products” is a basic communication process. This communication process is a process of sharing information.
You want to educate the right people, in the right way at the right time. You want to speak about who you are, and what you make. The values your jewelry has to offer them. And how you would like to develop your relationship — whether designer/client or designer/retailer or designer/jury — so that you may both benefit.
Fundamentally self-promotion is about communication. Communicators frame the narrative. Communicators start the conversation. They begin on favorable terms.
They would not say: Would you like to see my jewelry?
Instead, they would say: I have jewelry you are going to love.
Be Relevant
And this brings up the third point — be relevant.
Know your audience, what their needs are, what their problems are that need solving. You may have created the original piece to satisfying some personal yearning and desire. But if you want someone to buy the piece, wear the piece or sell the piece, you need to anticipate why. Why would they want to buy, wear, review or sell your piece of jewelry?
Do not assume they will figure all this out on their own. You will need to help them along in this process. You will need to communicate about the value your jewelry will have for them. You will need to do some self-promotion.
Inspire People
The last point — inspire people to spread your message.
Your best marketing and promotion will be what is called “word-of-mouth”. So you want to create supporters and fans and collaborators and colleagues. And you want them to be inspired enough about you, your creativity and your jewelry, so that they tell others about you. You inspire your current network of family and friends. You might make a presentation or teach a class. You might share images of your work on social media like FaceBook or Instagram or Twitter or Pinterest. You want to regularly connect with people, so that you and your work are frequently in their thoughts.
There are many self-promotion strategies that you can do. You don’t need to do everything at once. You might try one or two ideas first, and do those, then pick a third, and so on.
Self-Promotion Strategies
Some Self-Promotion Strategies That Have Worked Well For Others
1. Wear your jewelry all the time, and don’t be shy about saying you made it!
2. Have attractive business cards made, perhaps a brochure. Vistaprints online is a good place to start.
3. Have an active presence on social media, particularly Instagram, FaceBook, Twitter, and Pinterest; participate in discussions; get people to click on those LIKE buttons (or similar thumbs-up registers) next to your images and your discussions.
NOTE: When a person hits the LIKE button or adds a comment, look them up on the social media site. Find something about their background or their own creative work, and respond to them: (a) First, re-state their name at the top of your response, (b) thank them for the like or comment, (c) comment on what you learned about them, (d) type your name and perhaps a link to your website or your social media site.
4. Have a website, either as a “billboard”, or as a full-fledged e-commerce site
5. Get your website listed in as many online directories and search engines as you can
6. Generate an emailing list and use it regularly, such as sending out a newsletter; get into the habit of asking people if you can add them to your mailing list
NOTE: Try to maintain some more routine follow-up contacts with at least 50 people on your emailing list. Always point out something of interest about them to you.
7. Collect testimonials about your work, and post them publicly
8. Always speak and act passionately when discussing or showing your work.
NOTE: You don’t want to be sales’y. Simply show your excitement and passion and story about making the piece.
9. Organize your own discussion groups on FaceBook or LinkedIn, or begin a blog (WORDPRESS is a good place to start a blog)
10. Post video tutorials or videos showing you making things on YouTube
11. Submit images of your pieces to bead, craft and jewelry magazines
12. Teach courses, either locally, or as a connection with one of the many websites promoting teachers online
13. List yourself with websites that list custom jewelry makers for hire, such as Custommade.com
14. If your jewelry has done well for a store, convince them to carry more of it and let it take up more display space
15. Doing the occasional craft show, bazaar or flea market is also a good form of advertising and getting your message out to a large number of people you probably would never have met otherwise
16. Create a good, rememberable image to use as your avatar, on such websites as FaceBook
17. Follow up with customers and contacts, such as after a purchase, or after someone accepting to include you piece in a magazine, or sell their pieces in a shop. Thank them. Reinforce your personal brand with a short comment about the value of your pieces for them.
18. Have a clear personal style that you can point to in your jewelry, and that you can speak about.
19. Have a clear idea of what is called your “competitive advantage”. What are those 5–10 things about you and your work that sets you apart from, and perhaps makes you better than, the competition.
20. Search for companies or people that may want to see or buy your work. Use directories on Yahoo, Yelp and Google. Use LinkedIn.com. Search Twitter looking for people who are saying they need custom jewelry work done.
21. Network with other jewelry designers, both in your local area, as well as online. Ask for feedback on the self-promotional activities you are doing. Have any of these worked well for them? Are they doing other things you haven’t thought of?
22. Get out of your studio and meet people in the flesh.
23. Attend trade shows, networking events and charity events, or other types of places where your clients might also attend.
24. Offer something — one time only — for free. A free class, a free repair, a free pair of earrings.
25. Publish or self-publish a book or book-on-CD, and promote that
26. Develop your “elevator story”. Pretend you are stuck in an elevator with someone, and you have 30 seconds to say something about yourself which is very impressionable and relatable. This will prepare you for the frequently asked question: What do you do?
In this article, I discuss critical choices jewelry designers need to make when doing craft shows. That means, understanding everything involved, and asking the right questions.
[Pardon the all capital letters used below in the article. This is a script of a webinar I do.]
Learn How To… …Find, Evaluate and Select Craft Shows Right For You …Set Realistic Goals …Compute a Simple Break-Even Analysis …Best Way to Develop Your Applications and Apply …Understand How Much Inventory To Bring …Best Promote and Operate Your Craft Show Business
Doing craft shows is a wonderful experience. You can make a lot of money. You meet new people. You have new adventures. And you learn a lot about business and arts and crafts designing. That’s how I got started at Land of Odds. We made up a lot of jewelry. We put together some glass covered display boxes. We set up for the public, hoped for great weather, and prayed that our spread-the-word campaign would pay off. And it did. We repeated our success over and over again, with only a few exceptions — what we call “learning experiences.”
16 LESSONS I LEARNED DOING CRAFTSHOWS How To Find Them Lesson 1: Not Every Craft Show Is Alike Lesson 2: Research All Your Possibilities Lesson 3: Know Which Craft Shows Are For You, and, Which Are NOT For You Lesson 4: Set Realistic Goals — Breakeven Analysis Lesson 5: Get Those Applications In Early
How To Operate At Them Lesson 6: Promote, Promote, Promote Lesson 7: Set Up For Success Lesson 8: Bring Enough Inventory To Sell Lesson 9: Sell Yourself And Your Craft At The Show Lesson 10: Make A List Of Things To Bring Lesson 11: Be Prepared To Accept Credit Cards Lesson 12: Price Things To Sell, Minimize Discounting and Haggling Lesson 13: Keep Your Money Safe — Record Keeping Lesson 14: Focus Your Strategies For Generating Follow-Up Sales Lesson 15: Take Care Of Yourself Lesson 16: Be Nice To Your Neighbors
i. Final words of advice ii. Resource links
Lesson 1: Not Every Craft Show Is Alike
IT IS VERY IMPORTANT FOR ANYONE THINKING ABOUT SELLING AT CRAFT SHOWS, FESTIVALS, BAZAARS, MARKETS, OR SIMILAR SETTINGS TO BE SMART ABOUT IT. THAT MEANS, UNDERSTANDING EVERYTHING INVOLVED, AND, ASKING THE RIGHT QUESTIONS.
THERE ARE MANY ADVANTAGES TO DOING CRAFT SHOWS. YOU CAN MAKE GOOD MONEY. YOU CAN JUMP-START AND ENHANCE YOUR REPUTATION YOU CAN LEARN A LOT OF GOOD BUSINESS TRICKS AND FIND OUT ABOUT A LOT OF GOOD RESOURCES IF,… AND THAT’S A BIG, “IF”! YOU KNOW WHAT YOU’RE DOING.
ALL TOO OFTEN, JEWELRY DESIGNERS WHO WANT TO DO CRAFT SHOWS HAVE NOT DONE THEIR HOMEWORK. THEY HAVE NOT RESEARCHED AND EVALUATED WHICH SHOWS TO DO, AND WHICH NOT TO DO. THEY HAVE NOT FIGURED OUT HOW BEST TO SET UP THEIR BOOTHS AND DISPLAYS. THEY ARE CLUELESS ABOUT WHAT INVENTORY TO MAKE, AND TO BRING, AND HOW TO PRICE IT. THEY ARE UNPREPARED TO PROMOTE, TO MARKET AND TO SELL.
MEET ROLAND AND ROLANDA. NEW TO THE JEWELRY DESIGNING TRADE.
WHEN THEY STARTED, THEY DECIDED TO APPLY TO EVERY LOCAL CRAFT SHOW AND FESTIVAL AND FLEA MARKET THEY COULD FIND. THEY SET UP AT THE ST. BERNARD’S FESTIVAL. AND THE METRO ARTS COMMISSION “IN THE PARK” PROGRAM, AND THE SOUTH 2ND STREET FLEA MARKET. AND THE FLEA MARKET AT HOUSER LAKE. AND THE TENNESSEE ARTS COMMISSION FAIR. AND THE CRAFT SHOW OF THE AMERICAS.
ROLAND AND ROLANDA DID NOT UNDERSTAND THAT EVERY CRAFT SHOW WAS NOT ALIKE. THEY WERE NOT PREPARED FOR THE CONFLICTING DEMANDS. AND THEIR BUSINESS SUFFERED FOR IT.
CRAFT SHOWS AND SIMILAR VENUES ARE PLACES WHERE YOU CAN BRING YOUR MERCHANDISE, SET UP SOME KIND OF DISPLAY AND SELL TO PEOPLE WALKING BY. CRAFT SHOWS ARE A GREAT WAY TO MAKE MONEY. PEOPLE COME TO CRAFT SHOWS TO BUY. CRAFT SHOWS ARE A GREAT WAY TO GET BROAD EXPOSURE TO A LARGE CUSTOMER BASE. THEY ARE A GREAT WAY TO JUMP-START, RE-START AND RE-ENERGIZE YOUR JEWELRY DESIGN BUSINESS. AND, SOMETIMES YOU WILL MEET PEOPLE THERE WHO OWN BUSINESSES WHERE THEY WANT TO BUY YOUR ITEMS FOR RE-SALE.
CRAFT SHOWS ALLOW YOU TO HAVE LITTLE INVESTMENT IN OVERHEAD, LIKE RENT, INSURANCE AND THE LIKE THAT COMES WITH A PHYSICAL STORE. CRAFT SHOWS MEANS YOU DO NOT HAVE TO SHARE YOUR PROFITS WITH A STORE OR GALLERY.
NOT EVERY CRAFT SHOW IS ALIKE. THERE ARE: ARTS AND CRAFTS SHOWS FLEA MARKETS AND BAZAARS FESTIVALS AND FAIRS JURIED VS. OPEN INDOOR VS. OUTDOOR HOLIDAY OR THEMED LARGE VS. SMALL OPERATIONS WALK-BY-BOOTH SETUPS VS. WALK-IN-BOOTH SETUPS MIXED MERCHANDISE VS. JEWELRY ONLY SHOWS
ARTS AND CRAFTS SHOWS ONE TYPE IS AN ARTS AND CRAFTS SHOW. THESE ARE PROFESSIONALLY PRODUCED SHOWS WHICH PROMOTE THE SALES OF HANDCRAFTED ART AND OTHER CRAFT ITEMS. THESE CAN BE INSIDE OR OUTSIDE. YOU FIND THEM IN A WIDE ASSORTMENT OF SETTINGS, FROM PARKS TO COMMUNITY CENTERS TO SHOPPING MALLS. SOME FOCUS ON ART TO THE EXCLUSION OF CRAFT. OTHERS HAVE A BROADER FOCUS.
THIS TYPE OF SHOW WORKS WELL FOR JEWELRY ARTISTS. ARTS AND CRAFTS SHOWS ATTRACT A LOT OF PEOPLE WHO EXPECT TO PAY FOR QUALITY AND WHO COME TO BUY. BUT BE CAREFUL THAT THESE SHOWS ARE NOT “TOP-HEAVY” WITH JEWELRY VENDORS, UNLESS, OF COURSE, IT IS A JEWELRY-ONLY SHOW. THE APPLICATION PROCESS IS OFTEN FORMAL, AND SOMETIMES JURIED. SOME ENTRY FEES ARE VERY LOW. OTHERS ARE VERY HIGH.
FLEA MARKETS AND BAZAARS FLEA MARKETS AND BAZAARS ARE TYPICALLY ORGANIZED BY CHURCHES, SCHOOLS, CLUBS OR ORGANIZATIONS, OFTEN WITH A FUND-RAISING PURPOSE IN MIND. THERE ARE ALSO BUSINESSES IN MANY COMMUNITIES THAT, FOR A SMALL FEE, OFFER A PLACE FOR ANYONE TO COME TO SELL THEIR WARES. THERE ARE FEW RULES FOR ENTRY, AND FEES TEND TO BE VERY LOW.
THE MIX OF WHAT IS FOR SALE CAN BE VERY HAPHAZARD. PEOPLE OFTEN COME LOOKING FOR BARGAINS, OR TO BROWSE. IN MANY CASES, THE ATTENDANCE WILL HAVE HIGHS AND LOWS DURING EACH DAY
THIS TYPE OF SHOW WORKS WELL FOR THE CRAFTER OR HOBBYIST WHO MAKES THINGS DURING THE YEAR, AND WANTS A ONCE-A-YEAR SALES OUTLET. USUALLY, I FIND THAT THE RETURN-ON-INVESTMENT FOR THESE KINDS OF SHOWS IS NOT VERY GOOD. HOWEVER, IT DEPENDS ON HISTORY, TIMING, WEATHER AND LOCATION.
FOR EXAMPLE, A BAZAAR SETS UP EVERY TWO MONTHS AT A LOCAL UNIVERSITY WHERE I LIVE, THEY CHARGE $25.00 FOR A WEEKEND BOOTH RENTAL.AND PEOPLE DOING THE BAZAAR USUALLY MAKE A KILLING.
FESTIVALS AND FAIRS FESTIVALS AND FAIRS ARE “SPECIAL EVENTS”, SPONSORED BY TOWNS, CIVIC GROUPS, OR NEIGHBORHOOD ASSOCIATIONS, AND OFTEN PUT ON BY A SPECIAL PROMOTER. THESE ARE WELL-ORGANIZED, WELL-PUBLICIZED AND ATTRACT LOTS OF PEOPLE. SOMETIMES THESE WILL TAKE THE FORM OF AN ARTS AND CRAFTS SHOW, AND THAT WILL BE THEIR CENTRAL PURPOSE. OTHERTIMES, THE MAIN PURPOSE IS SOME KIND OF ENTERTAINMENT, AND THEY HAVE AN AREA SET ASIDE FOR PEOPLE TO SELL THEIR WARES.
IF THE PROMOTERS EMPHASIZE THE ARTS AND CRAFTS PART OF THE FESTIVAL, THEN YOU CAN DO WELL HERE. PEOPLE AT FESTIVALS ARE TYPICALLY WILLING TO SPEND AT MID-RANGE PRICES. IF THERE IS VERY LITTLE PROMOTION OF ARTS AND CRAFTS, OR, IF THAT AREA SET ASIDE FOR ARTS AND CRAFTS SALES IS FAR FROM THE MAIN ACTION, THEN THIS MAY NOT WORK OUT WELL FOR YOU.
JURIED OR OPEN ADMISSION SOME SHOWS ARE OPEN TO ALL TAKERS WHO PAY THE ENTRY FEE. OTHER SHOWS ARE JURIED. THAT IS, THEY REQUIRE THAT YOU SUBMIT IMAGES OF YOUR WORK, AND PERHAPS, SOME KIND OF ARTIST STATEMENT A PANEL OF JUDGES REVIEWS YOUR WORK, AND DECIDES WHOM TO ADMIT TO THE SHOW. JURIED SHOWS MAY ALSO REQUIRE THAT YOU SUBMIT IMAGES OF YOUR BOOTH AND DISPLAY SET UP.
JURIED SHOWS HAVE GOOD CONTROL OVER THE QUALITY OF VENDORS, AS WELL AS THE MIX OF MERCHANDISE AVAILABLE FOR SALE. THE FEES CAN BE STEEP. IF THESE JURIED SHOWS HAVE A GOOD REPUTATION AND HISTORY, THEY CAN BE VERY LUCRATIVE. THEY ARE BIG REPUTATION BUILDERS.
INDOOR OR OUTDOOR SOME SHOWS ARE HELD INDOORS. HERE YOU HAVE SOME PROTECTION FROM THE WEATHER. OTHER SHOWS ARE HELD OUTDOORS, WHERE YOU DO NOT. ON GOOD WEATHER DAYS, PEOPLE LIKE TO BE OUTDOORS. ON BAD WEATHER DAYS, PEOPLE LIKE TO BE INDOORS.
WHAT YOU BRING AND HOW YOU SET UP WILL VARY A BIT BETWEEN INDOOR AND OUTDOOR. YOU CAN OFTEN SPREAD OUT A LITTLE MORE, WHEN OUTDOORS. YOU WILL HAVE DIFFERENT SPECIAL LIGHTING NEEDS INDOORS THAN OUTDOORS. IF THE INDOOR SHOW IS VERY WELL ATTENDED, IT CAN GET VERY CLAUSTROPHIC, DUSTY AND HOT. IF THE WEATHER GETS REALLY BAD OR UNPREDICTABLE, YOU MIGHT HAVE A POOR SHOWING AT AN OUTDOOR SHOW. BE SURE TO ASK THE SHOW PROMOTERS WHAT THEIR POLICY IS FOR INCLEMENT WEATHER, IF THE SHOW IS OUTDOORS.
HOLIDAY, THEMED OR TIMING SENSITIVE SHOWS SOME SHOWS HAVE A STRONG THEME WHICH SETS A VERY IMPORTANT TONE AND DIRECTION FOR THE SHOW. YOU NEED TO PAY CLOSE ATTENTION TO THIS THEME. THERE ARE CHRISTMAS SHOWS AND WESTERN SHOWS AND NATIVE AMERICAN SHOWS. THERE ARE SUMMER CELEBRATIONS AND WINTER CELEBRATIONS. THERE ARE ETHNIC FESTIVALS. TOWN HISTORY FESTIVALS. HISTORICAL RE-ENACTMENTS.
LOTS OF SHOWS AND FESTIVALS AND BAZAARS WITH A HOLIDAY OR OTHER THEME, OR SOMETHING WHICH ARE TIED TO A SPECIFIC TIME OR EVENT. MAKE SURE THE MERCHANDISE YOU BRING, AND HOW YOU SET UP YOUR DISPLAYS AND SIGNAGE, AND EVEN THE WAY YOU PRESENT YOURSELF AS AN ARTIST AND CRAFTSPERSON, COORDINATES WELL WITH THE THEME.
LARGE VS. SMALL OPERATION SOME OPERATIONS ARE LARGE, OTHERS ARE SMALL. OBVIOUSLY, THE LARGER THEY ARE, THE MORE PEOPLE THEY WILL ATTRACT AND THE MORE LIKELY THEY WILL SUSTAIN THEMSELVES OVER TIME. THAT MEANS LESS RISK FOR YOU. HOWEVER, IF THE OPERATION IS SMALL,SUCH AS A SMALL NUMBER OF VENDORS, OR, A LIMITED RANGE OR QUANTITY OF MERCHANDISE, OR, A SMALLER EXPECTED ATTENDANCE, OR, MINIMAL ADVERTISING AND PROMOTION,
THEN, IT POSES MORE RISK, FROM A BUSINESS SENSE, SO, WHEN SETTING UP AT A SMALL OPERATION, BE SURE THERE ARE SOME OTHER COMPENSATING FACTORS. SUCH AS A SPECIAL LOCATION OR THAT IT IS LINKED TO A VERY SPECIAL EVENT OR THAT THE ATTENDEES ARE PRIMED TO SPEND, AND SPEND A LOT.
WALK-BY OR WALK-IN BOOTHS SOME SHOWS LET YOU SET UP SOME KIND OF BOOTH, WHERE CUSTOMERS CAN WALK INTO, WE CALL THIS A WALK-IN SETUP. OTHER SHOWS LINE UP ROWS OF TABLES. YOU RENT ONE OR MORE TABLES. THE TABLES, FROM VENDOR TO VENDOR, USUALLY MERGE WITH ONE ANOTHER. CUSTOMERS WORK THEIR WAY PAST THE FRONT OF THESE ROWS OF TABLES. WE CALL THIS A WALK-BY SETUP.
I PREFER WALK-IN SET-UPS. THESE GIVE YOU MUCH BETTER CONTROL AND MANAGEMENT OF CUSTOMERS AND THE BUYING SITUATION. THEY MORE CLEARLY DELINEATE THE BOUDARIES OF YOUR BOOTH, FROM THOSE OF YOUR NEIGHBORS.
IF DOING A WALK-BY SET-UP, THEN IF YOU CAN SECURE A CORNER SPACE, OR A CENTRAL AISLE INTERSECTION OR A SPOT NEAR THE MAIN ENTRANCE, THESE WORK BETTER. THEY GIVE YOU MORE VISIBILITY.
IF YOU CAN AFFORD TO RENT MORE THAN 1 TABLE AND HAVE THE INVENTORY TO DISPLAY ON MORE THAN 1 TABLE, THIS GIVES YOU EVEN MORE VISIBILITY. THE MORE VISIBILITY YOU HAVE, THE BETTER YOUR SALES.
JEWELRY ONLY VS. MIX OF MERCHANDISE MOST SHOWS SHOWCASE A MIX OF MERCHANDISE. HOWEVER, SOME SHOWS ARE JEWELRY ONLY. WHEN IT IS JEWELRY-ONLY, THE SHOW ATTRACTS BUYERS SPECIFICALLY INTERESTED IN JEWELRY BUT WILL ATTRACT A SMALLER NUMBER OF BUYERS. IF YOU ARE SELLING AT A JEWELRY ONLY SHOW, BE SURE SOMETHING ABOUT YOUR WORK SETS YOU APART FROM THE CROWD.
WHEN IT IS A MIX OF MERCHANDISE, IT MAY BE A LITTLE MORE DIFFICULT TO LINK UP TO YOUR TARGET CUSTOMER. HOWEVER, THERE WILL BE MORE POTENTIAL CUSTOMERS OVERALL. SHOWS WHICH HAVE A MIX OF MERCHANDISE OFTEN HAVE TO LIMIT THE NUMBER OF JEWELRY VENDORS — JEWELRY IS AN ESPECIALLY POPULAR CATEGORY.
LARGE MARKETING, ADVERTISING AND PROMOTION BUDGETS VS. SMALL BUDGETS AT THE SHOW, YOU ARE DEPENDENT ON ATTENDANCE. THAT MEANS, YOU ARE DEPENDENT ON HOW WELL THE SHOW PROMOTERS DELIVER THE GOODS. HOW MUCH MONEY DO THEY SPEND ON ADVERTISING AND MARKETING … TO GET THE WORD OUT? … HOW MUCH EFFORT ARE THEY MAKING TO EARN A GOOD REPUTATION?
SO, SHOWS WITH LARGE MARKETING BUDGETS DO BETTER THAN THOSE WITH SMALL ONES ESTABLISHED SHOWS DO MUCH, MUCH BETTER THAN 1ST YEAR SHOWS. IN FACT, I WOULD AVOID DOING SHOWS IN THEIR 1ST OR 2ND YEARS, UNTIL I SAW THAT THEY WERE SUCCEEDING ON SOME LEVEL.
I WOULD ALSO CLOSELY EXAMINE THE SHOW’S MARKETING BUDGET. IT MAY BE LARGE, BUT THEY MAY BE PLANNING TO SPEND ALL THEIR MONEY ON A SINGLE BILLBOARD ALONG THE INTERSTATE HIGHWAY. THIS IS NOT ENOUGH. YOU WANT TO SEE THE SHOW PROMOTERS UNDERTAKING A MULTIMETHOD MARKETING PLAN.
WHOLESALE TRADE VS. RETAIL TRADE FINALLY, WHILE MOST SHOWS WOULD BE CONSIDERED “RETAIL” SHOWS, THAT IS, TARGETED AT THE GENERAL PUBLIC. SOME SHOWS ARE FOR THE WHOLESALE TRADE. THAT IS, BUSINESSES WHO SHOP WHOLESALE SHOWS ARE LOOKING FOR LINES OF MERCHANDISE TO CARRY. THESE BUSINESSES HAVE THEIR OWN RETAIL OUTLETS FOR RE-SELLING YOUR WORK. THE FEES FOR THESE SHOWS ARE USUALLY VERY STEEP. YOU NEED TO BE PREPARED TO ACCEPT AND DELIVER ON LARGE ORDERS. OFTEN, TWO OR MORE BUSINESSES WILL SHARE THE COSTS OF A SINGLE BOOTH.
Lesson 2: Research All Your Possibilities
“I HEARD IT THROUGH THE GRAPEVINE”
THAT SHOULD BE IMOGENE MCALLISTER ROSENSTEIN’S SONG. BECAUSE THAT’S HOW SHE FINDS HER CRAFT SHOWS. BY WORD OF MOUTH BY TWEET BY FACEBOOK POST FROM FRIENDS AND FRIENDS OF FRIENDS AND FAMILY OF FRIENDS OF FRIENDS. LIKE I SAID, SHE HEARD IT THROUGH THE GRAPEVINE.
SHE KEPT SAYING TO ME, “I HEARD SUCH AND SUCH A SHOW WAS GREAT,” “HAVE YOU HEARD ANYTHING ABOUT IT?” RARELY EVER. SHE WOULD SIGN UP FOR THINGS IN PARTS OF TOWN THAT NONE OF HER CUSTOMERS WOULD GO TO. SHE WAS LITERALLY ALL OVER THE PLACE.
THERE ARE PLENTY OF TOOLS AND RESOURCES FOR FINDING OUT WHICH CRAFT SHOWS ARE RIGHT FOR YOU. YOU JUST HAVE TO MAKE YOURSELF AWARE OF THESE…AND USE THEM.
FINDING THEM: CRAFT SHOW DIRECTORIES
At the end of this handout, is a list of on-line craft show listings and databases. You can search these databases to see what shows are available where and when. You can determine what application rules and fees exist. You should follow up on this research by trying to find and talk with vendors who’ve attended these shows before. See if you can uncover an exhibitors/vendors list. If you can visit the show and check it out beforehand, that would be great.
Examine the mix of items offered at the show. Will your inventory complement and fit in? You want to be unique and different, yet you also want your products to have a good fit with whatever else is there. It’s the synergistic effect of all the vendors together which brings the crowds in, and this effect is greater when there are a lot of related things there for sale. Does the show’s style or theme fit well with that of your merchandise and your business? If you’re selling fashion jewelry, you don’t necessarily want to be set up at a country crafts show.
Find out the general attendance at the show, and the number of vendors exhibiting there. Evaluate the numbers with a critical eye. For example, a show without an admission fee might have a large attendance, but many of those attending might not necessarily be there to buy. Another example, all the booths might be full, but many of the vendors might be somehow associated with the event promoters and primarily there to give the appearance of filling up the spaces. Ask questions that get to the core issue: What are the qualities of the customers? What are the qualities of the vendors?
Find out how long the show has been in existence, and how it seems to have fared over time. Shows in their first year or two may not do well, because many people may be unfamiliar with the show. A show’s long-time staying power might reflect on its strength. Conversely, it might reflect on people needlessly holding onto tradition.
Ask about what kinds of marketing the show operators plan to do, and how systematically they’ve evaluated the strengths and weaknesses of past marketing strategies. Hopefully, they plan to do more than putting up a few signs. Successful show marketing requires a multi-method approach, lot of sustained effort and follow-through.
Critically assess the location of the show. Would your customers venture out to this location? Are there parking issues, finding-the-place issues, or related concerns? What are your specific options for a booth location within the show itself? Very often, newcomers start in the least desirable areas. Will customers at the show still find you? Will you be near complementary booths — ones with items that will attract customers you want to attract to your own booth?
Is the show held in conjunction with other activities? Are there entertainment or educational activities? Are there food concessions? Are there adequate bathroom facilities?
If possible, talk with other exhibitors who have done the show. Has it met their expectations? What kinds of people attend the show, and what types of products do they seem to buy? How much does a typical person spend at a booth? How is the traffic flow, and what, if any, peculiarities are there? What is the quality of the merchandise at the show?
If you determine that a particular show is a good fit for you, you should give it more than one chance. You might not do well your first time out because your own marketing efforts or inventory selection might be deficient. Sometimes even a good show has an off year.
THERE ARE MANY ONLINE CRAFT SHOW DIRECTORIES
– CONSUMER CRAFT AND BEADING MAGAZINES
– CRAFT AND ART ORGANIZATIONS, ASSOCIATIONS AND CLUBS IN THEIR NEWSLETTERS, ON THEIR WEBSITES AND FACEBOOK PAGES
– SOMETIMES CRAFT SHOWS WILL TAKE OUT ADS IN LOCAL PAPERS LOOKING FOR VENDORS
YOU CAN ALSO ATTEND LOCAL SHOWS AND TALK WITH MANAGEMENT YOU CAN TALK TO VARIOUS VENDORS AT LOCAL SHOWS. YOU CAN CONTACT LOCAL CRAFT AND FINE ARTISTS.
THERE ARE ALSO SERVICES ONLINE WHICH HELP CRAFT SHOWS FIND YOU. FOR EXAMPLE, JURIED ART SERVICES OR ZAPPLICATION. THESE DIGITAL JURIED AND APPLICATION SYSTEMS ALLOW YOU TO POST A PROFILE WITH IMAGES ONLINE. THEY SEND OUT EMAIL CALLS FOR APPLICATIONS FROM CRAFTS SHOWS THEY REPRESENT. AND THEY ALLOW YOU TO TAILOR FIT YOUR APPLICATION TO THE REQUIREMENTS OF THAT SPECIFIC SHOW.
YOU REGISTER WITH THESE ONLINE, UPLOADING IMAGES OF YOUR WORK, IMAGES OF YOUR BOOTH AND DISPLAY, AND VARIOUS WRITE-UPS.
LESSON 3: NOT EVERY CRAFT SHOW IS FOR YOU
ROWENA STARLIGHT LIKED TO TELL EVERYONE SHE LIVED ON LIGHTHOUSE ROAD.
SHE MIGHT AS WELL HAVE BEEN LIVING IN OUTER MONGOLIA. SHE WAS DETERMINED TO SELL HIGH-END JEWELRY IN LOW-BROW SETTINGS. SHE SPENT SO MUCH TIME MAKING EACH PIECE OF JEWELRY, AND SO LITTLE TIME RESEARCHING WHERE TO SELL IT. SHE RARELY SOLD ANYTHING, SAD FOR HER, SHE COULDN’T FIGURE OUT WHY.
NOT EVERY CRAFT SHOW WILL BE FOR YOU. WHEN YOU RESEARCH SHOW OPPORTUNITIES, ASK YOURSELF: IS THERE A GOOD FIT WITH
= YOUR MERCHANDISE, = YOUR GOALS, = YOUR EXPECTATIONS, “ = YOUR CUSTOMERS?
EVALUATE ALL YOUR SHOW OPTIONS BEFORE SELECTING ONE OR MORE OF THEM. MAKE SITE VISITS. SCOPE IT OUT BEFORE COMMITTING TO IT. IF YOU CAN’T ATTEND A SHOW PRIOR TO APPLYING, ASK THE PROMOTER FOR NAMES AND PHONE NUMBERS OR EMAIL ADDRESSES OF A FEW OF THE EXHIBITORS THAT HAVE DONE THE SHOW BEFORE, AND ARE RETURNING AGAIN.
YOU WANT TO ASK AND HAVE ANSWERED A SERIES OF QUESTIONS. QUESTIONS TO ASK YOURSELF. QUESTIONS TO ASK OTHER VENDORS. QUESTIONS TO ASK THE SHOW PROMOTERS.
WHEN YOU ARE ON YOUR SITE VISIT… CAREFULLY OBSERVE AND ASK YOURSELF THESE QUESTIONS? — IS THE VENDOR AREA THE FOCUS OF THE SHOW, OR A PART OF A LARGER ENTERTAINMENT VENUE? — IS THERE ENTERTAINMENT? — ARE THERE FOOD VENDORS? — WHO IS THE CUSTOMER? — IS THERE GOOD ATTENDANCE? — IS THERE AN ADMISSION CHARGE? — IS THERE ADEQUATE CUSTOMER PARKING? — ARE THE CUSTOMERS BUYING OR BROWSING? — WHAT IS THE MERCHANDISE MIX, AND HOW MUCH IS JEWELRY? — WHAT IS THE QUALITY OF THE MERCHANDISE LIKE? — IS THE MERCHANDISE HAND-CRAFTED ONLY, MOSTLY HAND-CRAFTED, OR NOT?
SPEAK WITH THE VENDORS, AND ASK THEM: — HOW WELL DOES THIS SHOW WORK FOR THEM? — HOW DID THEY FIND OUT ABOUT THE SHOW? — ARE THEY SATISFIED WITH THE MANAGEMENT AND MARKETING OF THE SHOW? — ARE THERE OTHER VENDORS, PERHAPS TOO MANY OTHER VENDORS, SELLING THE SAME KIND OF THING? — WHAT ARE THE BEST SHOWS THEY HAVE DONE, AND HOW DOES THIS ONE COMPARE? — WOULD THEY RETURN TO THIS SHOW AND DO IT AGAIN?
IF YOU CAN, SPEAK WITH THE PROMOTERS. — HOW LONG HAVE THEY BEEN DOING SHOWS, AND THIS SHOW IN PARTICULAR? — WHAT ARE THEIR GOALS FOR THE SHOW? — WHAT KIND OF MARKETING AND PROMOTION DO THEY DO? — WHAT IS THE AVERAGE ATTENDANCE? — WHAT AMOUNT DOES THE TYPICAL CUSTOMER SPEND? — WHAT ARE THE FEES? — DO YOU TAKE ANY ADDITIONAL COMMISIONS, SUCH AS A PERCENT OF SALES? — ARE THERE ANY INSURANCE REQUIREMENTS? — WHAT IS INVOLVED WITH THE APPLICATION PROCESS? — TELL THEM WHAT YOU SELL, AND ASK THEM IF THEY THINK YOU WOULD FIT IN? — IF YOU WANT TO DO THE NEXT SHOW, WHEN SHOULD YOU APPLY? — CAN YOU CHOOSE YOUR BOOTH LOCATION? — CAN YOU DO DEMONSTRATIONS IN YOUR BOOTH?
ASK THEM TO ADD YOUR NAME TO THEIR MAILING LIST.
THEN, CHECK FOR SHOW REVIEWS, RATINGS AND EXPERIENCES ONLINE. DO SOME SOCIAL NETWORKING. AND THINK!
THINK ABOUT… HOW COMFORTABLE ARE YOU WITH THE LOCATION, THE SETTING, THE LAY-OUT? THE OPPORTUNITY? THE POSSIBILITIES TO MAKE A PROFIT? HOW DOES YOUR MERCHANDISE STACK UP AGAINST THAT WHICH YOU HAVE SEEN?
TRY TO VISUALIZE THE EVENT IN YOUR MIND WITH AS MUCH INFORMATION YOU HAVE GATHERED. IS THIS PARTICULAR EVENT FOR YOU? DOES THIS SHOW ATTRACT THE TYPES OF CUSTOMERS MOST LIKELY TO BUY WHAT YOU MAKE?
craft show traffic flow
LESSON 4: SET REALISTIC GOALS
MAKING MONEY AT FAIRS AND SHOWS ISN’T AS EASY AS IT SEEMS.
AS ROLAND AND ROLANDA QUICKLY FOUND OUT. THEY THOUGHT ALL IT TOOK WAS TO RENT A TABLE AT ANY SHOW OR FAIR LAY OUT THEIR JEWELRY, WAIT FOR CUSTOMERS TO COME BY AND PURCHASE THEIR STUFF.
ALL THROUGH THE SHOWS, THEY SAT ON CHAIRS READING BOOKS, WAITING FOR PEOPLE TO COME BY. THEY SPENT MORE MONEY ON INVENTORY, PACKING, DISPLAYS AND TRAVEL THAN THEY EVER MADE. AND THEY NEVER DEVELOPED ANY KIND OF PLAN OF ACTION.
ROLAND AND ROLANDA NEEDED TO SET REALISTIC GOALS:
– (1) HOW MUCH MONEY DID THEY HAVE TO GET STARTED AND SUSTAIN THEMSELVES?
– (2) WHAT WAS THEIR BREAK-EVEN POINT?
– (3) WHAT DID THEY NEED TO PREPARE THEMSELVES TO “SELL”?
(4) WHAT AMOUNT OF REPEAT BUSINESS AND FOLLOW-UP SALES WERE THEY LOOKING FOR?
Defining Your Business / Setting Your Goals / Getting Started
Before you get started in your craft business, you need to do some thinking and reflecting. You need to have a clear idea of the types of products you want to sell, and what you think people will be willing to pay for them.
Then you need to research craft show opportunities. We suggest you start small, and start locally. Check out crafts fairs sponsored by local Arts and Park Commissions, churches and synagogues, non-profit organizations and schools. Your local craft and bead stores may know of craft shows, as well. YOU OBVIOUSLY WANT TO KEEP YOUR EXPENSES TO A MINIMUM, AND THERE CAN BE SOME STEEP UP-FRONT COSTS, SUCH AS CREATING A SUFFICIENT INVENTORY.STARTING SMALL GIVES YOU A CHANCE TO TEST OUT YOUR IDEAS ABOUT COSTS. WHEN YOU START, YOU MIGHT BE ABLE TO SHARE BOOTH SPACE WITH ANOTHER FRIEND WHO HAS A BUSINESS. AND SHARE SOME OF THOSE OTHER FIXED COSTS, LIKE TRAVEL AND FEES.
Next, set some business goals. How much are you willing to spend to be included in a Craft Show? How much money do you want to make? To what degree is it important that you make a profit at your first craft show(s)? In what ways can you leverage your efforts to increase your business later on — such as, strategies for getting repeat business, or increasing your mailing list, or finding information from other vendors about other show opportunities or other sources of craft supplies?
Then think about yourself, your personality, energy levels, levels of patience. Is there a good fit, and if not, what kinds of self-improvement things do you need to do to get that good fit? IT REQUIRES AN ABILITY TO KEEP UP A GOOD “RETAIL PERSONALITY” WHILE STANDING ON YOUR FEET FOR LONG HOURS, SOMETIMES WHEN IT’S TOO HOT OR TOO COLD OR TOO WINDY AND DUSTY. “SELLING JEWELRY” REQUIRES A DIFFERENT MIND-SET THAN “CREATING JEWELRY.” IF YOU DON’T HAVE THE PERSONALITY FOR “SELLING”, YOU MIGHT BRING A FRIEND WITH YOU WHO DOES.
Set goals about WHAT AMOUNT OF REPEAT BUSINESS AND FOLLOW-UP SALES SHOULD YOU LOOK FOR? A GOOD GOAL TO SET IS TO GENERATE REPEAT BUSINESS EQUAL TO 25%.SO, IF YOU HAD 10 SALES AT THE SHOW, YOUR GOAL WOULD BE TO GET 3 REPEAT SALES. THESE COULD OCCUR WHEN THE CUSTOMER CONTACTS YOU BETWEEN SHOWS. THESE COULD ALSO OCCUR AT THE NEXT SHOW YOU DO, WHEN THE CUSTOMER BUYS FROM YOU AGAIN. YOU WILL MAKE A MUCH HIGHER PROFIT AND EXPERIENCE BETTER LONG-TERM OUTCOMES, THROUGH REPEAT BUSINESS. WITH REPEAT BUSINESS, YOU CAN CONSIDERABLY LOWER YOUR VARIABLE COSTS, PARTICULARLY THOSE ASSOCIATED WITH MARKETING.BECAUSE OF THIS, THAT 2ND OR FOLLOW-UP SALE IS OFTEN MORE IMPORTANT THAN THAT 1ST SALE AT THE SHOW.
BREAKEVEN ANALYSIS
HOW MUCH MONEY WILL YOU NEED?
MAKE A LIST OF ALL POSSIBLE COSTS. THERE ARE THE OBVIOUS LIKE TRANSPORTATION, LODGING AND MEALS. AND THE COSTS OF DISPLAYS, PACKING AND MARKETING. AND THE COSTS OF THE PARTS USED TO MAKE THE PIECES WHICH SELL.
ENTRY FEES WILL VARY WIDELY FROM SHOW TO SHOW. THEY COULD COST $25/DAY UP TO $400 AND UP PER DAY. THEY COULD GO AS HIGH AS $5000 PER DAY.
IF YOU HAVE A SPECIFIC CRAFT SHOW IN MIND, REVIEW THEIR RULES, AND WHAT THEIR ENTRY FEES COVER, AND DO NOT COVER. WHAT ARE THE COSTS OF EXTRAS, LIKE ELECTRICITY, TABLES, SPECIAL LIGHTING? DO THEY ALSO COLLECT A PERCENT OF SALES? DO THEY OFFER SPECIAL SERVICES, LIKE BOOTH SITTING, FOR EXTRA FEES? IS PARKING FREE, OR DO THEY CHARGE? DO YOU NEED TO PROVIDE ADDITIONAL INSURANCE? WILL YOU NEED TO PURCHASE SPECIAL LICENSES, REGISTRATIONS AND PERMITS, SUCH AS AN OUT OF STATE WHOLESALE LICENSE?
YOU NEED TO PREPARE A PLAN AND A BUDGET… …TO BE SURE YOU CAN PAY FOR WHAT YOU ARE COMMITTING YOURSELF TO.
(1)Understand different types of costs and how to account for them
(2)Learn to apply simple Breakeven Analysis Formula
(3)Set revenue goals
(4)Determine how much inventory you need to bring with you
(5)Think about reinvestment
4.1. Types of Costs
FIXED COSTS: FIXED COSTS ARE COSTS THAT REMAIN THE SAME, REGARDLESS OF HOW MANY ITEMS YOU SELL AT YOUR CRAFT FAIR.
FIXED COSTS INCLUDE THINGS LIKE FEES, TRAVEL, FOOD, AND STAFFING. AGAIN, YOU HAVE TO LAY OUT THIS MONEY FOR FIXED COSTS, WHETHER YOU MADE NO MONEY AT ALL, OR MADE A BUCKET FULL OF MONEY AT YOUR CRAFT FAIR.
VARIABLE COSTS: VARIABLE COSTS ARE COSTS THAT GET INCURRED WHEN EACH UNIT IS SOLD.
THUS, VARIABLE COSTS FLUCTUATE BASED ON THE NUMBER OF UNITS SOLD. IF YOU SELL VERY FEW PIECES, YOUR VARIABLE COSTS ARE SMALL, IF YOU SELL A LOT OF PIECES, YOUR VARIABLE COSTS WILL BE MUCH HIGHER.
VARIABLE COSTS INCLUDE SPECIAL PACKAGING AND DISPLAYS, BROCHURES AND BUSINESS CARDS HANDED OUT WITH EACH SALE, CREDIT CARD FEES YOU ARE CHARGED BY THE BANKS AFTER EACH SALE, AND THE COST OF THE PARTS USED TO MAKE EACH PIECE THAT HAS SOLD.
WE ESTIMATE VARIABLE COSTS USING SOME INDUSTRY STANDARDS ABOUT THE PERCENT OF TOTAL SALES (USING RETAIL PRICES) THESE COSTS ARE ASSOCIATED WITH.
WHEN WE CALCULATE THE COST OF INVENTORY, WE DIFFERENTIATE BETWEEN THE COST OF THOSE PIECES WHICH WE HAVE SOLD FROM THE COST OF THOSE PIECES WE DID NOT SELL.
FOR PURPOSES OF DEVELOPING A BUDGET AND CALCULATING A BREAK-EVEN ANALYSIS, TO HELP US DECIDE WHETHER A PARTICULAR CRAFT SHOW IS WORTH THE RISK, WE FOCUS ONLY ON THE ESTIMATES BASED ON WHAT WE SELL.
NOTE: There are two other costs we do not deal with in a breakeven analysis, but have big impacts on your business decisions: 1. INVENTORY COSTS. Breakeven Analysis deals with the costs of your inventory which has sold. But you have to bring a lot more pieces with you, and will only sell a proportion of them, typically 25% is a good goal. You will still have to come up with enough cash to cover the full cost of putting together an inventory.
2. REINVESTMENT COSTS. Out of your profits, you will want to reserve some money to buy more jewelry making supplies beyond what you already have and beyond what you need to replace the items sold. You will also want to invest in new displays, packaging, additional marketing and the like. For new businesses, these reinvestments are usually 20–25% or more of your profit. If you think you need to make $100.00 to cover your business and personal costs, perhaps, with an eye on reinvestment, you need to up that goal to $125.00.
4.2Learn to apply simple Breakeven Analysis Formula
BREAKEVEN ANALYSIS
I WANT TO INTRODUCE YOU TO A QUICK AND DIRTY BREAKEVEN ANALYSIS. I CALL THIS “QUICK AND DIRTY” BECAUSE WE ARE USING IMPERFECT INFORMATION. HOWEVER, THIS IMPERFECT INFORMATION IS GOOD ENOUGH TO HELP US MAKE A DECISION WHETHER A PARTICULAR CRAFT SHOW IS WORTH THE RISK.
YOUR BREAKEVEN POINT IS WHERE YOU HAVE SOLD ENOUGH INVENTORY TO COVER YOUR FIXED AND VARIABLE COSTS. WE EQUATE “INVENTORY” WITH THE TOTAL RETAIL DOLLARS TAKEN IN.
WE USE OUR QUICK AND DIRTY BREAKEVEN ANALSIS TO ANSWER THE QUESTION: HOW MUCH INVENTORY DO I NEED TO SELL IN ORDER TO BREAK EVEN?
LET’S FAMILIARIZE OURSELVES MORE WITH THE COMPONENTS OF THE FORMULA, AND THEN REVIEW THE MATH.
EXAMPLE: 2-Day Craft Show, 200 miles away, and you need 1 extra person
SAY YOU WILL BE DOING A 2-DAY CRAFT SHOW OUT OF TOWN, 200 MILES AWAY FROM HOME. AND YOU WILL NEED TO HIRE 1 PERSON TO HELP YOU. LET’S LOOK AT OUR BUDGET FOR DOING THIS PARTICULAR CRAFT SHOW. YOU HAVE BUDGETED FOR YOUR FIXED AND VARIABLE COSTS AS SHOWN IN THE TABLE. I HAVE PLUGGED IN SOME TYPICAL NUMBERS INTO THIS BUDGET TABLE.
OUR FIXED COSTS ARE RELATIVELY EASY TO FIGURE OUT.
OUR VARIABLE COSTS, HOWEVER, WILL HAVE TO BE ESTIMATED.
THESE VARIABLE COSTS ARE KEYED OFF THE ESTIMATED SALES DATA (KEYED OFF OF RETAIL PRICES YOU SET FOR YOUR JEWELRY). In the chart above, $1528.57 is the estimated sales we think we will get at the craft show, stated in total retail prices. [We can estimate our sales because we expect to sell 25% of the total inventory brought. In this case, we would have brought 4*1528.57 or $6114.28 (at retail pricing). ] [So, if we marked up our inventory by 3, in this case, our wholesale costs for these sales would have been $1528.57/3 or $509.52, but the cost to us of all the inventory we brought with us would be $6114.28/3 or $2038.09.]
WE WILL USE SOME INDUSTRY PERCENT OF ITEMS SOLD PRICE STANDARDS, These are usually stated as some percent of every dollar sold (at retail pricing). AS WELL AS OUR BREAKEVEN ANALYSIS FORMULA TO HELP US FIGURE OUT THE “TO BE CALCULATED” VARIABLE COSTS IN OUR BUDGET TABLE.
FOR EXAMPLE, I HAVE USED 12% AS THE PROPORTION OF THE TOTAL RETAIL PRICE THAT WOULD BE SPENT ON MARKETING COSTS. THE COSTS WOULD INCLUDE BROCHURES, BUSINESS CARDS, A POST CARD MAILING, SOME PROMOTIONAL ADS, AND SOME EFFORT TO CONTACT PREVIOUS CUSTOMERS TO LET THEM KNOW YOU WILL BE AT THIS CRAFT SHOW. THE INDUSTRY STANDARD FOR MARKETING RANGES BETWEEN 5 AND 15 PER CENT. IF YOU ARE GETTING STARTED, YOU CAN USE MY NUMBERS PRESENTED IN THIS TABLE. AFTER YOU HAVE DONE A FEW CRAFT SHOWS, YOU CAN BEGIN TO ANALYZE YOUR OWN SALES AND COST DATA, TO DEVELOP WHAT ARE CALLED MULTIPLIERS FOR EACH VARIABLE LINE-ITEM CATEGORY.
BREAKEVEN FORMULA
OUR BREAKEVEN FORMULA HAS 3 VARIABLES:
LET’S TRY SOME MATH:
LOOK BACK AT OUR DEVELOPING BUDGET TABLE.
Y, WHICH IS OUR FIXED COSTS TOTAL = $535.00 .z IS THAT PERCENT OF REVENUE REPRESENTING TOTAL VARIABLE COSTS.
.z= .65 (.65 IS SUM OF OUR MULTIPLERS IN OUR BUDGET TABLE .05+.12+.02+.05+.01+.40)
SOLVE FOR X
NEXT, USING OUR BREAKEVEN FORMULA, WE SOLVE FOR X
TO SOLVE FOR X, WE NEED TO RE-ORGANIZE OUR FORMULA SO THAT THE X VARIABLE, WHICH OCCURS TWICE IN OUR FORMULA, IS ALL PUT ON ONE SIDE OF THE EQUATION.
THIS IS HOW WE SOLVE THIS FORMULA:
a. WE START WITH: X = 535.00 + .65X
b. WE MOVE THE .65X TO THE LEFT SIDE, BY SUBTRACTING IT FROM BOTH SIDES X-.65X = 535.00
c. WE COMBINE BOTH X VARIABLES, WHICH IN EFFECT, LET’S US SUBTRACT THE .65X FROM 1X, LEAVING US WITH .35X .35X = 535.00
d. WE DIVIDE BOTH SIDES OF THE EQUATION BY .35, TO GIVE US 1X X = 535/.35
e. AND WE GET OUR BREAKEVEN POINT X = $1528.57 (total inventory at retail price we need to sell to break even, given our fixed and variable costs)
SO, TO BREAK EVEN, WE WOULD NEED TO SELL A RETAIL TOTAL OF $1528.57 OF MERCHANDISE AT OUR 2-DAY SHOW. TO SELL THAT MUCH INVENTORY, WE WOULD NEED TO BRING ABOUT 4 TIMES THAT MUCH, OR $6,000.00 OF INVENTORY WITH US.
LET’S LOOK AT OUR RESULTING VARIABLE COSTS CALCULATIONS.
NOW, LET’S REVIEW OUR BREAKEVEN ANALYSIS WITH ANOTHER EXAMPLE.
SAY YOU ARE DOING A 1-DAY CRAFT SHOW CLOSE TO HOME, LOW FEES, YOU BRING YOUR OWN TABLES, DON’T NEED ELECTRICITY, AND DON’T NEED EXTRA STAFFING. YOU DON’T PLAN ON DOING A LOT OF MARKETING.
FIRST, YOU BEGIN TO SET UP A BUDGET.
HERE WE HAVE FIXED COSTS EQUAL TO $70.00. OUR VARIABLE COSTS WE ESTIMATE TO BE 54% OF OUR TOTAL REVENUES.
NEXT, WE CALCULATE OUR BREAKEVEN POINT, USING OUR QUICK AND DIRTY FORMULA.
WE SEE OUR BREAKEVEN POINT IS $152.17. AND, USING OUR RULE OF THUMB ABOUT HOW MUCH INVENTORY TO BRING, WE NEED TO BRING 4 X $152.17, OR ABOUT $600.00 OF INVENTORY.
4.3Set Revenue Goals
First, you do a BREAKEVEN ANALYSIS to determine the minimum amount of revenue you need to generate, in order to cover all your fixed and variable costs.
After you reach your Breakeven Point, you begin to generate a Profit. At this point, you have already covered all your fixed costs. For each additional piece of jewelry you sell, you mostly will only have to cover the variable costs. If your fixed costs in your breakeven analysis were 35% of your sales, then your profit will be roughly 35% of your sales, above this breakeven point.
HOW MUCH OF A PROFIT GOAL YOU WANT TO SET IS YOUR PERSONAL CHOICE. HOWEVER, I LIKE TO TELL STUDENTS THAT BREAKING EVEN AT THE SHOW ITSELF IS OK, IF YOU ALSO HAVE STRATEGIES IN PLACE TO GENERATE FOLLOW-UP SALES, EITHER THROUGH REPEAT SALES BETWEEN SHOWS, OR REPEAT SALES AT THE NEXT SHOW.
4.4Determine How Much Inventory You Need To Bring
A GOOD RULE OF THUMB FOR FIGURING OUT HOW MUCH INVENTORY TO BRING IS THIS: YOU WILL NEED TO BRING WITH YOU, AT A MINIMUM, 4 TIMES THE INVENTORY YOU HOPE TO SELL.
FOR EXAMPLE, IF YOU NEED TO SELL $200.00 OF MERCHANDISE TO BREAKEVEN, YOU WILL NEED TO BRING $800.00 OF MERCHANDISE WITH YOU. AGAIN, $800.00 IS THE TOTAL OF ALL THE RETAIL PRICES OF WHAT YOU BRING.
CONTINUE THIS EXAMPLE: IF YOU WANT TO TAKE IN ANOTHER $100.00 OF SALES ON TOP OF YOUR BREAKEVEN, THEN YOU WILL NEED TO SELL $300.00 OF MERCHANDISE, THEN, YOU WILL NEED TO BRING A TOTAL OF $1200.00 OF INVENTORY. THIS IS $400.00 MORE INVENTORY THAT YOU WOULD NEED TO BRING TO MAKE ONE HUNDRED MORE DOLLARS OVER YOUR BREAKEVEN POINT. AGAIN, $1200.00 IS THE TOTAL OF ALL THE RETAIL PRICES.
WE ARE GOING TO TALK ABOUT INVENTORY IN TERMS OF RETAIL PRICES, NOT IN TERMS OF NUMBERS OF ITEMS, AND NOT IN TERMS OF WHOLESALE COSTS.. OUR TOTAL INVENTORY WOULD EQUAL THE TOTAL OF ALL RETAIL PRICES, IF EVERY PIECE SOLD.
4.5 Think about reinvestment
AS WE GO BEYOND OUR BREAKEVEN POINT, AND BECOME PROFITABLE
WE COULD HAVE USED THAT REMAINING 35 CENTS OUT OF EACH DOLLAR OF ADDITIONAL REVENUE TO PAY FOR SOME OF OUR INVESTMENT COSTS, AS WELL AS PAY OURSELVES SOMETHING.
INVESTMENT COSTS ARE THINGS YOU PAY FOR WHICH EITHER HAVE TO LAST A VERY LONG TIME, AND WHICH YOU WILL USE AT MANY, MANY CRAFT SHOWS, OR WHICH INVOLVE EXPANDING YOUR CORE JEWELRY MAKING SUPPLIES INVENTORY BEYOND WHAT YOU NEED TO REPLACE THE PARTS REPRESENTED BY THE ITEMS SOLD.
THESE INCLUDE “LONG TERM ASSETS”, SUCH AS BUYING TABLES AND CHAIRS, A TENT, AND DISPLAY CASES. THESE ALSO INCLUDE “LONG TERM LIABILITIES”, SUCH AS PAYING DOWN LOANS AND CREDIT CARD CHARGES.
WE DO NOT INCLUDE THESE INVESTMENT COSTS IN OUR BREAK-EVEN ANALYSES.
application form example
LESSON 5: GET THOSE APPLICATIONS IN EARLY
JOHN JACOB THOUGHT HE COULD SET UP ANYWHERE AND ANYTIME.
SO HE MISSED THE APRIL 30TH DEADLINE FOR THE RED HILLS FAIR. AND HE SENT IN AN INCOMPLETE APPLICATION WITHOUT THE REQUIRED PICTURES TO NAPA SWEETS FESTIVAL.
AND HE DIDN’T TAKE SERIOUSLY THE FACT THAT NAPLES SYMPHONY DAYS WAS A JURIED COMPETITION. AND HE COULDN’T UNDERSTAND HOW ADDING ONE MORE JEWELRY VENDOR TO THE ROCKY MOUNTAIN SHOWROOM WOULD MAKE MUCH OF A DIFFERENCE.
HE HAD CALCULATED THAT HE NEEDED TO DO 4 SHOWS A YEAR TO MAKE A LIVING. BUT FOR SEVERAL YEARS NOW, ALTHOUGH HE HAD APPLIED TO AT LEAST 12 SHOWS EACH YEAR, HE RARELY WAS APPROVED FOR MORE THAN 2.
Application/Acceptance Process
Read ALL THE FINE PRINT.COMPLETE the Application forms COMPLETELY.Be sure to meet all DEADLINES. Include your CHECK/MONEY ORDER for all required PREPAYMENTS and DEPOSITS.
If you need special arrangements, be sure to negotiate these up front. Do you need electricity or special lighting or special access? Do you prefer to have a particular location or table arrangement? Will your displays conform to the show’s expectations, requirements and limitations? If you will be doing demonstrations, will all your equipment and tools meet show requirements or not? Do you need to be on a corner?
Is this a juried show? Are there additional costs besides the booth rental, such as required advertising expenses, parking fees, electricity fees, tables and chairs, insurance requirements, and the like? Are there are restrictions as to the type of merchandise allowed, such as a requirement that all merchandise be hand-crafted by the artist. Are promotional materials such as brochures or postcards provided to exhibitors? Be sure to find out ahead of time,
– what times you have to be ready and fully set up in your booth
– what time you have to wait until before you can take down your booth
how early you can begin to set up your booth
Application form example 2
THE APPLICATION
1. PREPARE A GENERIC APPLICATION
2. UNDERSTAND THE JURIED SELECTION PROCESS
3. SUBMIT APPLICATIONS AND FOLLOW-UP ON THEM
4. SCHEDULE YOURSELF FOR THE YEAR
5.1. PREPARE A GENERIC APPLICATION
SOME ORGANIZATIONS HAVE A FORMAL, PRINTED APPLICATION FORM TO FILL OUT. MORE AND MORE, HOWEVER, ORGANIZATIONS ARE USING ON-LINE APPLICATION SERVICES. I SUGGEST CREATING A GENERIC APPLICATION FORM, FROM WHICH YOU CAN CUT AND PASTE INTO THESE PRINTED OR ONLINE APPLICATION FORMS.
THEY MAY ASK YOU FOR THESE TYPES OF INFORMATION:
1. COMPANY INFORMATION, ADDRESS, PHONE, EMAIL, CONTACT PHONE, ONSITE-CONTACT PHONE, WEBSITE, LICENSE PLATE #, RE-SALE OR TAX NUMBER AND STATE WHICH ISSUED IT
2. TYPE OF MERCHANDISE TO BE SOLD
3. HAND-MADE?
4. HIGH AND LOW PRICE RANGE OF MERCHANDISE
5. DESCRIBE YOUR CRAFT (TECHNIQUES, MATERIALS, DESIGNS)
6. ARTIST STATEMENT (ABOUT 150–250 WORDS)
7. BOOTH SIZE REQUIREMENTS (WILL YOU NEED MORE THAN ONE 10’X10’ BOOTH SPACE?)
8. REQUIREMENTS FOR ADDITIONAL SERVICES, SUCH AS ELECTRICITY, TABLE AND CHAIR RENTAL, TENT
9. 5 (five) PHOTOS OF YOUR CRAFTS (BE SURE YOUR PHOTOS ARE SHARP AND ATTRACTIVE, AS IF THEY WERE PUBLISHED IN A BOOK. NO DARK PHOTOS.) WITH PHOTOS, YOU MIGHT NEED SLIDES, OR YOU MIGHT NEED .jpg IMAGES THAT ARE 72–96 dpi, OR YOU MIGHT NEED HI-RESOLUTION .jpg IMAGES WHICH ARE 300 OR 600 dpi. They may need to be in 8-bit color or 16-bit color. They may need to use a RGB color scale or another color scale. They might specify a specific width and height in pixels. BE PREPARED WITH EACH OF THESE.
10. 3 (three) PHOTOS OF YOUR BOOTH SET-UP (THEY WANT VISUALLY APPEALING, CUSTOMER ENTICING, USER FRIENDLY BOOTH SET-UPS. AGAIN, NO DARK PHOTOS.)
11. LIST OF SPECIAL PREFERENCES, SUCH AS “CORNER BOOTH, IF AVAILABLE”
12. CREDIT CARD NUMBER, EXPIRATION DATE, SECURITY CODE NUMBER (THEY WILL PROBABLY WANT THIS NUMBER TO KEEP ON FILE)
5.2. UNDERSTAND THE JURIED SELECTION PROCESS
AT THIS POINT, YOU HAVE SELECTED SHOWS WHICH YOU FEEL ARE A GOOD FIT WITH YOUR BUSINESS.NOW, DETERMINE IF YOU ARE ELIGIBLE FOR THEM. DO THEY PUT ANY LIMITATIONS ON WHO CAN AND CANNOT APPLY? DO THEY REQUIRE THAT YOUR CREATIVE WORK BE JURIED?
MOST CRAFT SHOWS MAKE SIMPLE ACCEPTANCE DECISIONS BASED ON — SUBMITTING AN APPLICATION FORM, AND — PAYING THE FEE
SOME MAY RESTRICT THE NUMBER OF JEWELRY VENDORS THEY ACCEPT, BECAUSE THEY WANT A BALANCE OF TYPES OF MERCHANDISE, AND OFTEN, TOO MANY JEWELRY VENDORS APPLY.
OTHER SHOWS WANT TO MAINTAIN SOME LEVEL OF MERCHANDISE QUALITY STANDARDS. THEY SUBJECT THE APPLICANT TO A MORE INTENSIVE JURY-REVIEW PROCESS. THE JURY PROCESS IS PROBABLY WHAT YOU WOULD EXPECT. USUALLY A FEW PEOPLE REVIEW ALL THE APPLICATIONS AND SCORE THEM AGAINST A SET OF CRITERIA. THEY CHOOSE THE ONES WHICH SCORE HIGHEST.
SOME TYPICAL CRITERIA THEY USE:
– PRODUCTS CONSIDERED BEST FOR THE SHOW
– AETHETICS AND VISUAL APPEAL
– FUNCTIONALITY
– CREATIVITY
– ORIGINALITY
– TECHNIQUE
– MARKETABILITY
– QUALITY OF WORK
– BOOTH DESIGN
THEY WANT TO END UP WITH VENDORS WHOSE WARES WILL SELL, WHERE THERE WON’T BE MUCH DUPLICATION, AND WHOSE PRESENCE AND SET-UP IS EXCITING FOR THE PEOPLE WHO ATTEND THE SHOW. YOUR SHORT WRITE-UP AND SUBMITTED PHOTOGRAPHS NEED TO MAKE YOUR CASE. WHAT DOES IT MEAN WHEN A JUROR SAYS “NO!”? MOST REJECTIONS ARE BASED ON THE LIMITED NUMBER OF OPENINGS — PARTICULARLY FOR JEWELRY VENDORS. ANOTHER MAJOR REASON FOR REJECTIONS IS THE POOR QUALITY OF PHOTOS SUBMITTED. LOOK AT YOUR PHOTOS. SHARE THEM WITH SOME FRIENDS. JUDGE THEM ACCORDING TO THE PREVIOUSLY DISCUSSED JUDGING CRITERIA. HOW WELL DO THEY MAKE YOUR CASE? ARE THEY CLEAR, FOCUSED, BRIGHT?
5.3. SUBMIT APPLICATIONS AND FOLLOW-UP ON THEM
YOU HAVE CREATED YOUR LIST OF POSSIBLE SHOWS, BASED ON YOUR SENSE OF FIT, THE GOALS YOU HAVE SET FOR YOURSELF, AND YOUR BUDGET, GIVEN THE COSTS INVOLVED. YOU HAVE DETERMINED WHETHER YOU ARE ELIGIBLE FOR THEM. DECIDE ABOUT HOW MANY SHOWS YOU WANT TO DO A YEAR. SELECT 5–10 MORE SHOWS IN ADDITION TO THE NUMBER YOU WANT TO DO. ANOTHER RULE OF THUMB IS TO SELECT 3 EVENTS TO APPLY TO FOR EACH WEEKEND YOU WANT TO WORK.
GET THEIR APPLICATION FORMS, AND REVIEW THE RULES AND APPLICATION DEADLINES. READ ALL THE RULES!
DETERMINE HOW LONG THEIR REVIEW PROCESSES ARE, AND FIGURE OUT WHEN YOU SHOULD KNOW WHETHER YOUR HAVE BEEN ACCEPTED.
CALL OR EMAIL EACH ONE, AND VERIFY THAT ALL THE INFORMATION YOU HAVE — DATES, FEES, APPLICATION REQUIREMENTS, DEADLINES — ARE TRUE.
**NOTE: THINGS CHANGE. THINGS GET PRINTED WRONG.
5.4. SCHEDULE YOURSELF FOR THE YEAR
ORGANIZATION IS CRITICAL HERE. GET A GOOD 3-YEAR CALENDAR. MAP EVERY DATE OUT. APPLICATION DEADLINE. APPLICATION ACCEPTANCE NOTIFICATION. DEADLINE FOR NOTIFYING THEM, CONFIRMING YOUR ACCEPTANCE, AND SUBMITTING ANY UP-FRONT FEES. SHOW DATES, INCLUDING SET-UP AND BREAK-DOWN DATES AND TIMES. REMEMBER, FOR MANY CRAFT SHOWS, YOU WILL BE APPLYING 6–12 MONTHS AHEAD OF TIME.
IT TAKES A LOT OF COORDINATED EFFORT TO KEEP EVERYTHING ON TRACK.YOU MIGHT SET UP A SPREAD-SHEET OR DATA-BASE. I USE THE ONLINE CALENDAR APPLICATION THAT COMES WITH MY EMAIL PROGRAM. I SET UP AUTOMATIC REMINDERS, SO THEY POP UP WHEN I NEED TO TAKE ACTION.
AFTER YOU SEND IN YOUR FEES, FOLLOW-UP IN 2 WEEKS TO BE SURE THEY RECEIVED YOUR APPLICATION AND PAYMENT.
5.5. BEFORE SAYING YES!…
RE-REVIEW YOUR
FIT WITH THE SHOW — BREAK-EVEN ANALYSIS — CALENDAR SCHEDULE — THE MONEY NEEDED UP-FRONT AND, — WHETHER THERE ARE ANY CANCELLATION PENALTIES OR RULES — WHAT KINDS OF LOCAL AND STATE LICENSES, CERTIFICATES AND PERMITS YOU WILL NEED,AND IF THE SHOW PROMOTERS ASSIST YOU IN OBTAINING TEMPORARY ONES FOR THE DURATION OF THE SHOW
LESSON 6: PROMOTE, PROMOTE, PROMOTE
YOU NEED TO ACTIVELY PROMOTE YOURSELF BOTH BEFORE AND AFTER THE SHOW. DO NOT RELY ON THE SHOW PROMOTERS TO DO ALL THE MARKETING.
ABOUT 2–4 WEEKS BEFORE THE SHOW: a. CONTACT YOUR EXISTING CUSTOMERS — EMAIL, MAIL, SOCIAL NETWORK SITES
b. PROMOTE YOUR MESSAGE TO POTENTIAL CUSTOMERS. LEAVE FLYERS AND BROCHURES AT RELEVANT BUSINESSES OR ORGANIZATIONS/ POST MESSAGES ON SOCIAL NETWORK SITES/ POST MESSAGES ON YOUR OWN WEBSITE OR BLOG/ GET LISTED ON COMMUNITY CALENDARS/ TELL PEOPLE YOU INTERACT WITH. IN YOUR PROMOTIONS, BE SURE YOU HAVE ALL THE DETAILS LISTED CORRECTLY. IN A SHORT, CATCHY PHRASE OR SENTENCE, TELL WHY THIS EVENT WOULD BE OF PARTICULAR INTEREST TO THEM. YOU MIGHT OFFER SPECIAL DISCOUNTS, IF THEY PRESENT YOUR CARD OR EMAIL NOTICE.
c. BE SURE YOU ARE GOING TO LOOK PRESENTABLE. IF YOU NEED A HAIR-CUT, GET IT. BE SURE YOU HAVE ALL THE CLOTHES YOU NEED. CHECK YOUR SUPPLY OF BUSINESS CARDS, BROCHURES, OTHER PROMOTIONAL MATERIALS. PRACTICE SAYING YOUR SELLING POINTS. BE STRATEGIC ABOUT WHICH PIECES OF JEWELRY YOU ARE GOING TO WEAR AT THE SHOW.
AT THE SHOW: HAVE YOUR BUSINESS CARDS, AND ANY BROCHURES, IF YOU HAVE THEM, OUT FOR THE TAKING. IT HELPS IF YOUR BUSINESS CARDS HAVE AN IMAGE OF YOUR JEWELRY ON THEM. TO HELP PEOPLE REMEMBER YOU.
HAVE A BOOK OR SIGN-UP SHEET WHERE PEOPLE CAN LIST THEIR NAMES, MAILING AND EMAILING ADDRESSES.
AFTER THE SHOW: UPDATE YOUR CUSTOMER DATABASE. STAY IN TOUCH WITH YOUR NEW CUSTOMERS, SUCH AS WITH A FOLLOW-UP MAILING OR EMAILING. DIRECT YOUR NEW CUSTOMERS TO YOUR WEBSITE OR OTHER WAYS OF CONTACTING YOU AND SEEING YOUR PIECES WHICH ARE FOR SALE.
LESSON 7: SET UP FOR SUCCESS
IMOGENE MCALLISTER ROSENSTEIN. REMEMBER SHE HAD NO PLAN OR STRATEGY FOR CHOOSING SHOWS. AND, GUESS WHAT, SHE HAD NO PLAN OR STRATEGY FOR SETTING UP AT SHOWS, EITHER.
IMOGENE, BLESS HER HEART, LOVED PLAIDS. SHE WOULD SET UP A TABLE, AND COVER IT WITH A DARK, PLAID CLOTH, AND LAY HER JEWELRY ONTO THE CLOTH. SHE LIKED TO PUSH HER TABLE UP TO THE FRONT OF THE BOOTH, AND SIT IN A CHAIR BEHIND IT.
HER BOXES OF SUPPLIES AND INVENTORY, WERE STACKED UP AGAINST THE BACK OF HER BOOTH, NO EFFORT TO DISGUISE OR HIDE THEM.
YOUR BOOTH IS YOUR SHOP.IT SHOULD BE COHESIVE, VISUALLY INTERESTING, FUNCTIONAL. YOU DO NOT WANT YOUR BOOTH TO BE DISORGANIZED, DIS-INVITING, INTIMDATING.
SETTING UP FOR SUCCESS MEANS HAVING A GOOD UNDERSTANDING OF
7.1. BOOTH DESIGN 7.2. LAY-OUT AND TABLE SET UP 7.3. MERCHANDISE DISPLAY 7.4. SIGNAGE 7.5. LOADING AND UN-LOADING
front-loadedislandL-shapeU-shape
WALLS: FIRST, WILL THIS SPACE BE ENCLOSED IN SOME WAY — WALLS, PARTITIONS, INSIDE A TENT?
DO YOU WANT TO HAVE WALLS? DO THE WALLS NEED TO BE FABRIC, WOOD, WIRE GRIDS OR CHICKEN WIRE? WHAT ARE YOU GOING TO DO WITH THE WALLS? CAN THINGS BE HUNG. HOW DO THESE WALLS AFFECT THE VISIBILITY OF YOUR BOOTH SPACE AND YOUR INVENTORY?
AS BEST AS I CAN, I LIKE TO USE MATERIALS AND FURNISHINGS WHICH WILL NOT DIMINISH THE VISIBILITY OF MY BOOTH, AND WHICH CAN DO DOUBLE-TIME. I OFTEN USE WINDOW SHUTTERS OR WIRE GRIDS FOR WALLS AND RACKS, SO THAT I CAN HANG THINGS FROM THEM.
THE CONTAINERS I USE TO TOTE MY INVENTORY AND SUPPLIES GET USED FOR DISPLAYS, OR AS SUPPORT COLUMNS FOR DISPLAYS.
TENT: IF YOU NEED A TENT, SOME SHOWS PROVIDE THEM OR RENT THEM. SOME SHOWS HAVE DETAILED REQUIREMENTS FOR WHAT TENTS SHOULD LOOK LIKE. SOMETIMES THEY WANT ALL TENTS TO BE WHITE. YOU CAN FIND ONLINE SOURCES FOR BUYING TENTS. YOU WANT A TENT WHERE YOU CAN ROLL THE WALLS UP AND DOWN. BE SURE YOU HAVE TENT WEIGHTS, TO DEAL WITH WINDY WEATHER. SOMETIMES, IF THE AIR IS HOT AND HUMID, AND THE TENT WALLS ARE DOWN, THE AIR IN YOUR BOOTH BECOMES STALE AND HEAVY. DON’T LET THIS HAPPEN.
TABLE: SECOND, IF YOU ARE TO BE PROVIDED WITH TABLES, HOW MANY AND OF WHAT SIZE WILL THEY BE? I FIND 6’ BY 2’ TABLES TO BE ESPECIALLY EASY TO MANEUVER AND MANAGE.
FOR EACH TABLE, I HAVE CUT UP PVC PIPE — TO STICK THE LEGS OF MY TABLES IN, AND TO ALLOW ME TO RAISE THE HEIGHT OF THE TABLES ABOUT 6–9” SO CUSTOMERS DO NOT TO HAVE TO BEND DOWN SO FAR TO VIEW THE INVENTORY.
I DON’T LIKE TABLES FLUSH WITH THE AISLE. IN SOME SETTINGS, THIS IS YOUR ONLY CHOICE. BUT THIS MAKES IT UNCOMFORTABLE FOR PEOPLE TO STAND THERE AND LOOK AT YOUR STUFF. THEY ARE TOO CONCERNED THEY MAY BLOCK SOMEONE IN THE AISLE. IF POSSIBLE, MOVE THE TABLES INWARD, SO YOU GET THEM TO FEEL LIKE THEY HAVE STEPPED INTO YOUR BOOTH.
ADDITIONAL FURNISHINGS: THIRD, WHAT KINDS OF ADDITIONAL FURNISHINGS WILL YOU NEED TO BRING? DO THINGS NEED TO GO ON SHELVES? IS THERE ROOM FOR SOME KIND OF RACK? DO YOU WANT TO PUT A RUG ON THE FLOOR, OR IN FRONT OF YOUR BOOTH? DO YOU WANT TO BRING BOX FANS (OR SPACE HEATERS)? WHAT WILL YOU USE TO STORE THINGS YOU NEED ACCESS TO DURING THE SHOW? BRING A MIRROR FOR YOUR CUSTOMERS.
LIGHTING: FOURTH, WHAT IS YOUR LIGHTING PLAN, AND TOWARDS THIS END, WILL YOU HAVE ACCESS TO ELECTRICITY? HAVING LIGHTING MAKES A BIG DIFFERENCE IN YOUR SALES RESULTS. BRIGHT LED LIGHTS, AT 4100k TO 5500k, ARE BEST. THIS KELVIN MEASURE WILL GIVE YOU A BLUISH WHITE LIGHT. BRING POWER STRIPS AND LONG EXTENSION CORDS. THERE MAY BE ELECTRICITY, BUT THE SOURCE OF THIS POWER MAY BE LOCATED FAR FROM YOUR BOOTH. IF THERE IS NO ELECTRICITY, YOU CAN PURCHASE BATTERY OPERATED LED LIGHTS
OPTIMUM FLOOR PLAN: FIFTH, GIVEN THE SPACE, WHAT IS THE OPTIMUM FLOOR PLAN FOR YOUR BOOTH? IF POSSIBLE, I PREFER TO ALLOW MY CUSTOMERS TO WALK INTO PART OF MY BOOTH. TOWARDS THIS END, AGAIN IF POSSIBLE, I LIKE TO SET THE TABLES UP EITHER IN AN “L-SHAPE” OR A “U-SHAPE”.
People don’t like to stand in a place where they feel someone might brush against their behind while walking by.
PRACTICE PRACTICE PRACTICE: LAST, PRACTICE SETTING EVERYTHING UP. PRACTICE PACKING YOUR THINGS, TRANSPORTING YOUR THINGS, AND UN-PACKING YOUR THINGS. IF YOU WILL BE USING A TENT, PRACTICE SETTING THIS UP. CAN YOU DO ALL THIS BY YOURSELF? GIVEN THE DISTANCE BETWEEN WHERE YOU WILL HAVE TO PARK, AND WHERE YOUR BOOTH IS, CAN YOU MANAGE TRANSPORTING ALL YOUR STUFF THIS DISTANCE.
ANTICIPATE THE TRAFFIC FLOW BOTH IN FRONT OF YOUR BOOTH, AS WELL AS INSIDE YOUR BOOTH, IF YOU CAN SET UP TO ALLOW PEOPLE TO COME INSIDE. REMEMBER: YOUR SPACE AND CUSTOMER FLOW GO BEYOND THE BOUNDARIES OF YOUR TABLE. REMEMBER: VISUALIZE HOW TRAFFIC WILL FLOW TO AND FROM EACH OF YOUR NEIGHBORS.
AS SHOPPERS WALK BY YOUR BOOTH, HOW MUCH OF IT CAN THEY SEE? ARE THERE THINGS, AND ENOUGH THINGS, TO CATCH THEIR EYE, AND ENTICE THEM TO STOP AND LOOK?
BE SURE THE DÉCOR OF YOUR BOOTH COORDINATES WELL WITH THE JEWELRY YOU ARE SELLING. IT MUST COORDINATE WITH THE SHOW, AS WELL. YOU DON’T WANT BEACH DÉCOR AT A CHRISTMAS HOLIDAY SHOW.
CAN CUSTOMERS…
– ENTER AND EXIT EASILY
– SHOP EASILY
– PAY EASILY
– NOT FEEL TRAPPED, WHEN A LOT OF PEOPLE ARE IN YOUR BOOTH
PREVENT THE “SCRATCHED TUSH” SYNDROME. CUSTOMERS AVOID STANDING WHERE THEY FEAR SOMEONE WILL BRUSH AGAINST THEIR BACK-SIDES.
SET UP A PAYMENT STATION WHERE CUSTOMERS CAN MAKE THEIR PURCHASES OUT OF THE WAY OF OTHER SHOPPERS BUT WHERE YOU CAN STILL KEEP AN EYE ON THINGS. AT YOUR PAYMENT STATION, YOU WILL NEED TO ACCEPT PAYMENT AND MAKE CHANGE, AND YOU WILL NEED TO BE ABLE TO WRITE SOME KIND OF CUSTOMER RECEIPT. YOU MAY NEED TO WRAP UP OR PACKAGE AN ITEM,
SOME ADDITIONAL QUICK POINTERS:
– COVER YOUR TABLES WITH FABRIC
– DON’T USE DARK COLORS. THESE BRING THE MOOD DOWN, AND OFTEN DON’T ENHANCE YOUR JEWELRY IN THESE VERY OPEN SETTINGS.
– CHOOSE COLORS WHICH ADD TO YOUR PRODUCT, BUT DO NOT COMPETE WITH THEM
– CUSTOMERS LIKE TO USE ALL THEIR SENSES WHEN THEY SHOP: SEE, TOUCH, THINK
– SUBTLY USE PROPS AND MIRRORS TO HELP THE CUSTOMER VISUALIZE HOW THE PRODUCT MIGHT USED OR WORN
– I LIKE TO MAKE MY BOOTH FEEL HOMEY.
– I LIKE TO HAVE RUGS INSIDE AS WELL AS IN FRONT OF MY BOOTH
– I LIKE TO HAVE CHAIRS OR A BENCH NEAR THE FRONT OF MY BOOTH, TO ATTRACT PEOPLE TO SIT AND LINGER, AND SO IT ALWAYS LOOKS LIKE PEOPLE ARE LOOKING AT MY BOOTH
– IN HOT WEATHER, I LIKE TO HAVE A FAN CIRCULATING AIR WHERE THE CUSTOMERS ARE STANDING, NOT JUST ON ME.
– IN COLD WEATHER, I HAVE A HEATER GOING.
– NO GARBAGE SHOULD BE VISIBLE.
– EVERYTHING SHOULD BE STORED AND NEAT
– HAVE ENOUGH SIGNAGE TO GET PEOPLE’S ATTENTION, AND EDUCATE THEM ABOUT YOUR PRODUCTS
DISPLAY YOUR PRICES CLEARLY
ANTICIPATE THE WEATHER IS IT…
– HOT AND HUMID
– COLD
– RAINY OR STORMY
– WINDY
– DUSTY
HAVE DROP CLOTHS TO PROTECT YOUR MERCHANDISE AND DISPLAYS. I KEEP LARGE PIECES OF CARDBOARD THAT I CAN LAY ON WET GROUND, WHEN MY BOOTH IS OUTSIDE. SOMETIMES I TAKE A BALE OR TWO OF STRAW THAT I PURCHASED AT THE LOCAL HARDWARE STORE OR GARDEN CENTER, TO COVER WET GROUND. I HAVE PLENTY OF CLEANING AIDS, TO KEEP THE MERCHANDISE LOOKING FRESH AND SALEABLE ALL DURING THE SHOW.
I WEAR LAYERS OF CLOTHING. I BRING SUNGLASSES, GLOVES, HATS, A BATTERY-POWERED HAND-HELD FAN, WHATEVER IT TAKES TO KEEP ME PERKY, HAPPY AND COMFORTABLE.
DISPLAYING YOUR MERCHANDISE: SOME POINTERS
COVER YOUR TABLES WITH ATTACTIVE FABRIC, IN A SOLID COLOR WHICH COMPLEMENTS YOUR PIECES. IN CRAFT SHOW SETTINGS, YOU WILL FIND THAT LIGHTER COLORS WORK BETTER THAN DARKER ONES. I THINK IT IS BETTER TO COVER THE FULL FRONT OF THE TABLE WITH A CLOTH, NOT JUST THE TOP OF THE TABLE.
HAVE PRETTY CONTAINERS TO HOLD YOUR WARES.
THINK OF DISPLAY IN TERMS OF LEVELS. YOU DO NOT WANT EVERYTHING LYING FLAT ON A TABLE. IN YOUR BOOTH, YOU MIGHT HAVE A MIX OF LOW TABLES, HIGHER TABLES, TALL HEIGHTS, STANDS, PEDESTALS, HANGING ITEMS
COORDINATE YOUR USE OF COLOR WITH THE COLORS PROMINENT IN YOUR BUSINESS CARDS, BROCHURES AND SIGNAGE.
A WARM, AIRY FEELING IS MUCH BETTER THAN A DARK, CAVE FEELING.
OPEN BOOK CASES WORK BETTER THAN ONES WITH CLOSED BACKS.
BE CAREFUL, IF USING DISPLAYS WHICH ARE GLASS ENCLOSED, THAT THE GLASS REFLECTION DOES NOT DIMINISH THE ABILITY TO VIEW JEWELRY INSIDE THESE DISPLAYS.
KEEP THINGS CREATIVE, BUT NOT COMPLEX OR CLUTTERED. DON’T LET THINGS GET BARREN, EITHER, — WHAT I CALL A “TOOTHLESS LOOK”
YOUR DISPLAYS SHOULD BE ATTRACTIVE, BUT SHOULD NOT COMPETE FOR ATTENTION WITH YOUR JEWELRY.ITH THIS IN MIND, YOU DO NOT NECESSARILY HAVE TO PUT ALL YOUR INVENTORY OUT AT ONCE.
CREATE NATURAL PLACES FOR THE CUSTOMER’S EYE TO SETTLE. BUILD DISPLAYS AROUND THESE NATURAL FOCAL POINTS.
CLEAN. KEEP YOUR GLASS CLEAN. KEEP YOUR JEWELRY SHINY. KEEP YOUR BOOTH TIDY. YOU WANT THAT CUSTOMER AT 4PM SUNDAY TO BE AS EXCITED AS THAT CUSTOMER WAS AT 1PM THE DAY BEFORE.
7.4. SIGNAGE
FIRST AND FOREMOST, FOLLOW THE SHOW PROMOTER’S RULES ABOUT SIGNAGE.
Signs should generate interest and help sell your products. Don’t use “superlatives” like best, most, cheapest, largest and the like. In as few words as possible, tell the customer how your product will solve his or her problem, or meet his or her needs. Be positive and diplomatic in your wording. Writing “unruly kids will be sold as slaves” makes the point much better than “No Kids”.
Explain that which is not obvious. What’s it made of? When using the product, what must be avoided — such as getting it wet? Are there any disclaimers or conditions? What are the advantages of your product over others?
Use colors, typefaces, and images on your sign which have the same feel as your merchandise. Don’t overdo your signage, so that the signs overwhelm your inventory.
Be sure you have a clear, prominent sign that includes the name of your business. If your booths are number, this number should appear on the sign.
YOUR SIGN OR SIGNS SHOULD BE VISIBLE FROM ALL SIDES OF YOUR BOOTH FROM WHICH CUSTOMER WILL BE APPROACHING. IF THE BACK OF YOUR BOOTH WILL BE VISIBLE, PUT A SIGN THERE. PUT A SIGN ON THE INSIDE OF YOUR BOOTH. I LIKE TO HANG A POSTER-SIZED IMAGE OF SOMEONE WEARING A PIECE OF MY JEWELRY. I IMPRINT MY BUSINESS NAME ON THE POSTER.
YOUR SIGNS SHOULD BE SIMPLE, CLEAN AND WITH A CLEAR FONT. THE COLORS RED AND YELLOW ARE SEEN FROM THE FURTHEST DISTANCE AWAY.
YOUR SIGN SHOULD SAY WHAT YOU SELL, NOT NECESSARILY YOUR BUSINESS NAME FOR EXAMPLE: “JEWELRY TO LOVE” IS MUCH BETTER THAN “IMOGENE’S CREATIONS”
EVERYTHING IN YOUR BOOTH SHOULD BE TAGGED, LABELED, PRICED AND IDENTIFIED FOR THE CUSTOMER. INFORMATION IS IMPORTANT.
YOU MIGHT HAVE FRAMED LITTLE WRITE-UPS SITTING WITH VARIOUS DISPLAYS AND TELLING THE CUSTOMER SOMETHING ABOUT YOURSELF, YOUR TECHNIQUE OR YOUR JEWELRY.
WITHOUT GOOD AND PROMINENTLY VISIBLE INFORMATION, CUSTOMERS OFTEN WALK AWAY WITHOUT ASKING FOR HELP.
PRICE TAGS ARE A MUST. IF YOU HAVE THE TIME AND CAN AFFORD IT,USE PROFESSIONALLY-PRINTED PRICE TAGS.YOU CAN BUY LABEL MAKERS NOW AT STATIONERY STORES AND WITH WHICH YOU CAN GENERATE PRINTED PRICE TAGS. PRICE TAGS GIVE CREDANCE TO THE PRICE, AND REDUCE THE TIMES CUSTOMERS MAY TRY TO HAGGLE.
HAVE BUSINESS CARDS, POSTCARDS, BROCHURES, AND NEWSLETTERS EASILY AVAILABLE.
PUT OUT A SIGN-UP BOOK OR SIGN-UP SHEETS TO EXPAND YOUR MAILING AND EMAILING LISTS.
7.5. LOADING AND UN-LOADING
ALLOW YOURSELF PLENTY OF TIME TO UNLOAD AND SET UP YOUR BOOTH. IF ALLOWED TO DRIVE INTO THE VENUE TO UNLOAD, BE COURTEOUS AND UNLOAD AS QUICKLY AS POSSIBLE. THEN MOVE YOUR VEHICLE BEFORE CONTINUING TO SETUP.
I LIKE TO MODULAR-IZE EVERYTHING. THAT IS, I LIKE TO USE SIMILAR SIZED AND SHAPED CONTAINERS TO CARRY EVERYTHING IN. THEY ARE STURDY, EASY FOR ONE PERSON TO CARRY. THE CONTAINERS ARE STACKABLE. EACH CONTAINER IS CLEARLY LABELED ON THE OUTSIDE TO WHAT IS ON THE INSIDE. SOME OF MY CONTAINERS DO DOUBLE-TIME AS PEDESTALS OR SUPPORTS FOR DISPLAYS. I USE OTHER CONTAINTERS FOR ACTIVE STORAGE DURING THE SHOW.BUT EASILY STORABLE, OUT OF SIGHT OF THE CUSTOMERS.
IF YOU NEED A VAN OR TRUCK, AND DON’T OWN ONE, THESE ARE EASILY AND VERY INEXPENSIVELY RENTABLE AT A LOCAL U-HAUL OR SIMILAR BUSINESS.
LESSON 8: BRING ENOUGH INVENTORY TO SELL
INVENTORY
1. BRING ENOUGH INVENTORY TO SELL, TYPICALLY 4X WHAT YOU HOPE TO SELL.THUS, IF YOU WANT TO SELL $200.00 OF STUFF, YOU WOULD WANT TO BRING $800.00 OF MERCHANDISE.
2. DON’T NECESSARILY PUT EVERYTHING OUT AT ONCE.YOU WANT YOUR BOOTH TO LOOK FULL, ABUNDANT AND COMPLETE, BUT NOT CLUTTERED OR OVERWHELMING. AT THE SAME TIME, YOU DON’T WANT “EMPTY SPACES” WHERE IT LOOKS LIKE YOU HAVE RUN OUT OF THINGS TO SELL. IF YOU STARTED WITH A LARGE BOWL OF LOOSE ITEMS, AND YOU HAVE SOLD OUT HALF OF THEM, REPLACE THAT BOWL WITH A SMALLER BOWL.
3. HAVE MERCHANDISE WITH A VARIETY OF PRICE POINTS. YOU WILL WANT TO HAVE A MIX OF IMPULSE ITEMS, AS WELL AS MORE EXPENSIVE THINGS, AND PERHAPS 2 OR 3 VERY HIGH END ART PIECES.
THINK WHAT KINDS OF JEWELRY SELLS THE MOST, AND WHAT SELLS THE LEAST. USUALLY EARRINGS AND BRACELETS SELL THE MOST, AND NECKLACES AND SPECIALIZED ITEMS SELL THE LEAST. BUT THIS ALL DEPENDS SOMEWHAT ON CURRENT FASHIONS.
PEOPLE CARRY AROUND WITH THEM $1 BILLS, $5 BILLS, $10.00 BILLS, $20’S, $50’S AND $100’S. THE IMPULSE BUYER IS MORE LIKELY TO PURCHASE SOMETHING IN THESE DENOMINATIONS.
4. SELL THINGS YOU LOVE.
LESSON 9: SELL YOURSELF AND YOUR CRAFT AT THE SHOW
AT THE SHOW, YOU ARE NOT ONLY SELLING YOUR PRODUCTS. YOU ARE SELLING YOURSELF. YOURSELF AS A JEWELRY DESIGNER. YOUR CREATIVITY. YOUR PERSONALITY. THE ESSENCE OF YOUR ARTISTIC SOUL.
YOU SELL YOURSELF TO MOTIVATE YOUR CUSTOMERS. YOU WANT TO MOTIVATE PEOPLE TO STOP BY YOUR BOOTH AND LINGER. YOU WANT TO MOTIVATE PEOPLE TO BUY. YOU WANT TO MOTIVATE THEM TO REMEMBER YOU AND YOUR WORK. YOU WANT THEM TO PURCHASE FROM YOU AGAIN.
ALL THIS MOTIVATING WILL TAKE A LOT OF WORK ON YOUR PART.
(1) BODY LANGUAGE
(2) TELLING YOUR STORY
(3) DEMONSTRATING YOUR SKILLS
(4) MAKING THE SALE WORK FOR THEM
(9.1) BODY LANGUAGE THE WAY YOU SIT, THE WAY YOU STAND, YOUR FACIAL EXPRESSIONS, HOW YOU GREET CUSTOMERS, HOW YOU CONVERSE WITH CUSTOMERS, HOW YOU DESCRIBE YOUR WORK, AND YOUR TECHNIQUE, THESE ALL SUBTLY AFFECT THE SHOPPING EXPERIENCES AND BEHAVIORS OF YOUR CUSTOMERS.
PART OF THE SELLING PROCESS IS PURE THEATER. YOU NEED TO PUT ON A GOOD SHOW. AFTER ALL,YOU WANT TO ATTRACT CUSTOMERS TO YOUR BOOTH. YOU WANT THEM TO LINGER. YOU WANT THEM TO ASK FOR HELP, AND ASK OTHER QUESTIONS. YOU WANT THEM TO REMEMBER YOU AND WHAT YOU SELL.
FIRST, STAND, DON’T SIT. IF YOU DO NEED TO SIT, SIT AT AN ANGLE TO YOUR BOOTH OR DISPLAY TABLE. RATHER THAN SITTING DIRECTLY CENTERED, FACING FORWARD. IN THIS WAY, PEOPLE CAN APPROACH YOUR DISPLAY WITHOUT FEELING YOU ARE WATCHING THEIR EVERY STEP AS THEY MAKE THEIR WAY TO YOUR BOOTH. IF IT’S GOING TO BE A LONG DAY AND A LONG WEEKEND, YOU MIGHT RESORT TO A HIGHER DIRECTOR’S CHAIR OR STOOL, AS A SORT OF COMPROMISE BETWEEN STANDING AND SITTING TO TAKE SHORT BREAKS.
YOUR FACIAL EXPRESSIONS ARE IMPORTANT. DON’T LOOK BORED. DON’T STARE OFF INTO SPACE. DON’T LOOK LIKE YOU WOULD RATHER BE SOMEWHERE ELSE. DON’T STAND WITH YOUR ARMS FOLDED, OR YOUR HANDS IN YOUR POCKETS. DON’T LOOK LIKE YOUR PRIMARY MISSION IS TO GUARD YOUR BOOTH. LOOK HAPPY. LOOK EAGER TO MEET NEW PEOPLE, GREET FAMILIAR FACES, AND SHARE YOUR STORIES AND YOUR WORK.
BE VISIBLE, DON’T HIDE.
LOOK BUSY. WHEN IT’S SLOW, DO BUSINESS-RELATED ACTIVITIES: CLEAN, DUST, RE-ARRANGE, CHANGE OUT MERCHANDISE, PRICE, MAKE SOME MORE JEWELRY, INVENTORY THINGS, TAKE PICTURES.
ENGAGE PEOPLE AS THEY WALK BY OR APPROACH YOUR BOOTH. CATCH THEIR EYES. SAY “GOOD DAY”, OR “BEAUTIFUL DAY OUT TODAY” COMPLMENT PEOPLE, LIKE SAYING “LOVE THAT NECKLACE,” OR “BEAUTIFUL SHOES.” IF YOU HAVE DIFFICULTY TALKING WITH PEOPLE, HIRE SOMEONE TO WORK WITH YOU WHO CAN.
GIVE YOUR CUSTOMERS SOME SPACE TO SHOP. YES, YOU DO HAVE TO WORRY ABOUT SHOP-LIFTING, BUT YOU DON’T WANT TO MAKE EVERY CUSTOMER FEEL LIKE YOU THINK THEY ARE A CROOK. DON’T HOVER OVER THEM. DON’T FORCE CONVERSATIONS ON THEM. DON’T TAKE AWAY THEIR FUN OF SHOPPING.
BUT ALSO, DO NOT IGNORE THEM. GREET THEM. ASK THEM IF THEY NEED ASSISTANCE. ASK THEM IF THEY WOULD LIKE TO TRY A PIECE ON. ASK THEM HOW THE SHOW HAS BEEN GOING FOR THEM.
DRESS THE PART. BE WELL-GROOMED. BE PRESENTABLE. SMELL GOOD. BUT DON’T BATH YOURSELF IN COLOGNE.DON’T GET CAUGHT WITH BAD BREATH. AND, IN A SIMILAR VEIN, DON’T EAT THINGS WHICH RESULTS IN BAD BREADTH, LIKE ONIONS AND TUNA FISH.
WEAR YOUR JEWELRY.
WEAR A NAME BADGE.
DON’T EAT IN YOUR BOOTH.
DON’T TALK ON THE PHONE.
DON’T TEXT.
DON’T SMOKE.
DON’T DRINK ALCOHOLIC BEVERAGES.
DON’T READ OR SLEEP.
DON’T GET LOST IN CONVERSATION WITH YOUR PARTNER OR STAFF, TO THE EXCLUSION OF YOUR CUSTOMERS.
DON’T BLOCK THE ENTRANCE TO YOUR BOOTH
IT’S A GOOD IDEA TO TAKE BREAKS ABOUT EVERY 4 HOURS. BUT DON’T LEAVE YOUR BOOTH FOR MORE THAN 20 MINUTES AT A TIME. PEOPLE WANT TO MEET THE ARTIST. YOUR PRESENCE IS ONE OF YOUR MAIN SELLING POINTS.
WHEN IT’S CROWDED, AND YOU HAVE CUSTOMERS COMPETING FOR YOUR ATTENTION, ACKNOWLEDGE EACH ONE, LET THEM KNOW ABOUT HOW LONG IT WILL BE BEFORE YOU FINISH WITH YOUR EXISTING CUSTOMER, AND CAN WAIT ON THEM.
PRIORITIZE.THE PERSON YOU MAY BE HELPING MIGHT REQUIRE A LOT OF TIME. THE NEXT PERSON MIGHT REQUIRE JUST A FEW MINUTES. EXCUSE YOURSELF FROM THE FIRST PERSON, AND WAIT ON THE SECOND.
IF YOU HAVE A CHATTY CUSTOMER, LEARN HOW TO POLITELY INTERRUPT, AND RE-DIRECT THE CONVERSATION, SO THAT YOU CAN SMOOTHLY TRANSITION TO THE NEXT CUSTOMER.
THANK YOUR CUSTOMERS FOR COMING OVER TO YOUR BOOTH.
BE SURE THEY SIGN A GUEST REGISTER. BE SURE THEY LEAVE WITH SOME PROMOTIONAL MATERIAL. BE SURE THEY KNOW HOW TO CONTACT YOU AFTER THE SHOW.
IF SOMEONE HAS PURCHASED SOMETHING FROM YOU, THANK THEM, THEN SAY SOMETHING LIKE, “THAT NECKLACE WILL LOOK GREAT ON YOU,” OR, “THAT’S SUCHA THOUGHTFUL GIFT YOU ARE BUYING,” WHICH REINFORCES THE GOOD FEELINGS THEY HAVE ABOUT THE PURCHASE, AS THEY HAND YOU THE MONEY.
(9.2) TELL YOUR STORY
WHEN YOU ESTABLISH A VERY PERSONAL CONNECTION WITH YOUR CUSTOMER,YOU WILL MORE LIKELY MAKE THE SALE.
PEOPLE ARE NOT JUST BUYING YOUR WORK. THEY ARE BUYING AN EXPERIENCE. THE MORE THEY KNOW ABOUT YOU, YOUR TECHNIQUES AND THE PARTICULARS OF THE WORK, THE MORE LIKELY THEY ARE TO BUY SOMETHING. YOU, IN EFFECT, ARE BUILDING A BRAND.THE BRAND IS YOU. YOUR STORY SHOULD BE REAL, RELEVANT TO WHAT YOU ARE SELLING, AND REPEATABLE.
SO, YOUR STORY COULD INCLUDE
– IMPORTANT MILESTONES IN YOUR DEVELOPMENT AS AN ARTIST
– HOW YOU GOT STARTED
– HOW YOU LEARNED YOUR “CRAFT”
– WHO TAUGHT YOU
– THE REASONS YOU ARE PASSIONATE ABOUT YOUR WORK
– DO YOU MAKE THINGS FULL TIME OR PART TIME
– YOUR INSPIRATIONS
– INTERESTING FACTS ABOUT THE MATERIALS YOU USE, and WHERE YOU FIND THEM
– SOME HUMOROUS TALES OF THINGS THAT HAPPENED TO YOU, IN THE CONTEXT OF YOUR WORK
– THE KINDS OF THINGS WHICH DIFFERENTIATE YOURSELF FROM OTHER JEWELRY DESIGNERS
– THE KINDS OF THINGS WHICH ARE CRITICAL TO YOUR SUCCESS
– HOW YOU MANAGE A REGULAR JOB AND YOUR “CRAFT”
– WHERE ELSE DO YOU SELL YOUR PIECES
IF YOU ARE UNCOMFORTABLE TALKING ABOUT YOURSELF AND YOUR JEWELRY, PRACTICE, PRACTICE, PRACTICE. WRITE UP A STORY. MAKE THIS WRITE-UP PART OF YOUR PROMOTIONAL MATERIALS. TELL YOUR STORY TO FRIENDS AND RELATIVES. EVENTUALLY TELLING YOUR STORY WILL BECOME SECOND-NATURE.
(9.3) DEMONSTRATING YOUR SKILLS IF THE SHOW PROMOTERS ALLOW DEMONSTRATIONS, FIND OUT THEIR RULES.
DEMONSTRATIONS ARE GREAT MARKETING TOOLS. THEY ALWAYS ATTRACT CUSTOMERS. THEY GET PEOPLE TO LINGER. THEY SHOW YOU REALLY DO MAKE YOUR OWN PRODUCTS.
(9.4) MAKE THE SALE WORK FOR THEM
HELP THE CUSTOMER JUSTIFY THE PURCHASE. MAKE IT WORK. HAVE TOOLS HANDY TO TAKE OUT A LINK OR ADD A LINK TO SHORTEN OR LENGTHEN THAT PIECE OF JEWELRY.
YOU MAY NOT HAVE EXACTLY WHAT THEY WANT. PERHAPS YOU HAVE IT IN YOUR INVENTORY AT HOME, AND YOU CAN MAIL ORDER THE SALE.
OR, IF YOU DO COMMISSION WORK, LET PEOPLE KNOW ABOUT THIS. EXPLAIN TO THEM WHAT COMMISSION WORK MEANS, AND WHAT YOUR TERMS ARE.
Children CHILDREN CAN DISRUPT THE SALES PROCESS. THEY CAN COMPETE FOR THE ATTENTION OF YOUR CUSTOMER THEY CAN SOMETIMES REEK HAVOK WITH YOUR MERCHANDISE AND YOUR DISPLAYS. I ALWAYS HAVE SOME SMALL ITEMS TO DISTRACT THEM, OR SOMETHING THEY CAN FIDDLE OR PLAY WITH.
body language
LESSON 10: MAKE A LIST OF THINGS TO BRING
MAKING LISTS IS ONE OF THE ONLY WAYS I KNOW TO KEEP UP WITH ALL THE DETAILS.
MAKE LISTS OF THINGS TO BRING FOR EACH OF THE FOLLOWING:
1.PACKING AND UNPACKING: storage bins, hand-trucks, bubblewrap
2. BOOTH SET-UP INCLUDING FURNISHINGS AND EQUIPMENT, LIGHTING AND EXTENSION CORDS
11. MONEY, CREDIT CARD AND SALES MANAGEMENT INCLUDING CASH AND CHANGE, FORMS, CELL PHONE, CREDIT CARD EQUIPMENT CREDIT CARD AUTHORIZATION PHONE NUMBERS, SALES TAX CERTIFICATE, BUSINESS LICENSE
12. WEATHER AND OTHER CONTINGENCIES SUPPLIES SUCH AS SAFETY PINS, BUNGEE CORDS, ZIP TIES, SCISSORS, TWINE, TAPE, TENT WEIGHTS, PLASTIC DROP CLOTHS OR TARPS, TOOL KIT FOR REPAIRS, BUG SPRAY, HAT, SUNGLASSES
13. CLEANING SUPPLIES INCLUDING PAPER TOWELS, GLASS CLEANER, JEWELRY CLEANER, GARBAGE BAGS
14. SHOW RELATED SUCH AS COPY OF ALL CORRESPONDENCE WITH SHOW PROMOTER, YOUR APPLICATION FORM
15. DEMONSTRATION SUPPLIES INCLUDING TOOLS, SUPPLIES, SAMPLES
CAMERA: BE SURE TO BRING A CAMERA.TAKE PICTURES OF YOUR FINAL BOOTH SET-UP. TAKE PICTURES OF YOUR MERCHANDISE DISPLAYS.TAKE PICTURES OF ITEMS THAT SEEM TO BE SELLING WELL.
LESSON 11: BE PREPARED TO ACCEPT CREDIT CARDS
YOU WILL DEFINITELY LOSE SALES, IF YOU DO NOT HAVE A WAY TO ACCEPT CREDIT CARDS.
TODAY, THERE ARE SEVERAL SYSTEMS THAT ALLOW YOU TO PUT A SMALL ATTACHMENT ONTO YOUR CELL PHONE. THEY ALLOW YOU TO RUN CREDIT CARDS WITH VERY SMALL FINANCE CHARGES TO YOU. IT IS VERY QUICK AND EASY TO GET APPROVED. YOUR CELL PHONE COMPANY MAY HAVE A PRODUCT FOR YOU. OR YOU CAN RUN CHARGES DIRECTLY ON YOUR CELL PHONE OR TABLET.
ALSO, THERE ARE COMPANIES WITH SIMILAR PRODUCTS LIKE SQUARE GOPAYMENT PAYANYWHERE
LESSON 12: PRICE THINGS TO SELL
CUSTOMERS WHO ATTEND DIFFERENT KINDS OF SHOWS HAVE DIFFERENT KINDS OF EXPECTATIONS ABOUT PRICE. PEOPLE EXPECT TO PAY HIGHER PRICES AT ARTS AND CRAFTS SHOWS, AND LOWER PRICES AT FLEA MARKETS AND BAZAARS.
YOU ALWAYS BEGIN BY SETTING FAIR AND REASONABLE PRICES
AT HIGHER END SHOWS, YOU WANT TO MINIMIZE ANY DISCOUNTING OR HAGGLING.AT FLEA MARKETS, BE PREPARED TO HAGGLE. WHEN YOU HAGGLE ON PRICE, IN ANY SETTING, YOU WOULD TYPICALLY BE PREPARED TO SELL FOR ABOUT 15% LESS THAN THE MARKED PRICE.
IT’S OK TO SAY “NO”, TO A CUSTOMER IF THE CUSTOMER ONLY SEEMS WILLING TO PAY A VERY LOW AMOUNT. YOU WOULD BE OUT OF BUSINESS IF YOU SOLD ALL YOUR STUFF BELOW WHAT IT COSTS YOU TO MAKE.
LESSON 13: KEEP YOUR MONEY SAFE
YOU NEED TO MANAGE YOUR TRANSACTIONS.
KEEP YOUR MONEY SAFE
SET UP AN EFFICIENT PAYMENT STATION.
HAVE ENOUGH MONEY ON HAND TO MAKE CHANGE — 1 AND 5 DOLLAR BILLS, AND QUARTERS, DIMES, NICKELS AND PENNIES.
WITH ALL THE PEOPLE AROUND, COMPETING FOR YOUR ATTENTION, IT GETS TOO EASY FOR SHOP-LIFTERS TO STEAL YOUR MONEY BOX, OR TO STEAL YOUR PURSE, BEFORE YOU NOTICE IT.
I LIKE TO WEAR AN APRON WITH POCKETS. I KEEP ENOUGH MONEY IN THE APRON POCKETS TO HANDLE A FEW HOURS WORTH OF SALES. I KEEP THE REST OF THE MONEY IN PANTS POCKETS OR A MONEY BELT OR FANNY PACK ON MY PERSON.
BE ESPECIALLY ALERT AT SET-UP AND BREAK-DOWN, WHEN THERE IS A LOT OF COMMOTION.
ACCEPTING CHECKS LOTS OF PEOPLE PASS BAD CHECKS. SOME PEOPLE MAKE A CAREER OF THIS. BECAUSE OF THIS, I AM ALWAYS LEERY OF ACCEPTING CHECKS. LUCKILY TODAY, MANY PEOPLE USE THEIR DEBIT CARDS, IN LIEU OF CHECKS, AND THESE ARE MUCH SAFER. IF SOMEONE ASKS IF THEY CAN WRITE A CHECK, I TRY TO DISCOURAGE IT. I ASK THEM IF THEY CAN USE A DEBIT OR CREDIT CARD, INSTEAD.
OCCASIONALLY I DO ACCEPT CHECKS. IF ACCEPTING CHECKS, SOME YELLOW FLAGS TO WATCH OUT FOR:
– CHECK SEQUENCE NUMBERS BELOW 300
– ANY CHECK FROM ANYONE IN THE MILITARY
– STARTER CHECKS, WHERE THE ADDRESS IS NOT IMPRINTED
– OUT OF STATE CHECKS
– WHERE THE WRITER SHOWS A COLLEGE ID, OR THE ADDRESS IS A COLLEGE DORM
VERIFY THE CUSTOMER’S PHONE NUMBER, AND WRITE THIS ON THE CHECK. ALSO, CHECK THE CUSTOMER’S DRIVER’S LICENSE, WITH PICTURE AND SIGNATURE. AND WRITE DOWN THE CUSTOMER’S DRIVER’S LICENSE ON THE CHECK.
MOST BANKS NO LONGER ALLOW YOU TO VERIFY WHETHER THE CUSTOMER HAS ENOUGH MONEY IN THEIR ACCOUNT TO COVER THE CHECK. THE FEW BANKS THAT STILL PROVIDE THIS SERVICE, OFTEN CHARGE YOU $5.00 TO $10.00 PER VERIFICATION.
SHOPLIFTING CRAFT SHOWS ATTRACT SHOPLIFTERS. THERE ARE LOTS OF PEOPLE, LOTS OF COMMOTION, AND LOTS OF DISTRACTIONS. YOU FIND YOURSELF IN A NEW, UNFAMILIAR ENVIRONMENT. THESE KINDS OF THINGS MAKE SHOPLIFTING EASIER TO GET AWAY WITH.
SHOPLIFTERS COME IN ALL SIZES, SHAPES, AGES, GENDERS AND COLORS. THEY MAY TRY TO STUFF SOME JEWELRY INTO A LARGE PURSE OR BAG OR COAT POCKET, AND WALK AWAY WITH OUT PAYING. THEY MAY TRY A PIECE OF JEWELRY ON, AND WALK AWAY WITHOUT PAYING. THEY MAY GRAB AND RUN. OFTEN, THEY WORK IN PAIRS, ONE PERSON TO DISTRACT YOU, AND THE OTHER PERSON TO STEAL YOU BLIND WHILE YOU ARE NOT LOOKING.
TELL-TALE CHARACTERISTICS OF SHOPLIFTERS: — SEEM NERVOUS, REFUSE OFFERS OF ASSISTANCE — SPEND AN INORDINATE AMOUNT OF TIME WATCHING SALES STAFF, RATHER THAN LOOKING AT MERCHNDISE — MAKE AN ESPECIALLY HURRIED EXIT — WEAR OVERCOATS, BAGGY CLOTHES, CARRY OVERSIZED PURSES — GROUPS OF TEENAGERS OR TWEEN-AGERS SHOPPING TOGETHER — LOITER
SHOPLIFTERS REQUIRE SOME LEVEL OF PRIVACY IN ORDER TO CONCEAL MERCHANDISE. So… — MAXIMIZE VISIBILITY — MINIMIZE BLIND SPOTS — FROM WHERE YOU ARE STANDING OR SITTING, YOU SHOULD HAVE GOOD SIGHT LINES THROUGHOUT THE AREAS IN YOUR BOOTH YOUR CUSTOMER HAS ACCESS TO
LOCK UP SHOPLIFTER ATTRACTIVE MERCHANDISE, OR KEEP IT BEHIND THE COUNTER
AS A GENERAL RULE, THE SMALLER AND MORE VALUABLE AN ITEM, THE MORE ATTRACTIVE TARGET IT IS
WHAT PROPORTION OF MERCHANDISE SHOULD YOU KEEP UNDER GLASS? THERE IS NO RULE OF THUMB HERE. YOU HAVE TO USE YOUR JUDGMENT.
KEEP EVERYTHING IN ITS PLACE. THIS MAKES IT EASIER TO MONITOR THINGS, BECAUSE, IF EVERYTHING HAS ITS PLACE, AND YOU KEEP PUTTING THINGS BACK IN THE SAME PLACE, YOU ARE MORE LIKELY TO NOTICE, AND NOTICE MORE QUICKLY, IF THINGS ARE OUT OF ORDER.
IF YOU PUT ITEMS IN A BAG, STAPLE IT CLOSED. STAPLE THE RECEIPT TO THE BAG. YOU CAN EVEN STAPLE ONE OF YOUR BUSINESS CARDS TO THE BAG.
REQUIRE A RECEIPTS FOR ALL RETURNS. — ONE THING SOME SHOPLIFTERS LIKE TO DO IS STEAL SOMETHING, AND THEN RETURN IT FOR CASH.
THE MOST EFFECTIVE THING YOU CAN DO TO PREVENT SHOPLIFTING IS TO PROVIDE EXCEPTIONAL CUSTOMER SERVICE. — ACKNOWLEDGE EACH CUSTOMER — ASK IF THEY NEED ASSISTANCE
IF YOU SUSPECT OR CATCH A SHOPLIFTER, IMMEDIATELY NOTIFY THE SHOW’S SECURITY. YOU WANT TO DESCRIBE THE SUSPECT, WHETHER YOU THINK HE OR SHE IS STILL PRESENT, WHETHER THEY MIGHT BE CAUSING TROUBLE, AND WHAT THE SUSPECTS LOOKS LIKE AND IS WEARING.
JEWELERS SELLING FINE JEWELRY, PARTICULARLY WITH GOLD AND PRECIOUS STONES, NEED TO TAKE SPECIAL PRECAUTIONS. DON’T WORK ALONE. YOU SHOULD HAVE ONE OR MORE PEOPLE WITH YOU IN THE BOOTH AT ALL TIMES. IF YOU FEEL THAT ANYONE IS CASING YOU, ALERT THE SHOW AUTHORITIES.
YOU MIGHT TAKE A PICTURE OF ANYONE SUSPICIOUS WITH YOUR CELL PHONE OR DISPOSABLE CAMERA.
DON’T REGISTER AT THE HOTEL USING YOUR BUSINESS NAME. DON’T TAKE A FIRST FLOOR ROOM. DON’T TAKE A ROOM NEAR AN ELEVATOR OR STAIRS.
WHEN YOU CHECKOUT OF THE HOTEL, YOU WANT TO DRIVE A LONG DISTANCE BEFORE STOPPING FOR FOOD OR GAS. SO BE SURE YOUR HAVE A FULL GAS-TANK BEFORE THAT LAST DAY AT THE SHOW.
KEEP YOUR MONEY ON YOUR PERSON. IF YOU HAVE VALUABLE MERCHANDISE OR MONEY IN CONTAINERS, KEEP THESE CHAINED TO SOMETHING IMMOVABLE, LIKE A SUPPORT COLUMN IN THE ROOM.
ABOUT HIRING HELP BE CAREFUL ABOUT HIRING NON-SHOW PEOPLE, WHO HAPPEN TO BE AROUND THE SHOW AT SET-UP, AND OFFER TO HELP FOR MONEY.
IF YOU NEED TO HIRE EXTRA HELP, TRY TO ARRANGE THIS AHEAD OF TIME. DOES THE SHOW PROMOTER KEEP OF LIST OF LOCAL PEOPLE TO CONTACT? CAN YOU CONTACT LOCAL CRAFT, BEAD OR JEWELRY STORES TO ASK FOR RECOMMENDATIONS? HOW ABOUT A LOCAL CRAFT ASSOCIATION OR BEAD SOCIETY? HOW ABOUT OTHER VENDORS — DO THEY KNOW SOMEONE LOCALLY THAT THEY USED BEFORE?
YOU CAN ALSO CONTACT SOME LOCAL TEMPORARY SERVICES
OTHER SECURITY CONCERNS: DON’T LEAVE TEMPTING ITEMS IN YOUR BOOTH OVERNIGHT.
LOCK YOUR VEHICLE. BE SURE ALL THE DOORS ARE LOCKED — FRONT, BACK, SIDES
RECORD KEEPING RECORD KEEPING IS VERY IMPORTANT. KEEP GOOD RECORDS OF YOUR SALES. KEEP GOOD RECORDS OF CUSTOMER MAIL, EMAIL ADDRESSES. KEEP GOOD RECORDS AND RECEIPTS OF EXPENSES INCURRED AND OTHER ASSOCIATED COSTS. KEEP GOOD RECORDS OF CAR MILEAGE ASSOCIATED WITH YOUR SHOW RELATED TRAVEL.
IF YOU WILL BE COLLECTING SALES TAXES, BE SURE YOU ARE COLLECTING ALL THE INFORMATION YOU NEED TO FILL OUT ANY GOVERNMENT SALE TAX FORMS.
IF YOU ARE SELLING WHOLESALE, BE SURE YOUR CUSTOMERS ARE PRESENTING YOU WITH THE CORRECT TAX ID NUMBERS AND DOCUMENTATION.
IF YOU ARE IN A STATE THAT COLLECTS SALES TAXES, YOU WILL NEED TO COLLECT SALES TAXES AT THE SHOW. YOU MAY HAVE A PERMANENT RE-SALE NUMBER IN THAT STATE. SOME STATES CALL THESE TAX NUMBERS OR WHOLESALE NUMBERS. IF SO, YOU WOULD PAY THE SALES TAXES YOU HAVE COLLECTED TO THE STATE, AS YOU ALWAYS DO.
IF YOU HAVE A TEMPORARY STATE RE-SALE LICENSE THAT COVERS YOUR TIME AT THE SHOW, YOU WILL BE GIVEN A FORM BY THE STATE WITH WHICH TO TRANSMIT PAYMENT FOR COLLECTED TAXES.
SOMETIMES, STATE OFFICIALS WILL BE AT THE SHOW, GOING BOOTH TO BOOTH, TO COLLECT YOUR SALES TAXES. IF SO, THEY EXPECT YOU TO HAVE COMPLETED YOUR FORM, MEANING YOU HAVE CALCULATED ALL YOUR TAXABLE AND NON-TAXABLE SALES, AS WELL AS THE TOTAL SALES TAXES OWED AS YOU ARE CLOSING DOWN YOUR BOOTH, AND BEGINNING TO PACK UP.
OTHERTIMES, YOU ARE EXPECTED TO SUBMIT THAT FORM WITH PAYMENT USUALLY WITHIN 2–4 WEEKS OF THE SHOW. NOWADAYS, A LOT OF THIS PROCESS IS DONE ONLINE. BE SURE YOU HAVE THE INSTRUCTIONS ABOUT WHAT YOU NEED TO DO WHEN.
LESSON 14: ALWAYS THINK OF WAYS TO GENERATE FOLLOW-UP SALES
YOU MAKE YOUR REAL MONEY THROUGH REPEAT BUSINESS. MUCH OF THIS REPEAT BUSINESS OCCURS BETWEEN SHOWS. SOME OF IT OCCURS WHEN PEOPLE, WHO BOUGHT FROM YOU AT ONE SHOW, RETURN TO YOUR BOOTH AT THE NEXT ONE.
BEFORE THE SHOW…
– NOTIFY YOUR EXISTING CUSTOMERS WHERE YOU WILL BE WHEN EITHER EMAILING THEM OR MAILING OUT POSTCARDS WORKS FINE. FOR REGULAR OR VERY GOOD CUSTOMERS, YOU MIGHT TRY PHONING THEM.
ALSO, YOU SHOULD HAVE SOME KIND OF WEB PRESENCE WHERE THE CUSTOMER CAN EASILY FIND YOU BETWEEN SHOWS.
DURING THE SHOW…
– HAVE A GUEST REGISTER OR SIGN-UP SHEET, TO GENERATE MAIL AND EMAIL ADDRESSES
– HAVE AT LEAST 2–3 TAKEAWAY PROMOTIONAL ITEMS, SUCH AS BUSINESS CARDS, BROCHURES, POSTCARDS
BE SURE, ON EACH OF YOUR PROMOTIONAL HANDOUTS, YOU CLEARLY LIST HOW THE CUSTOMER CAN GET IN TOUCH WITH YOU BETWEEN SHOWS.
ALSO, I LIKE TO HAVE SOME KIND OF GIVE-AWAY, WHERE PEOPLE FILL OUT A FORM WITH THEIR ADDRESS INFORMATION,SAY TO WIN A FREE PIECE OF JEWELRY.
SOME PEOPLE LIKE TO GIVE AWAY PROMOTIONAL ITEMS WITH THEIR BUSINESS NAMES IMPRINTED ON THEM.
AFTER THE SHOW…
– UPDATE YOUR MAILING AND EMAILING DATABASES
– FOLLOW UP AT LEAST WITH THOSE CUSTOMERS WHO MADE A PURCHASE, USING EMAIL OR MAIL, AND THANKING THEM
– DO SOME EVALUATION. WRITE DOWN WHAT THINGS TO KEEP OR KEEP DOING, AND WHAT THINGS DID NOT SELL THAT WELL. ASK YOURSELF WHY AND WHY NOT?
RETURN TO YOUR BREAKEVEN ANALYSIS. HOW MUCH MONEY DID YOU ACTUALLY MAKE? WAS IT WORTHWHILE? IF YOU SPENT $1,000, DID YOU MAKE AT LEAST $1,000 BACK?
LESSON 15: TAKE CARE OF YOURSELF
TAKE CARE OF YOURSELF AT THE SHOW. SHOWS ARE EXCITING, BUT ALSO CAN BE PHYSICALLY AND EMOTIONALLY EXHAUSTING.
IF IT’S POSSIBLE TO BRING SOMEONE ALONG TO HELP YOU, DO SO.
BE SURE YOU WORK OUT THE DETAILS FOR FOOD BREAKS AND BATHROOM BREAKS.
BRING FOOD TO SNACK ON, WATER TO DRINK, ANY MEDICATIONS YOU NEED, AT THE LEAST, SOME ASPIRIN.
ANTICIPATE THE WEATHER, AND WHETHER IT WILL CHANGE DURING THE DAY, OR OVER THE DAYS OF THE SHOW.
AND BRING CLOTHES, HATS, SUNGLASSES, SWEATERS, SUN-BLOCK, BUG-SPRAY — WHATEVER.
ALWAYS THINK IN TERMS OF LAYERS OF CLOTHING.
YOU MAY WANT DIFFERENT CLOTHES TO WEAR WHEN SETTING UP, THAN WHEN STAFFING YOUR BOOTH.
I CAN’T EMPHASIZE ENOUGH: WEAR COMFORTABLE SHOES.
YOU MAY WANT A CHANGE OF CLOTHES, PARTICULARLY IF THE DAYS ARE HOT AND HUMID.
LESSON 16: BE NICE TO YOUR NEIGHBORS
MAKE FRIENDS WITH YOUR NEIGHBORS. YOUR NEIGHBORS MAY BECOME SOME OF YOUR BEST BUSINESS RESOURCES. ASK ABOUT THEIR PRODUCTS. ASK ABOUT THEIR EXPERIENCES WITH CRAFT SHOWS. SEND CUSTOMERS THEIR WAY. EXCHANGE BUSINESS HINTS AND CRAFT SHOW OPPORTUNITIES. OFFER TO WATCH THEIR BOOTHS WHEN THEY NEED TO TAKE A BREAK. LISTEN TO HOW THEY MANAGE SALES AND CUSTOMERS. AS YOU WALK AROUND THE SHOW, PAY ATTENTION TO GOOD BOOTH AND DISPLAY IDEAS.
FOLLOW CRAFT SHOW RULES: OPEN YOUR BOOTH ON TIME. DON’T START PACKING UP AND CLOSING YOUR BOOTH UNTIL THE SHOW OFFICIALLY CLOSES. BE SENSITIVE TO THE NEEDS OF THE HANDICAPPED. STICK WITHIN THE “LINES” OF YOUR SPACE BE SURE YOU HAVE CONFORMED TO LOCAL, STATE AND FEDERAL RULES. RESPECT LIMITS ON SMOKING, DRINKING, EATING AND PLAYING MUSIC.
Booth Etiquette / Following Event Guidelines
If you sign a contract to do a show, you are agreeing to follow all the guidelines and stipulations. Don’t whine or complain. The show owners have a lot to deal with. You don’t want to get yourself banned from future shows.
Stay within your space. If you need a slightly large space, either “buy it” ahead of time from the show promoters, or negotiate an arrangement with your neighbor. You don’t want to make enemies with your neighbors. You don’t want to make it difficult and uncomfortable for your customers to view your merchandise. You don’t want to alienate the show’s promoters.
Don’t pack up early. Wait until the very end of the show.
Be aware of any restrictions about smoking and eating in your booth, or in the general exhibit area.
i. SOME FINAL WORDS OF ADVICE
DOING CRAFT SHOWS IS A WONDERFUL EXPERIENCE. YOU CAN MAKE A LOT OF MONEY AT CRAFT SHOWS, YOU MEET NEW PEOPLE, YOU HAVE NEW ADVENTURES. YOU LEARN A LOT ABOUT BUSINESS AND ARTS AND CRAFTS DESIGNING.
IF… YOU DO YOUR HOMEWORK WHEN SELECTING THEM, AND VERIFY ALL INFORMATION, AND, IF… YOU ARE VERY ORGANIZED IN PREPARING FOR THEM, SETTING UP, SELLING AND RE-PACKING UP, AND, IF… YOU PROMOTE, PROMOTE, PROMOTE.
ONE OF THE FIRST THINGS I TELL ANYONE WHO WANTS TO GET INTO THIS BUSINESS IS TO GIVE IT 3 YEARS. IF YOU ARE STILL STRUGGLING AFTER 3 YEARS, PERHAPS CRAFTS SHOWS ARE NOT FOR YOU.
EACH YEAR, YOU WILL DO SOME SHOWS, AND SOME WILL WORK, AND OTHERS MIGHT NOT.
AVOID FIRST TIME EVENTS. I USUALLY AVOID SHOWS IN EXISTENCE LESS THAN 3 YEARS.
TRY TO DO EVENTS OTHERS HAVE TOLD YOU HAVE BEEN SUCCESSFUL FOR THEM.
I GIVE MANY SHOWS A SECOND CHANCE IF I FEEL THE MAJOR ISSUES FOR SLOW SALES, WERE TIMING OR WEATHER.
DON’T FEEL DISAPPOINTED IF YOU DIDN’T MAKE A FORTUNE YOUR FIRST TIME OUT.
REMEMBER, IT’S THAT REPEAT BUSINESS WHERE YOU MAKE THE MOST MONEY.
CANYON SUNRISE for music artist attending awards ceremony. Piece had to reflect nature.
I am a jewelry designer, and have been doing custom jewelry design for over 30 years. It’s challenging. It’s fun. But it can be a headache. Here are some lessons I have learned which I want to share with you.
When I began my jewelry making career, one of the smartest things I did was take on repairs. I learned so much. With each repair, I was able to re-construct in my mind the steps the jewelry designer made when creating this piece of jewelry — choices about stringing materials, clasps, beads, and how to connect everything up. And at the same time, I could see where these choices were inadequate. I could see where the piece broke or wore down. I could question the customer about how the piece was worn, and what happened when it broke.
And with each repair, I gained more knowledge from yet another jewelry designer’s attempt to fashion a piece of jewelry.
All these repairs resulted in more self-confidence about designing jewelry and designing jewelry for others. And, just as important, it led to more custom work.
28 COINS NECKLACE for poker player, includes coin pearls and jade good fortune carving
When you do custom work, I think you need an especially steeled personality to deal with everything that can go awry.
First comes the fitting. You take some initial measurements, but after the piece is made, the perspective changes, and so do the desired measurements.
Then comes a lot of customer indecision — colors, lengths, beads, silhouettes, overall design. They have a sense of what they want, but often have difficulty articulating the specifics.
Or they want to use several gemstones, but want them all to have the exact same markings and coloration.
Or they want to use several colors which really don’t harmonize well with each other.
Or they want to use components which are not easily available.
And not to forget to mention the sometimes questionable taste.
Or the possibilities of infringement of other jeweler’s designs, when the customer wants you to re-produce something they saw in a magazine or on-line. Identically.
And then time-frame. Can I finish the piece by the time the customer wants it done?
SOUNDTRACK::Color for folk musician who wanted something similar to a piece worn by Alanis Morissette. Client wanted all these colors (with raspberry as the dominant color) incorporated into this micro-macrame piece.
We discuss pricing, where all-to-often many customers seem resistant to paying anything for my time, which for custom designed pieces, is considerable. I walk them through the detailed process ad nauseum so they get the gist of all the work involved.
And last, payment. It’s not so easy to get some people to pay.
I still do a lot of custom work. But I delay a bit, sitting down and actually constructing the piece. I have a lot of discussions with the client. If there are color or materials questions, I usually present the client only 3 colors or materials at a time, and ask them to choose which they prefer. Then another 3-at-a-time forced-choice exercise, until things get narrowed down.
I photo-shop a lot of images — different colors, designs, beads — with the client, and get a lot of feedback. As I assemble all the information, I sketch/photo-shop what a final piece might look like. I superimpose this image on a mannequin to show the customer what it might look like. I have the customer formally sign-off on a final design. And only then, do I begin to construct the piece.
I try to develop in my mind a type of behavioral profile on each client. I pay attention to the styles of clothing they wear, the colors, how much jewelry they wear, and what that looks like. I spend time asking where, when and how they will be wearing the jewelry. I ask if they any expectations about the reactions they want or expect from others, when wearing the jewelry. I try to elicit the reasons why they are purchasing this custom piece, and whether it is filling any gaps they perceive in their wardrobe. I try to get a sense of how elaborate or simple they want the finished piece to be.
I give the client a realistic deadline. If the client needs the piece sooner, we discuss right up front where I will need to make process changes, in order to meet the reduced deadline.
It’s important to make everything about the design process and my management steps which I need to take predictable and clear right up-front. I don’t want to present the client with any surprises.
I require a 50% deposit up front.
I agree to make some adjustments for 6 months after the customer has the piece in hand.
I have a .pdf Certificate of Authenticity which I sign and give to the client. I name each piece (and if it is part of a series, that series will have a name as well), and this information is included in the Certificate. The Certificate also states my 6-months of adjustments policy.
JEWELRY DESIGN: An Occupation In Search Of A Profession
Jewelry design is an activity which occupies your time.
How the world understands what you do when you occupy that time, however, is in a state of flux and confusion.
Is what you are doing merely a hobby or avocation? Is it something anyone can do, anytime they want, without much preparation and learning?
Is what you do an occupation? Does it required learning specialized skills? Is it something that involves your interaction with others? Is it something you are payed to do?
Or is what you do a profession? Is there a specialized body of knowledge, perspectives and values to learn and apply? Do you provide a service to the public? Do you need to learn and acquire certain insights which enable you to serve the needs of others?
Are you part of another occupation or profession, or have your own? Is jewelry design merely a craft, where you make things by following sets of steps?
Is jewelry design an art, where your personal inspirations and artistic sense is employed to create things of aesthetic beauty for others to admire, as if they were sculptures? Is the jewelry you create to be judged as something separate and apart from the person wearing it?
Or is jewelry design its own thing. Is it a design activity where you learn specialized knowledge in how to integrate aesthetics and functionality, and where your success can only be judged at the boundary between jewelry and person – that is, only as the jewelry is worn?
The line of demarcation between occupation and profession is thin, often blurred, but for the jewelry designer, this distinction is very important. It feeds into our sense of self and self-esteem. It guides us in the choices we make to become better and better at our craft, art and trade. It influences how we introduce our jewelry to the public, and how we influence the public to view, wear, exhibit, purchase or collect the things we make.
What does it mean to become a professional?
At the heart of this question is whether we are paid and rewarded solely for the number of jewelry pieces that we make, or for the skill, knowledge and intent underlying our jewelry designs.
If the former, we do not need much training. Entry into the activity of jewelry design is very open, with a low bar. Our responsibility is to turn out pieces of jewelry. We do not encumber ourselves too much with art theory or design theory.
If the latter, we need a lot of specialized training and experience. Entry into the activity of jewelry design is more controlled, most likely staged from novice to master. Our responsibility it to translate our inspirations into aspirations into designs. It is also to influence others viewing our work to be inspired to think about and reflect and emote those things which have excited the artist, as represented by the jewelry itself. And it is also to enable others to find personal success and satisfaction when wearing or purchasing this piece of jewelry.
To become a professional jewelry designer is learn, apply and experience a way of thinking like a designer. Fluent in terms about materials, techniques and technologies. Flexible in the applications of techniques and the organizing of design elements into compositions which excite people. Able to develop workable design strategies in unfamiliar or difficult situations. Communicative about intent, desire, purpose, no matter the context or situation within which the designer and his various audiences find themselves. Original in how concepts are introduced, organized and manipulated.
The designs of artisans who make jewelry reflect and refract cultural norms, societal expectations, historical explanations and justifications, psychological precepts individuals apply to make sense of themselves within a larger setting. As such, the jewelry designer has a major responsibility, both to the individual client, as well as to the larger social setting or society, to foster that the ability for the client to fulfill that hierarchy of needs, and to foster the coherency and rationality of the community-at-large.
All this can happen in a very small, narrow way, or a very large and profound way. In either case, the professional roles of the jewelry designer remain the same. Successfully learning how to play these roles – fluency, flexibility, communication, originality – becomes the basis for how the jewelry designer is judged and the extent of his recognition and success.
Teaching literacy in jewelry design is a lot like teaching literacy in reading and writing. We want our students to comprehend. We want them to be able to be self-directed in organizing and implementing their basic tasks. We want them to be able to function in unfamiliar situations and respond when problems arise. We want them to make reasonable judgements on marrying aesthetics to functionality. We want them to develop an originality in their work. We want them to think like designers. And, we want a high level of automaticity in all this. The basic jewelry design curriculum does not accomplish this. There is an absence of strategy and strategic thinking. There is a weak commitment to jewelry design as a discipline, with its own vocabulary and ways of thinking through and doing and responding to different, often unfamiliar, situations as they arise. Without a commitment to embed the teaching of a disciplinary literacy within the standard curriculum, we will fail to impart that necessary learned awareness about fluency, flexibility, originality, and comprehension the designer needs to bring to the design process.
TEACHING DISCIPLINARY LITERACY
She said it wasn’t her job!
This prominent jewelry instructor told me that it wasn’t her job to teach anything beyond the basic steps for getting a project done. It was not her responsibility to share any insights, choices, compromises, fix-it solutions or design considerations she herself made when creating the original project – now taught as a class with a kit and a set of step-by-step instructions. If a student asked a specific question, she would gladly answer it. But otherwise, it was not her job.
This attitude is so prevalent in the standard jewelry making curriculum and education. Teachers stick very closely to the standard, basic curriculum. Facts, not ideas. Absolutes, not what-ifs. Step-by-steps, not creative thinking. Teachers rarely explain the implications for using one bead vs. another, or one stringing material vs. another, or one clasp vs. another, or one material vs. another, or one technique vs. another. They rarely discuss the deeper meanings and potentialities underlying various problematic situations. They ignore the role and power of jewelry to influence human relations.
They have the student gloss over things as if, once seen and memorized, the student will automatically be able to make the right choices over and over, again and again. The teachers see themselves as easily transferring knowledge, skills and understandings to the student as if inoculating them as you would with a vaccine and a syringe. And the student becomes a star jewelry designer. Or not.
Teachers too often see jewelry making and design as a basic set of skills, easily adaptable and applicable to all kinds of jewelry making situations. They assume that the challenge of improving jewelry making skills would primarily be a function of making more and more jewelry.
This might be true for the novice student, but as the student moves from basic decoding to fluency, flexibility and originality in design, what was learned initially becomes less generally useful. For example, the student may learn about basic color schemes, but not how to adapt these in different situations, or leverage them to achieve an even more resonant result, or be more deliberate and intentional when choosing colors and determining how to use them.
There is an absence of strategy and strategic thinking. There is a weak commitment to jewelry design as its own discipline, with its own vocabulary and ways of thinking through and doing and responding to different, often unfamiliar, situations as they arise.
Jewelry, in the standard, traditional design education model, is understood as an object. We can speak about and learn about it as an object. This object is distanced from the creative spark that created it. It is divorced from desire. Apart from the wearer or the viewer. Ignorant of context or situation. There are no deeper explanations, no pointing out implications, no experimenting with situational contingencies, no debating synergistic or other external effects. The student is run through color theories, materials composition, step-by-step jewelry construction as if learning a basic lexicon is sufficient and enough.
This whole traditional process of standard jewelry designer education ignores the required disciplinary literacy. It assumes the student is creative, or not. It approaches jewelry design as if it were a subset of some other discipline, usually art, or more specifically, painting or sculpture. It ignores architectural requirements allowing jewelry to move, drape and flow as it is worn. It forgets that jewelry has personal, situational and social consequences. It pretends that jewelry design does not have any disciplinary requirements of its own. There are no specialized knowledges or ways of thinking unique to jewelry design alone.
It is weak at teaching the student, from a design perspective, how to decode design elements and how to combine them into compositions apart from basic art theory. It pretends there are no architectural issues underlying how jewelry functions. It ignores the fact that jewelry gains much of its appeal and power only as it is worn, and not as it sits on a mannequin or easel. It totally avoids confronting the fact that much of the power of jewelry results from how it instigates and sustains relationships – artist to self, artist to wearer, wearer to viewer, artist to seller, exhibitor to client, artist to collector, and so forth. And, it fails to impart that necessary learned awareness about fluency, flexibility, originality and comprehension the designer needs to bring to the design process.
It’s not their job. It’s not their job to assist the student’s developing creative thinking or applying that creative spark towards better jewelry design.
It’s not their job.
But, in fact, it is!
What Is Disciplinary Literacy?
Disciplinary Literacy1 assumes there are real differences in the way professionals across fields participate and communicate. Without this, students and professionals in a particular field would flounder and fail. Disciplinary literacy encompasses those techniques and strategies used to teach designers to think like designers (or historians like historians or scientists like scientists, and so forth)2.
Disciplinary literacy refers to how the particular discipline creates, disseminates, and evaluates knowledge. Each discipline has its own way of looking at the world, defining things using a specific vocabulary, gathering information, specifying understandings, posing questions and problems, delineating solutions and using evidence to justify their ideas and conclusions.
An artist looking at jewelry, or a craftsperson looking at jewelry, for instance, would have different thought and interpretive processes than a jewelry designer looking at jewelry. Jewelry, after all, is different than a painting or sculpture or simple functional object. Jewelry is only art as it is worn. It must satisfy the requirements of both aesthetics and functionality. It exists in a 3-dimensional space. It is worn on the body. It establishes special relationships between designer and wearer, wearer and viewer, designer and seller, designer and collector. It encapsulates situational and socio-cultural meanings. To evaluate whether a piece of jewelry is finished and successful requires a different thought process than art or craft alone would provide.
There are key disciplinary differences in how a jewelry designer…
Chooses and evaluates evidence
Relates evidence to a perspective
Gains understanding
Visualizes things
Manipulates things
Creates a truth and achieves an error- free solution
Introduces things publicly
Training in jewelry design should teach students the unique challenges they face within their discipline as they think through design and create jewelry. At each increment within the jewelry design process, they need to think like a designer.Not as an artist, nor like a craftsperson.As a designer.Finding evidence whether a piece is finished and successful.Linking causes to effects. Understanding how inspiration resulted in a finished design.Developing knowledge, understandings and skills to the level where they can transfer these to others.Generating a large number of ideas.Making inferences about the implications of any one choice.Producing things which are original.Responding to problematic or unanticipated situations.Finding new ways to adapt existing ideas to new conditions.Anticipating shared understandings about how their work will be evaluated, assessed and judged.Knowing when something is parsimonious and finished, and knowing when something resonates and is successful.
Types of Literacy
There are three different types of literacy – Basic, Intermediate, and Disciplinary. The standard jewelry design curriculum typically focuses on Basic literacy, with some nod toward Intermediate. Disciplinary literacy is usually ignored, but it should be incorporated and integrated within Basic and Intermediate literacy instruction.
Basic Literacy
Basic literacy refers to the degree the student learns knowledge of high frequency concepts that underlie virtually all jewelry design and jewelry making tasks. These concepts are typically universally recognized and understood by artist and client alike. Here jewelry is understood as an object. An object has literal characteristics which the student can identify and list.
The student demonstrates this basic literacy by an ability to decode. The student can decode things like color use, rules of composition, materials selection, technique implementation and the like. The student picks up the basic words and definitions, links the vocabulary to relevant objects, and can identify their presence and use within any piece of jewelry. Each element and principle of design can be graphically represented, and the student begins to make connections between word and graphic. The student begins to recognize which design elements can stand alone, and which are dependent on the presence of other elements. The student can identify harmonious and balanced clusters of these design elements within compositions. The goal is an automaticity in decoding.
Intermediate Literacy
Here the student develops the knowledge to make more complex jewelry forms and designs. There is more comprehension. The student recognizes that the various design elements and principles have a range of variations in meaning and expression. In a similar way, the student begins to recognize that clusters of design elements and principles can also show variations in meaning and expression.
The student learns about different materials and what they can and cannot be used to achieve. Materials have names, places of origins, stories about how they get from one place to another, processes.
The student is introduced to variations in techniques and technologies. There is more than one way to accomplish things. There are more things that can be created using familiar techniques.
The student learns to problem-solve with various “fix-it” procedures, like re-doing, changing tools, requesting help, looking things up, drawing analogies.
The student learns to process-plan. S/he begins to relate inspirations, aspirations and intentions to more critically evaluate their choices or the choices of others. Students are more able to stick with things and maintain attention to a more extended design process.
The student begins to learn how to design for an audience. This might be a client, or a purchaser, or an exhibitor, or a collector. This begins the developing understanding of how to meld personal held preferences with those of others.
Students monitor and reflect on their own comprehension. The goal is an automaticity in fluency.[4] Here jewelry is understood as content. As content, the jewelry as designed conveys meanings and expressions which the student can derive. The jewelry and its compositional design is still, however, mostly viewed objectively, as if sitting on an easel, not as it is worn.
Disciplinary Literacy
This involves a way of thinking and doing specific to the discipline. The student learns specialized literacy skills relevant to jewelry design as the jewelry is introduced and worn publicly. The student learns how parsimony and resonance as outcomes expressed in design differ from harmony and variety as expressed in art.
The student learns to anticipate shared understandings[5] and the role of desire among the many audiences the student works with, works in, and relates to. These include clients, sellers, exhibitors, collectors, wearers, viewers, and the artist him- or herself.
Much of the design process takes on the qualities of backwards design.[7] The designer begins the process by articulating the essential shared understandings and desires against which their work will be evaluated and judged. The designer starts with questions about assessment, and then allows this understanding to influence all other choices going forward.”
The student has an ability to conceptualize and explain what jewelry means, how it is more an action than an object, and how this meaning emerges dialectically, as the jewelry is introduced publicly, worn, shared and displayed.
The student learns to recognize the dynamics of coherency,decoherency, and contagion. The artist’s coherent choices about design become contagious, attracting someone to want to touch the piece, wear it, or buy it. To the extent others share the artist’s ideas about coherence, the more likely the work will be judged finished and successful. Jewelry becomes more than an expression of meanings, but rather, it becomes an expression of meanings within context.
The process of coherence continues with the wearer, who introduces the piece into a larger context. There is more contagion. When efforts at design are less than successful, we begin to have decoherence. Decoherence may come in the forms of bad feedback, inappropriate feedback, less than satisfying feedback, or no feedback at all. The wearer may not get that sense of self s/he seeks. S/he may feel less motivated to wear the piece, or may store it, or give it away.
The student can comfortably and flexibly respond in unfamiliar situations or to new materials, techniques, technologies and requests, and take on larger challenges arising from higher levels of ambiguity, abstraction, subtlety, and contradiction. The student can find new ways to adapt existing ideas to new situations and requirements.
The student learns how to inspire to. That is, the student learns how to translate an inspiration into a design in such a way that the wearer and viewer are inspired to, not merely inspired by. They don’t simply react emotionally by saying the piece is “beautiful.” The piece resonates for them. They react by saying they “want to wear” it or “want to buy it” or “want to make something like it”. They come to feel and see and sense the artist’s hand.
The student learns how to manage a very involved, and often very long and time-consuming process of jewelry design, beginning with inspiration, then aspiration, then execution, and presenting the piece publicly for exhibit or sale. The student also picks up the skills and attitudes necessary to stick with what can be a very long process.
The goal is an automaticity in design flexibility and originality. Jewelry is understood as both intent and dialectic communication. Here the student can visualize, anticipate, and respond to all the things which might happen when the jewelry is introduced publicly and its value and worth is judged and determined.
Literacy in Jewelry Design
Teaching literacy in jewelry design is a lot like teaching literacy in reading and writing. We want our students to comprehend. We want them to be able to be self-directed in organizing and implementing their basic tasks. We want them to be able to function in unfamiliar situations and respond when problems arise. We want them to make reasonable judgements on marrying aesthetics to functionality. We want them to develop an originality in their work. We want them to think like designers. And, we want a high level of automaticity in all this.
Using literacy techniques, goals and concepts, we teach students to read, write, express and express in context when understanding jewelry and its design.
We teach the student to “read” jewelry. That means learning a basic vocabulary, as well as the various design elements, and how these design elements can either function on their own, or be arranged and clustered together within a design. They learn to describe the piece, including the name of the artist and the name of the piece, the style of the piece, when the piece was created, the materials used, the construction technique, and the use of design elements such as point, line, shape, form, space, texture, color, value and pattern.
We teach the student to “write” jewelry. The student constructs (or anticipates how a particular designer has constructed), then reflects, upon the choices made. That means learning various principles of composition, construction and manipulation. These affect arrangements as well as the juxtaposition and clustering of design elements, materials and techniques. They learn to how the placement and organization of elements, materials and techniques results in things like harmony, balance, contrast, variety, unity, emphasis, movement, depth, rhythm, focus, and proportions.
We further teach the student to be more “expressive” with jewelry. That means learning how jewelry signifies various meanings and evokes emotions. They learn to question and ponder through answers to questions like What did they think the designer was trying to say? Or What kind of reaction(s) would you expect to this piece of jewelry? What feelings does the jewelry convey? In what context would wearing the piece be especially relevant and appropriate? Are there things in the piece which might be symbolic or otherwise signify things which transcend the piece of jewelry itself?
Last, we teach the student to be “expressive within a context”. That means understanding how jewelry functions communicatively, socially and psychologically within any context or situation. That means learning how various artists and various audiences use jewelry as a means of self-identity and self-esteem, and how the interaction of the artist with various audiences affects the success (or failure) of their continued relationship oriented around (and perhaps anchored to) the jewelry. It means delving into the how and why the jewelry would be valued or worth determined or evaluative judgements made, and, furthermore, how such judgements and determinations might be contingent in their expression. It also means understanding what jewelry is as it is worn, and the required artistic, functional and design choices and compromises which must be made, if the piece of jewelry is to be judged finished and successful.
Literacy in jewelry design includes such things as:
Learning art and design vocabulary, including design elements, principles of composition, manipulation and construction, and basic vocabulary words
Developing an understanding of a range of materials, how these are selected, and the possibilities for their use, or mis-use, in any one project
Developing a range of technical and technological knowledges and skills, how to vary them, and when to apply them and when not to apply them
Translating inspirations into aspirations into specific designs and execution
Choosing media, technique and strategy to convey concepts, forms and themes
Organizing, managing and controlling a jewelry design process, from start to finish, especially over an extended period of time
Deciphering the graphic representation of ideas
Communicating these ideas through critique and analysis of jewelry genres, styles, media use, and artist/designer intent
Reconciling tensions and conflicts between appeal and functionality, especially as the jewelry is worn
Introducing their work to others, coordinating artist goals with marketing goals, and exhibiting or selling publicly
Working with various client audiences, and translating, influencing or mitigating their understandings and desires about jewelry with those of the designer, whether a piece should be judged as finished and successful
Figuring out “fix-it” strategies where things do not turn out as desired, are uncertain, or things go wrong
Reflecting on one’s own thought processes and choices, increasing that metacognitive awareness of what things lead to better design
Developing a personal style and originality and strategies for how these get reflected in the artist’s finished compositions
Why Do We Need More Fluent Designers?
The standard curriculum and approach for teaching the making and designing of jewelry is commonly viewed as teaching basic literacy. This includes teaching a basic set of skills, widely adaptable and applicable to all kinds of jewelry making situations. These basic skills are highly generalizable and adaptable.
In the standard curriculum, it is assumed that the challenge of improving jewelry making skills is a function of making more and more jewelry. The designer, thus over time, would automatically evolve into a better designer with better, more satisfying, more appealing designs. We refer to this as the vaccination conception of teaching.
In some sense here, these ideas about teaching basic literacy are partly right. All students need a basic vocabulary. All jewelry designers need these basic perceptual and decoding skills which are very connected to early learning. These are entailed in all jewelry designs and crafting tasks.
However, as the designer moves from basic decoding to fluency, flexibility and originality, the basics which were learned become less generally useful. For example, the designer may learn basic color schemes, but not learn how to adapt these in different situations, with components which do not easily match colors on the color wheel, and which present differently when used in combination, or under different lighting or contextual situations.
Our standard teaching curriculum, if that is all we teach, becomes less than useful. We rely on a bad assumption: If we only provide adequate basic skills, so we assume, from that point forward, the student with adequate background knowledge will be able to design and make anything successfully. When the emphasis is on giving out more information and instructions rather than on discussion and challenge, students have little chance to learn to think as a fluent jewelry designer.
But this also begs the question: Why do we need more fluent designers?
Isn’t turning out basic technicians sufficient? Aren’t there enough designers meeting everyone’s jewelry needs? Even if there are not, are there enough clients and customers who would want to see and purchase better, more insightful, jewelry designs?
My answer, obviously, is Yes! We need more fluent designers who have been taught and are fluent in a disciplinary literacy. That is because there are many things going on around us which increase the need for all this.
These include,
The need to adapt to more global competition, better ride the ever-faster waves and changes of fashion and style trends, and more strategically confront and challenge global “sameness” in design
The need to adapt, and adapt more quickly, to changes in technologies and materials
Automaticity in how designers more easily and successfully meet their various client needs – self, wearer, viewer, seller, exhibiter, and collector
Creating a clearer, publicly sanctioned professionalization of the jewelry design discipline
Expanding the connectedness and networking of jewelry designers in today’s world
Increasing opportunities for more attention, visibility, communication, support, demand and income
Encouraging individual student pursuits, diversity and experimentation
How Should Disciplinary Literacy
Be Incorporated Into Jewelry Design Education?
Jewelry Design is rarely taught at this disciplinary level.
There is a need to identify what an advanced literacy curriculum in jewelry design might be, how it differs from that in art or craft, and how best to implement it.
We need to move away from the ideas of “teacher of art” or “teacher of craft”, and begin to understand the role of teacher as “teacher of disciplinary literacy in jewelry design”. How can we best prepare all jewelry design students for the thinking, the making, and the critically reflecting upon required by more intermediate and advanced work? How can we prepare students to be independent thinkers? Self-starters? What program of authentic learning more closely reflects what a jewelry designer does in the field?
A disciplinary literacy program should not, however, be understood as a separate curriculum. It is not something supplemental. Rather, disciplinary literacy should be a part of and embedded within all existing instruction, from basic to advanced. Disciplinary literacy should support the standard curriculum with literacy tools uniquely tailored to jewelry design.
Some ideas for integration…
Build more depth into what is already taught and increase student engagement
Leverage a wide range of resources – popular articles and images, academic articles, interviews, gallery exhibits and their presentation and marketing materials, online videos, bead and jewelry making magazines
Task students with communicating what they read, viewed, experienced and attempted to do, and elaborate more on their understandings
Ask questions which encourage students to think like jewelry designers
Model design strategies and fix-it strategies
Allow students to do more problem-solving and experimentation
Students should be encouraged to…
Experiment
Perform
Demonstrate
Discuss findings
Anticipate the
understandings of others
Monitor their thinking
Deal with ambiguity
Problem solve
Read
Write
Debate options
Compare their work to
others
Challenge assumptions
Go beyond the ordinary
and obvious
Comment
Communicate
Ask questions
Seek evidence to inform their
work
Gather information
Detect bias
Expose their ideas and works to
others
BLOOM’S TAXONOMY
If you are not already familiar with Bloom’s Taxonomy (1956)[6], and its model’s evolution and various adaptations in different disciplines, I urge you to do so. This is a particularly useful tool when teaching higher level thinking and creative problem solving. Are your lesson plans, assignments, projects, questioning strategies touching on each progressive level in Bloom’s Taxonomy? The Taxonomy helps you evaluate the level of rigor in your instruction and the degree you are presenting your students and involving them in learning higher level thinking skills in a subject or discipline.
In jewelry design, we might adapt Bloom’s Taxonomy like this…
Creating: designing, constructing, developing, producing, manipulating, translating inspiration into aspiration and aspiration into a design
Evaluating: judging, evaluating, appraising, defending, challenging, showing connections, linking design choices to emotional and resonant outcomes or sense that piece feels finished
Analyzing: comparing, contrasting, experimenting, testing, questioning, examining, what happens when analyses with different materials, techniques, technologies, and construction and composition strategies
Applying: dramatizing, sketching, using, solving, illustrating, writing, demonstrating, instructing, diagramming, arranging, using different techniques and technologies in making jewelry
Remembering: memorizing, listing, recalling, repeating, reproducing, copying, building up a specialized vocabulary
As teachers of jewelry design, we want to build up our students’ design knowledge and skills through literacy. This means such things as,
Building prior knowledge – showing connections between what they are expected to do now with what they have done or experienced before
Building a specialized vocabulary and how to use this in context
Learning, applying, varying and experimenting with different materials, techniques and technologies
Practicing translating inspirations into aspirations
Learning to deconstruct complex visual representations of ideas which each piece of jewelry encapsulates
Using knowledge of artistic design elements and genres to identify main and subordinate ideas expressed within any piece
Articulating what the graphic representations mean and how they are used within a piece of jewelry, and how this supports the artist’s intent
Posing disciplinary relevant questions
Critically comparing one piece of jewelry to others
Using reasoning with jewelry design, such as searching for alternatives, or selecting evidence to evaluate claims of finish and success
Enabling students to be metacognitive – that is, become aware of the ways in which they think, learn, create and problem-solve, and aware of how they overcome those times of creativity block
Anticipating shared understandings about what it means for a piece to be finished and successful
Bridging creative learning to the creative marketplace
What Are Some Specific Useful Techniques?
We should teach students to design jewelry, not draw it, not sculpt it, not craft it. And that should be our primary goal as teachers: developing our students’ Fluency, Flexibility and Originality with design.
This involves:
a developmental approach and organization of knowledges, skills and understandings to be taught, usually taught as sets of interrelated, integrated skill sets, rather than one skill at a time
a multi-method teaching plan and program with a shared goal of teaching disciplinary literacy,
a rubric specifying degrees of accomplishment and the criteria of evaluation – all shared with the student
a willingness to adjust teaching styles because different students rely on different senses and strategies for learning
I am going to touch on each of these below, but you will find numerous articles in print and online which go into much more detail.
Developmental Approach
Think of jewelry design as a large matrix. The rows are the various knowledges, skills and understandings students need to master. The columns represent ordered stages of learning, indicating what needs to be learned first, second and third, etc.
In the example below, learning objectives were specified for an introductory bead stringing class. The learning objectives were characterized by skill level needed. These objectives were clustered together and taught as a set. The student could identify what things were learned at what level, and what things needed to be learned in another class. Emphasis was placed during the instruction to visibly point out to the student how each learning objective was interrelated to the others.
At the conclusion of the class, students were asked to self-evaluate what they learned about each learning objective, and what else they would like to know or learn about it. What were their take-aways, and what would they like to do next.
10. Determining Measurements and Ease, including Width and Length of a Piece, Especially In Relationship To Bead Sizes
BEGINNER
11. Finishing Off Threads, Cable Wires or Other Stringing Materials in Piece or Adding Threads/Cable Wires/Stringing Materials
BEGINNER
UNDERSTANDING CRAFT BASIS OF STRINGING METHODS
1. Starting the Piece
BEGINNER
2. Implementing the Basic Method
BEGINNER
3. Finishing Off Your Piece With A Clasp Assembly
BEGINNER
4. Managing String/Cord/Thread/Wire Tension
BEGINNER
5. Crimping
BEGINNER
6. Making Simple and Coiled Loops Using Hard Wire
7. Making and Using Connectors; Segmenting; Directional Control
8. Adding Dangles and Embellishments
9. Making Multi-Strands Piece
10. Making Twist-Strands Piece
UNDERSTANDING ART & DESIGN BASIS OF BEAD STRINGING
1. Learning Implications When Choosing Different Sizes/Shapes of Beads, or Using Different Stringing Materials
BEGINNER
2. Learning Implications When Choosing Different Kinds of Clasps, or Using Different Jewelry Findings and Components
BEGINNER
3. Understanding Relationship of this Bead Stringing Method in Comparison to Other Types of Bead Stringing Methods
BEGINNER
4. Creating Support Systems Within Your Piece In Anticipation of Effects of Movement, and other Architectural considerations
BEGINNER
5. Understanding How Bead Asserts Its Need For Color When Stringing Beads
6. Creating Your Own Design with This Bead Stringing Method, in Reference to Jewelry Design Principles of Composition
7. Creating Shapes, Components and Forms To Use With This Bead Stringing Method, and Establishing Themes
BECOMING BEAD STRINGING ARTIST & DESIGNER
1. Developing A Personal Style
2. Valuing or Pricing Your Work
3. Teaching Others Bead Stringing Methods
4. Promoting Yourself and Your Work
When taking a developmental approach, you teach groups of integrated knowledges, skills and understandings. You teach technical mechanics concurrently with art and craft history, and concurrently with discipline-specific literacy. We want our students to be able to think strategically and critically, deal with unfamiliar or problematic situations, and be self directed.
In the Developmental Approach, you start with a cluster of a core set of skills. You show, demonstrate, and have the student apply, communicate about, and experiment with how these skills inter-relate in jewelry design.
You then introduce another cluster of knowledges, skills, and understandings. As with the core, you show, demonstrate, and have the student apply, communicate about, and experiment with how all these inter-relate. Then you repeat all this by teaching how this second cluster of things inter-relates to the core.
And again, you introduce a third cluster, and link to the second, then link to the core. And so forth.
Jewelry design covers a wide range of factors beyond the physical and structural aspects of jewelry. It incorporates aesthetics, structure, value systems, philosophies, sustainability, technologies, and their integrations. Thus the jewelry designer has to know some things about art, and some things about architecture, and about physical mechanics, and anthropology and psychology and sociology, and engineering, and be a bit of a party planner. Here, this developmental approach serves them well. It helps the student learn the inter-connectedness and inter-dependencies of them all, in a gradual, developmental, building-up-to-something sort of way.
Multi-Method Teaching Plan
Students need to come at jewelry design problems from different angles. Within each lesson, teachers need to gradually relinquish control over the learning process to the student. Using a single teaching method, such as having students keep rehearsing a series of steps, or relying on a single textbook won’t cut it. We also need to infuse opportunities for reflection within virtually every activity.
Some of things I find especially useful include,
(a) Guided Thinking
(b) Thinking Routines
(c) Developing an effective questioning strategy
(d) Application, practice and experimentation
One approach is called “Guided Thinking”. Here, within each lesson, the teacher begins with controlling the information and how it is presented. This involves some lecture, some demonstration, some modelling. The teacher never insists that there is only one way to accomplish any task. Over the course of the lesson, the teacher gradually relinquishes more and more control to the student for directing the learning activity.
For example, we might encourage students to construct and feel and touch similar pieces made with different materials, beads or techniques, and have them tell us what differences they perceive. We should guide them in thinking through the implications for these differences. When teaching a stitch, I typically have students make samples using two different beads – say a cylinder bead and a seed bead, and try two different stringing materials, say Fireline and Nymo threads.
We also should guide them in thinking through all the management and control issues they were experiencing. Very often beginning students have difficulty finding a comfortable way to hold their pieces while working them. I let them work a little on a project, stop them, and then ask them to explain what was difficult and what was not. I suggest some alternative solutions – but do not impose a one-best-way – and have them try these solutions. Then we discuss them, fine-tuning our thinking.
After some trial-and-error and experimentation, I begin to introduce some goals. They had identified some management and control issues, and had some observations about what they were trying to do. I link these developing discussions to these goals. These are issues because…. And I let them fill in the blanks. What do they think needs to be happening here?
I begin to put words to feelings. I guide them in articulating some concrete goals. We want good thread tension management for a bead woven piece. We want the beads to lay correctly within the piece. We want the piece to feel fluid. We want an easier way to work the piece and hold it, so it doesn’t feel so awkward.
We return to Guided Thinking. I summarize all the choices we have made in order to begin the project: type of bead, size of bead, shape of bead, type of thread, strategy for holding the piece while working it, strategy for bringing the new bead to the work in progress. I ask the students what ideas are emerging in their minds about how to bring all they have done so far together.
At this point, I usually would interject a Mini-Lesson, where I demonstrate, given the discussions, the smarter way to begin and execute the Project. In the Mini-Lesson, I “Think Aloud” so that my students can see and hear how I am approaching our Project.
And then I continue with Guided Thinking as we work through various sections of the Project towards completion. Whatever we do – select materials, select and apply techniques, set goals, anticipate how we want the Project to end up – is shown as resulting from a managed process of thinking through our design.
In “Guided Thinking”, I would prompt my students to try to explain what is/is not going on, what is/is not working as desired, where the student hopes to end up, what seems to be enhancing/impeding getting there.
As the lesson proceeds, I reduce the amount of direction and information I provide. I relinquish this responsibility gradually to the student. The student is asked to try out a technique or strategy, then try an alternative. The student is asked to communicate the differences, their preferences, their explanations why, and what they might try to do next.
Experimentation with evaluation is encouraged. The student is asked to develop a more concrete jewelry project, and explain the various choices involved. What-if and what-next questions are posed. The student is allowed to follow a pathway that might be not as efficient, or even a dead-end. More discussion about what occurs begins. If the student asks me what would happen if, I tell them to try it and see, and then discuss their experience and observations.
Towards the end of the lesson, I prompt the student to communicate what they have done and what they have discovered. I ask them, in various ways, what take-aways they have from the class, or how they think they might apply what they learned in the future. I suggest the “what next.” I identify different options and pathways they might pursue next. Metacognition and reflection are important skills for any jewelry designer to have.
And we’re ready for the next lesson.
Another approach is called “Thinking Routines”. With guidance, demonstration and repetition, it is my hope that these experiences become a series of Thinking Routines my students resort to when starting a new project. As students develop and internalize more Thinking Routines, they develop greater Fluency with design.
Thinking Routines are different strategies for structuring a set of steps which lead a person’s thinking. “They are the patterns by which we operate and go about the job of learning and working together in a classroom environment. A routine can be thought of as any procedure, process, or pattern of action that is used repeatedly to manage and facilitate the accomplishment of specific goals or tasks. Classrooms have routines that serve to manage student behavior and interactions, to organizing the work of learning, and to establish rules for communication and discourse. Classrooms also have routines that structure the way students go about the process of learning. These learning routines can be simple structures, such as reading from a text and answering the questions at the end of the chapter, or they may be designed to promote students’ thinking, such as asking students what they know, what they want to know, and what they have learned as part of a unit of study.”[3]
Some examples:
What Do You See…..What Do You Think…..What Do You Know
Think – Pair – Share
What Makes You Think That?
I used to think… Now I think…
Connect – Extend – Challenge
True for Who?
Look – Score — Explain
We use Thinking Routines mirror the kinds of thinking and analytic practices common to the discipline of jewelry design. We encourage students to reflect on what they were thinking. We ask how they were anticipating getting to the point where they would call their piece finished. We ask them whether there was some kind of order or routine to their process. We ask them what criteria they would use to know that they were successful. We ask them to anticipate what others would think, and whether others would agree that the piece was finished and successful.
These are some of the kinds of situations we want our students to develop thinking routines for:
a. Exploration of experience for a purpose; translating inspiration into designs
b. Search for meaning as conveyed by various design elements alone, clustered together, or arranged within a composition
c. Formulating how to deal with unfamiliar tasks or roadblocks preventing the finishing of a task
d. Completing well practiced technical tasks
e. Varying well practiced technical tasks
f. Contingent thinking and fix-it strategies
g. Incorporating the shared understandings of others into the thinking about what constitutes a finished and successful design
h. Introducing jewelry publicly, such as for exhibit or for sale
Another approach I want to point out is having an Effective Questioning Strategy. Students need to be engaged in thinking and talking about jewelry and its design and its powers when worn. The questions we ask them, and the way we phrase them, can have a big impact on this.
Questions should lead the student towards greater understanding. Ask questions which encourage students to think like jewelry designers and understand jewelry design as a series of problems to be solved.
Decode piece of jewelry; measure jewelry’s impact; relate to artist intent
Correlation or causation when explaining and identifying design issues
What q’s weren’t answered; ability to assess the information at hand relevant to the design problem
Do the results solve the design problem and support the conclusions
Other explanations for the results
Given an artist intent, sketch a jewelry design
Given a piece of jewelry to be sold, develop a sales pitch
Some pointers:
Avoid questions with Yes/No answers
Avoid questions which contain the answers, such as “don’t you think the designer did a good job?”
Avoid questions which seem to have a particular answer in mind, such as “how did the designer use materials to represent the upper class?”
Do elicit questions with multiple answers.
Do elicit questions which incorporate each of our senses, not just the visual, such as “what sounds do you think this piece of jewelry would make?”
Do elicit questions of varying levels of difficulty and rigor.
Do elicit personal interpretations of ideas and feelings, coupled with questions about what evidence the student used to come to these conclusions.
Do elicit questions about how to value or judge worth, and how such values might differ among different audiences, and why.
Do elicit questions about contingent situations — if such and such a variable or piece of information changed, how would our thoughts, feelings and understandings change?
Do elicit follow-up questions.
If no one responds immediately to a question, pause and wait about 5 seconds.
Encourage conversation among all participants in the room.
Encourage students to generate their own questions.
When looking at a piece of jewelry, students might be asked (in reference to Bloom’s Taxonomy)[6] to:
DESCRIBE IT: What do you see? What else do you see? If you were describing this to another person who has not seen it, what would you say?
RELATE IT: What things do you recognize? Do you feel connected to the piece in any way? Would you buy it? Would you wear it? How does this piece of jewelry relate (to any other piece of jewelry)? What interests you the most in this piece? If you passed this piece of jewelry onto your children or grandchildren, do you think they would relate to it in the same way you did; explain? Would this jewelry be successful or appropriate in any culture or situation; explain with examples?
ANALYZE IT: What can you tell me about the design elements used in this piece of jewelry? About the arrangement and composition? About its construction? What type of person would wear this piece and why? What is the most critical part of this piece of jewelry which leads to its success (or failure)? What questions would you want to ask the designer? What internal or external forces will positively or negatively impact the piece? What about the piece creates good support, enabling it to move, drape and flow? What about the piece creates good structure, enable it to keep its shape and integrity when worn?
INTERPRET IT: What name would you give this piece of jewelry, and why did you pick this name? What sounds do you think this piece of jewelry would make? What role(s) would this piece of jewelry serve for the wearer, and why? Why do you think the designer made this piece of jewelry, and made it this way?
EVALUATE IT: Does this piece seem finished; explain? Would you see this piece as successful; explain? Would this piece evoke an emotion, and how? Does this piece resonate, and how? Does this piece feel parsimonious – that is, if you added (or subtracted) one more thing, would it make the piece seem less finished or successful? How has the artist selected and applied materials, techniques and technologies, and could better choices have been made and why? What do you think is worth remembering about this piece? What do you think other people would say about this piece? If you were selling this piece, what would be the selling points; explain? In what ways might this piece have value and worth for various audiences? Anticipating the artist’s purpose and intent, to what degree was the artist successful? What would make the piece better, and what would make it worse?
RE-CREATE IT: If you were making a similar piece, what would you do similarly and what would you do differently; explain why? If you wanted to re-create something similar, but for a different audience or context than you thought it was originally made, what kinds of things might you do; explain? What would you change about the piece to make it more appealing to you? What would you change about the piece to change the “sound” it seems to make? How could we make the piece more Traditional? Or Avant Garde? How could you build in more or better support or structure? How might your own work be influenced (or not) by this piece? Have you learned something from this piece that would influence you to do something differently in your own work in the future? If a particular color / material / finding had not been available, what could you substitute instead?
One last approach is encouraging lots of opportunities for Application, Practice, and Experimentation.
Jewelry design students need time to create various understandings, correct or not, and to put these understandings to the test. They should be encouraged to imagine, experiment, play, practice and apply their emerging knowledges and skills. We need to ween them off the standard design-by-number curriculum. We should provide opportunities for students to develop the skills to work intuitively and practically in context.
Towards this end, we should
Provide space/time for artistic creativity and discovery
Provide opportunities to discuss, reflect and critique about the design, management and control issues which arose
Have students actively anticipate, through discussion and/or writing, what kinds of reactions various audiences might have to various design and composition choices
Ask students to compare and contrast various designs or design approaches, including what is appealing (or not) and wearable (or not) and representative of an artist’s ideas and intent (or not)
Students should be given various pieces to decode; that is, breaking them down into their essential design elements and compositional arrangements
Students should be asked to reflect upon how the jewelry would hold up or be evaluated in different situations or cultures
Students can be given different open-ended design tasks, such as creating a piece of jewelry that celebrates the student; or having students write “recipes” for the ingredients in a piece of jewelry and give these to other students to see what they come up with; or creating jewelry with social or political content; of develop a marketing and promotion strategy with a sales pitch for a particular piece of jewelry; or write a poem or short story about a piece of jewelry
A Rubric RUBRIC[8] AS THINKING ROUTINE
Students who plan on becoming jewelry designers need a simple map to all these ideas about literacy and fluency – something they can easily review and determine where their strengths and weaknesses are, what kinds of courses they need to take, what kinds of learning goals they need to set in order to grow within the profession and gain proficiency and fluency in design over time. One type of map is a rubric.
A rubric is a table of criteria used to rate and rank understanding and/or performance. A rubric answers the question by what criteria understanding and/or performance should be judged. The rubric provides insightful clues for the kinds of evidence we need to make such assessments. The rubric helps us distinguish degrees of understanding and/or performance, from the sophisticated to the naïve. The rubric encapsulates what an authentic jewelry design education and performance would look like.
Here is one rubric we provide students to give them insight to the educational curriculum we offer in our program. We divide the program into Skill Levels, from preparation to beginner, intermediate, advanced, and integrated. We identify how jewelry is defined and conceptualized at each level. We specify the kinds of learning goals at each level – that is, what the students needs to have mastered before continuing on to the next level. We list the classes a student could take at each Skill Level.
BE DAZZLED BEADS: EDUCATIONAL RUBRIC: Learning How To Think Like A Jewelry Designer
Learning Stage
Jewelry Defined As…
I know I’ve mastered this level when…
BEAD WEAVING CLASSES
Using needle and thread with seed beads to make things which approximate cloth
BEAD STRINGING and HAND KNOTTING CLASSES
Putting beads on stringing material to make necklaces and bracelets
WIRE WORKING and WIRE WEAVING CLASSES
Incorporating wires and sheet metal in jewelry by making shapes, structural supports, or patterns and textures
BUSINESS OF CRAFT CLASSES
Bridging creative learning to the creative marketplace
JEWELRY DESIGN CLASSES
Using creative skills to conceptualize, construct and present jewelry pieces
PREPARA-TION
I have assembled basic supplies and tools, and set up a workspace
ORIENTATION TO BEADS & JEWELRY FINDINGS CLASS (**Required First Class)
Here we teach you about the choices you will need to make when buying or using different kinds of beads, metals, findings, stringing materials, tools, and various jewelry making techniques. Focus on quality issues, contingencies and implications of making one choice over another
BEGINNER
(Decoding)
Object – defined apart from the maker, wearer and viewer, and apart from any inspiration or aspiration
I am familiar with the range of materials, beads, jewelry findings, components, stringing materials, tools and types of techniques used in jewelry making, and all associated quality issues and issues of choice.
I can identify and list the basic design elements present in any piece of jewelry.
I can explain which design elements are independent – that is, can function on their own, and which are dependent – that is, require the presence of other design elements
I have mastered the mechanics of the major techniques in the interest area(s) I have chosen
* Bead Weaving Basics
* Basic Wrap Bracelet (laddering)
Clinics/Mini-Lessons:
– Flat Peyote
– Tubular Peyote
– Right Angle Weave
– Ndebele
– Petersburg Chain
– Brick Stitch
– Square Stitch
– Kumihimo
– Attaching End Caps
* Basics of Bead Stringing and Attaching Clasps
* Introduction to Pearl Knotting
* Mahjong Tile Bracelet
* Cozumel Necklace (micro-macrame)
Clinics/Mini-Lessons
– Crimping
– Elastic String
– Using Fireline
– Simple and Coiled Wire Loops
– Adjustable Slip Knots
* Wire Mix N Match Bracelet
* Viking Knit
*Wire Weave I: 2 base wires
*Wire Weave II: 3+ base wires
* Basic Soldering
* Intro to Silver Smithing
Clinics/Mini-Lessons:
– Simple and Coiled Wire Loops
– Let’s Make Earrings on Head Pins
– Let’s Make Earrings Off of Chain
* Getting Started In Business
* Pricing and Selling
* So You Want To Do Craft Shows
* Naming Your Business / Naming Your Jewelry
Clinics/Mini-Lessons:
– Pricing Formula
* Beads and Color
INTERMEDI-ATE
(Comprehending)
Content / Expression – conveys and expresses meaning; reflects ideas about how inspiration is to be translated into a design; inspires someone to respond emotionally
I can select and arrange design elements into a pleasing composition.
I can anticipate both aesthetic and architectural requirements of my piece as it is to be worn.
I am comfortable self-directing my design process. I know 1 – 2 variations in techniques I use.
I am beginning to develop “Fix-It” strategies when approaching new or difficult situations.
* Various Workshops during year
* Aztec Wrap Bracelet
Clinics/Mini-Lessons:
– Peyote Cabochon Bezel
* Mala Necklace w/Tassel
* Cold Connections Bracelet
* Wire Wrap Bracelet w/Beads
* Wire Wrap Cabochon Pendant
* Wire Sparkle and Shine Necklace
* Wire Swirled Pendant w/Earrings
* Wire Contemporary Pendant
* Wire Woven Mayan Pendant
* Wire Woven Curvy Bracelet w/Beads
* Branding
* Jewelry Design I: Principles of Composition
ADVANCED
(Fluent, Flexible, Original)
Action / Intent / Communica-tiveInteraction – conveying content in context; design choices understood as emerging from interaction between artist and various client audiences; jewelry reflects artist’s intent
I have well-developed tool box of “Fix-It” strategies for dealing with unknown situations, with a high degree of automaticity in their use.
I understand how parts of the mechanics of every technique I use allow the piece to maintain its shape (structure), and how other parts allow the piece to maintain good movement, drape and flow (support).
My jewelry reflects both parsimony in the choices of elements, and resonance in its expressive qualities for the wider audiences; I understand how this differs from traditional art concepts of “harmony” and ‘variety”
I can anticipate shared understandings as these are used to judge my piece as finished and successful; I understand how wider audiences affect the coherence – decoherence- contagion impacts of my designs
I am very metacognitive of all the composition, construction, and manipulation choices I have made, and constantly reflective of the effects and implications of these choices
* Various Workshops during year
* Wire Woven Cabochon Pendant
* Wire Woven Pagoda End Cap
*Jewelry Design II: Principles of Form, Function, Structure, Body, Mind, Movement
*Architectural Bases
INTER-RELATING AND INTEGRAT-ING ALL LEVELS
(Disciplinary Literacy)
How we begin to build and expand our definitions of jewelry and design
I am learning how all these things inter-relate, leading to better design and construction:
– art
– craft
– design
– architecture and engineering
– physical mechanics
– anthropology, sociology, psychology
– perception and cognition
– management and control
– systems theory
– party planning
– creative marketplace
JEWERLY DESIGN DISCUSSION SEMINARS
1. Good Design
2. Contemporary Design
3. Composition
4. Manipulation
5. Resonance
6. Beads and Color
7. Points, Lines, Planes, Shapes, Forms, Themes
8. Architectural Basics
9. Contemporizing Traditional Jewelry
10. Mixed Media / Mixed Techniques
11. Designing An Ugly Necklace
12. Backwards Design
13. What Is Jewelry, Really?
14. Is Jewelry Making Teachable, or Merely Intuitive?
15. Can I Survive As A Jewelry Artist?
16. Creativity Isn’t Found, It Is Developed
17. Jewelry Design Management
18. 5 Questions Every Jewelry Designer Should Have An Answer For
19. The Multiple Responsibilities of Being a Professional Jewelry Artist
20. Your Work Space
21. Design Theater
22. Overcoming Designer’s Block
23. Fashion, Style, Taste or Art?
24. Threading the Business Needle
Willingness To Adjust Styles To The Different Ways Students Think
Students learn in different ways. Some are more visual, some more oral, some more tactile, some more experiential. It is important that teachers vary their styles within each lesson.
For example, better instructions are presented not only with written steps, but also images illustrating each step, and diagrams or patterns explaining each step.
It is important to provide opportunities for students to reflect on what they did, and evaluate the thinking, management and control issues they confronted, and what they attempted to do to overcome these.
Last, it is just as important for the teacher to model (and think aloud) their own thought processes when attempting to design or construct a piece of jewelry.
Why Should The Teacher Be Motivated
To Take A Disciplinary Approach?
The unwillingness of instructors to break out of that mold of standard craft or art content curriculum is rooted in many things.
For one, it is not very lucrative. Teaching disciplinary literacy on top of the standard content curriculum is more work. It requires more thought and integration. Initially, it requires more effort and planning. Yet the earned instructional fees would remain the same had the instructor not made the additional effort.
Teaching disciplinary literacy involves making very public and visible the teacher’s design thinking and choices. The teacher is expected to model design behaviors. The teacher will introduce think-alouds, experimentation, thinking routines. The teacher, within each lesson, gradually relinquishes control of the teaching task to the student. The student takes over the design process, making more and more choices, whether good or bad, right or wrong. The student then evaluates, citing evidence, what appears to be working, what not working, some reasons why, and some possible consequences. These disciplinary literacy techniques might make the teacher feel very exposed, vulnerable and uneasy where such thinking and choices of the teacher might be questioned or challenged, or where the student begins to take over and assert control over learning about design.
Teachers must also expand their training and learning to go beyond art and craft. They must more clearly incorporate ideas about architecture and functionality into their teaching. They must train their students to be aware of how jewelry design is a process of communicative interaction.
Teacher reluctance to incorporate disciplinary learning into the standard curriculum might also be due to the fact that there is little professional recognition. The recognition that tends to exist gets very tied to criteria based on a standard content which understands jewelry as an object, not a dialectic between artist and relevant other. Jewelry design is an occupation becoming a profession, and it may feel safer for the teacher to remain in craft or art, rather than design, because the criteria for teacher evaluation is more well defined and agreed-upon.
And there is no student demand. Jewelry design is often viewed more as an avocation or occupation, rather than a professional pursuit. It’s a way to exercise creative thoughts. A way to earn some extra money. A way to have fun. Jewelry design is not seen in professional terms with specialized knowledge and specific responsibilities.
Partly demand reflects low student expectations. There are assumptions that you cannot teach creativity – you have it or you don’t. There are assumptions that anyone can make jewelry, and that once you learn some basic vocabulary and techniques, better design skills will naturally evolve over time. And these assumptions get affirmed because all students ever see and experience is good ole basic craft or art education.
Partly demand reflects some realities of the marketplace. Most people who buy jewelry have little understanding about quality issues, art and design considerations, who the artists are and what their reputations are. They don’t know better so they don’t demand better. Jewelry purchases skew heavily toward the upper classes. However, this does not mean that we should assume that better designed jewelry has to equate to more expensive jewelry.
It is my firm belief, however, that if instructors integrate disciplinary literacy – thinking routines for how designers think design – into the standard curriculum, both student and client demand will follow, as well as teacher pay and recognition.
As teachers of jewelry design, we should be motivated to create that demand for deeper, disciplinary learning. We need to support the professionalization of the field. We should want to make jewelry design even more fulfilling for our students.
Towards this end, we should teach jewelry design knowledge and skills development which lead to greater fluency, comprehension, self-direction, flexibility, originality and automaticity in design. This means developing our students as architects, as well as artists. It means helping our students develop those critical thinking skills so they can adapt to different design situations, and more easily problem-solve when things go awry. It means enabling our students to evaluate situations and contexts in ways which make clear how the shared understandings of others impact the jewelry design process. It means giving our students a clear understanding of how creative thinking relates to the creative marketplace. It means teaching our students to be able to assert their worth – the worth of the pieces they create, their skills, their ideas, and their labor. Only in these ways will we play an active part in enhancing the ability of our students to make a living from their artistry and design work. Only in this way, moreover, will we elevate contemporary jewelry design so that it has a life outside the studio, and so that it doesn’t get whipped by the whims of fashion or seen only as a design accessory.
How Should We Measure Successful Teaching?
In the standard design curriculum, it is relatively easy to measure our success as teachers. We can gauge how many students take our classes. We can refer to the number of concepts learned. We can count the number of successfully completed steps students have completed. We can get a sense of how many students are able to sell or exhibit their pieces.
What is more difficult to measure, from a disciplinary literacy standpoint, is how well our students are able to think, analyze, reflect, create and engage in jewelry design, given variation and variability in audience, client, context, situation, society and culture.
It is difficult, as well, to gauge the degree we have been able to elevate the importance of jewelry design as a profession. Something beyond craft. Something beyond occupation. Something even beyond art.
For Warren Feld, Jewelry Designer, (www.warrenfeldjewelry.com), beading and jewelry making have been wonderful adventures. These adventures have taken Warren from the basics of bead stringing and bead weaving, to wire working, wire weaving and silversmithing, and onward to more complex jewelry designs which build on the strengths of a full range of technical skills and experiences.
Warren leads a group of instructors at Be Dazzled Beads (www.bedazzledbeads.com). He teaches many of the bead-weaving, bead-stringing, wire weaving, jewelry design and business-oriented courses. He works with people just getting started with beading and jewelry making, as well as those with more experience. Many of his classes and projects have been turned into kits, available for purchase from www.warrenfeldjewelry.com or www.landofodds.com. He conducts workshops at many sites around the US, and the world.
His pieces have appeared in beading and jewelry magazines and books. One piece is in the Swarovski museum in Innsbruck, Austria.
He is probably best known for creating the international The Ugly Necklace Contest, where good jewelry designers attempt to overcome our pre-wired brains’ fear response for resisting anything Ugly.
He is currently writing a book – Fluency In Design: Do You Speak Jewelry?
[1] T. Shanahan, C. Shanahan. “Teaching disciplinary literacy to adolescents: Rethinking content-area literacy,” Harvard Educational Review, 2008.
[2] Historians gathering evidence like letters, journals, newspaper articles, photographs, analyze them and compare then. They look for patterns and corroboration. From that they infer understanding and conclusions. The historian may take many paths and turns to discover information that may or may not be factual, but may be helpful.
Scientists set up controlled experiments, typically using information they consider facts, and interrelated these facts mathematically in order to establish understandings and conclusions. They go about things following the scientific method and approach, beginning with observations, formulating hypotheses, setting experiment and collecting data, and so forth.
Jewelry designers manage tensions between appeal and functionality. The successful managing of these tensions involves adequately anticipating the shared understandings of various client groups about whether a piece should be considered finished and successful. The designer is able to establish something in and about the piece which signals such anticipation and understanding.
[3]Thinking Routines. I teach jewelry design. I find it useful to engage students with various ways of thinking out loud. They need to hear me think out loud about what choices I am making and what things I am considering when making those choices. They need to hear themselves think out loud so that they can develop strategies for getting more organized and strategic in dealing with information and making decisions. My inspiration here was based on the work done by Visible Thinking by Project Zero at Harvard Graduate School of Education . http://www.visiblethinkingpz.org/VisibleThinking_html_files/VisibleThinking1.html
[4]Fluency. I took two graduate education courses in Literacy. The primary text we used was Literacy: Helping Students Construct Meaning by J. David Cooper, M. Robinson, J.A. Slansky and N. Kiger, 9th Edition, Cengage Learning, 2015. Even though the text was not about jewelry designing per se, it provides an excellent framework for understanding what fluency is all about, and how fluency with language develops over a period of years. I have relied on many of the ideas in the text to develop my own ideas about a disciplinary literacy for jewelry design.
[5]Shared Understandings. In another graduate education class, the major text reviewed the differences between understanding and knowledge. The question was how to teach understanding. Worth the read to gain many insights about how to structure teaching to get sufficient understanding to enrich learning. Understanding by Designby Grant Wiggins and Jay McTighe, 2nd Edition, Association for Supervision and Curriculum Development, 2005.
[6] Bloom’s Taxonomy.
Bloom, Benjamin S. 1956. Taxonomy of educational objectives; the classification of educational goals. New York: Longmans, Green.
Anderson, L. W., Krathwohl, D. R., & Bloom, B. S. (2001). A taxonomy for learning, teaching, and assessing: A revision of Bloom’s Taxonomy of educational objectives (Complete ed.). New York: Longman.
Bloom’s Taxonomy and the Arts. Incredible Art Department. As referenced at
[7]Backwards Design. I had taken two graduate education courses in Literacy and one in Planning that were very influential in my approach to disciplinary literacy. One of the big take-aways from Understanding by Design by Grant Wiggins and Jay McTighe, 2nd Edition, Association for Supervision and Curriculum Development, 2005, was the idea they introduced of “backwards design”. Their point is that you can better teach understanding if you anticipate the evidence others will use in their assessments of what you are trying to do. When coupled with ideas about teaching literacy and fluency (see Literacy: Helping Students Construct Meaning by J. David Cooper, M. Robinson, J.A. Slansky and N. Kiger, 9th Edition, Cengage Learning, 2015), you can begin to introduce ideas about managing the design process in a coherent and alignable way.