


Turning Silver and Copper Metals Black: Some Oxidizing Techniques
Posted by learntobead on April 18, 2020
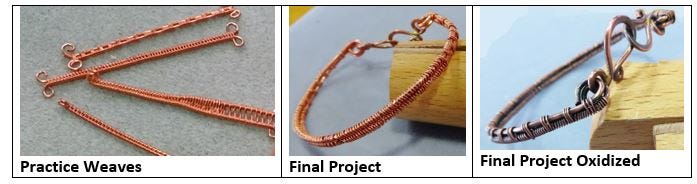
OXIDIZING TECHNIQUES
(Use bare wire, if you intend to oxidize it; this means it has no protective lacquer finish on it to prevent it from tarnishing)
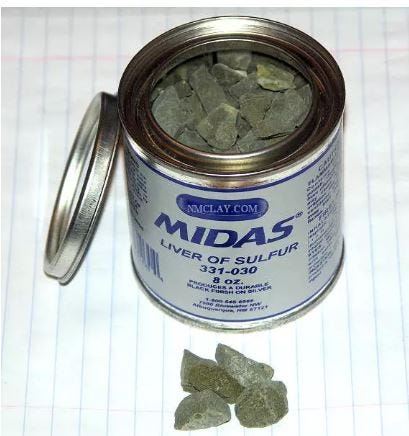
1. USING LIVER OF SULFUR
Step 1 Preferably work outside when using Liver of Sulfur (LOS). Make sure you wear gloves and designate glass or ceramic containers that will be used solely for this purpose.
Step 2 Clean the silver before you begin. Any polishing residues, wax or fingerprints could affect the consistency of the oxidation. Hot soapy water and an old toothbrush work well.
Step 3 Make a neutralizing bath. You will use this later to neutralize the silver once you have finished oxidizing.
Step 4 To make the neutralizing bath: Using one Mason jar, mix two teaspoons of baking soda in one cup of cold water.
Step 5 Stir solution until the baking soda is dissolved. Set aside for later.
Step 6 Prepare your workstation. You need two mason jars with one cup of hot water in the LOS solution, the neutralizing bath you just made, Liver of Sulfur, the silver you wish to oxidize, a pair of gloves, a plastic spoon and some paper towels. (Hot water (not boiling): 30 seconds in microwave) (Use glass jars, not plastic)
In the one with the piece you wish to oxidize, if you use hot water, oxidation will occur very quickly. If you use room temperature or even ice water, the oxidation will take longer to occur. With silver, this will give you an opportunity to control what color tone the final piece will have. But with copper, the metal darkens extremely fast.
Step 7 Drop the silver into the water (hot, room temp or cold) of one Mason jar.
Step 8 In the other Mason jar add 1 pea sized lump of LOS to the hot water.
The hotter the solution, the faster the oxidation. Alternative: Room temperature LOS solution, and put silver in ice-cold water. A greater temperature difference slows patina process, and can get more variation in colors with blues and golds, not just blacks.

Liver of Sulfur gel can be brushed on using a small paint brush, or you can make a solution. To make a solution, coat half a teaspoon with the gel and allow the excess to drip off. Then dip the spoon in a container of hot water and allow to dissolve.
Step 9 Mix thoroughly.
Step 10 Remove the silver from the water and carefully place the silver into the LOS solution trying not to splash.
Step 11 Leave the silver in the LOS solution until it reaches the desired color, stirring occasionally to get an even finish. [This can happen within seconds, within 5 minutes, within 15 minutes, or within 1 hour, depending on the piece and how dark you want it, and the differences in solution temperatures.]
Step 12 Remove the silver from the LOS solution and place the silver in the neutralizing bath. This will stop any further oxidation of the silver.
Step 13 Remove the silver form the neutralizing bath and dry slightly with the paper towel.
Step 14 You can either tumble the silver to polish and seal the oxidized finish or you can use a polishing cloth. You can try rough paper towels. You can try 0000 steel wool. Be careful not to completely rub off the oxidation.
Step 15 Put two teaspoons of baking soda into the LOS solution to neutralize it.
Step 16 Loosely seal the Mason jar that contains the LOS solution and leave the jar out doors, out of the reach of children or animals. The LOS will degrade and eventually turn clear. Once it is clear it is no longer toxic and you can dispose of it by diluting the solution and flushing it down the drain.

2. USING BLACK MAX (Contains hydrochloric acid and tellurium)
The result from Black Max is a bit shinier black finish than Liver of Sulphur, which is more matte. With liver of Sulphur, oxidation does not wear off as fast. Can’t get the range of oxidations colors with Black Max, as you can with LOS.
For silver, immerse in or apply Black Max with a cloth or applicator until the desired finish is obtained (20–30 seconds is the norm). Enough solution in jar to cover your piece.
Do not heat solution or piece.
Otherwise, you will follow similar steps as with LOS, including the baking soda solution to neutralize the reaction.

3. USING HARD BOILED EGG (using Sulphur to oxidize silver or copper)
Boil the egg, and peel the shell.
Put the peeled egg inside a zip lock bag.
Use your fingers to crush the peeled egg inside the bag.
Put your piece of silver inside the bag and into the crushed egg pieces.
Check every 15 minutes to see if it is sufficiently oxidized for you. Can easily take 1 hour.
Rinse with warm water and some dish detergent.
Use paper towel or 0000 steel wool to brush off any excess oxidation.
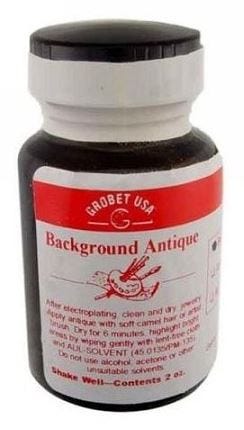
4. ANTIQUING or VARNISH SOLUTION
Another thing you can do is to buy an antiquing solution, or use a dark color varnish.
You paint this on, and then rub it off with a soft cloth. Let it dry for about 20 minutes, and repeat, if you need the antiquing to be darker.
This leaves a glossy black finish. Here, again, you usually want to leave some gradations of color on the metal, so that the top surfaces are shinier than the crevices.
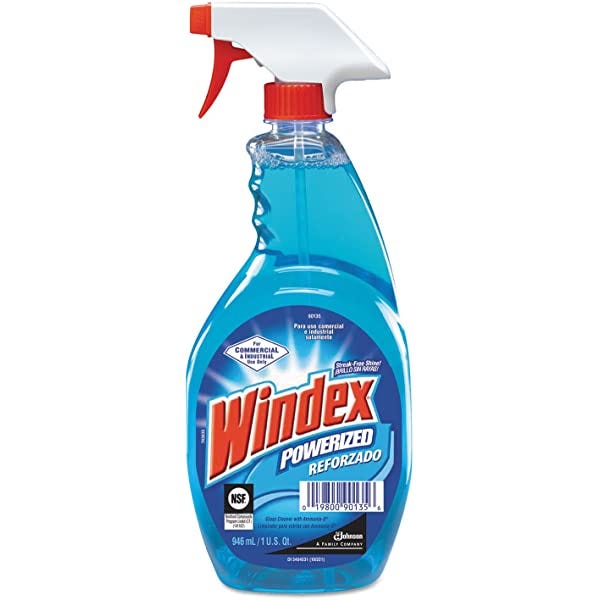
5. AMMONIA
If you want to speed up the tarnishing process, but do not want to turn your product black, spray your metal with Windex with Ammonia.
The ammonia will turn the silver black, and the low amount of ammonia in this product will make the process very gradual. With more ammonia concentration, the faster and the blacker it will turn.
6. OTHER CHOICES
You will find online a wide range of patina’s. These typically are in liquid form. Different patinas work with different metals. Different patinas have different final coloration results. You can get ones that do blues or purples or golds or rainbow effects.

FINISHING YOUR PIECE OFF AFTER YOU OXIDIZE IT
After you have oxidized and patina’d your piece, you probably want to let some of the higher areas get a little shinier again, leaving the recessed areas dark.
Easy to do.
Take some steel wool (#0000) or a rougher paper towel, or a soft bristle toothbrush, and gently rub over the surface. Like an artist, you will control where you want highlights and where you want lowlights.
Think you went to far? Then oxidize again. Not a problem.
Other Articles of Interest by Warren Feld:
Best Way To Thread Your Needle
Bead Stringing With Needle and Thread
Turning Silver and Copper Metals Black: Some Oxidizing Techniques
Color Blending; A Management Approach
Cleaning Sterling Silver Jewelry: What Works!
What Glue Should I Use When Making Jewelry?
When Choosing Colors Has You Down, Check Out The Magic Of Simultaneity Effects
When Your Cord Doesn’t Come With A Needle…What You Can Do
What To Know About Gluing Rhinestones
Know Your Anatomy Of A Necklace
How Does The Jewelry Designer Make Asymmetry Work?
I hope you found this article useful. Be sure to click the CLAP HANDS icon at the bottom of this article.
Also, check out my website (www.warrenfeldjewelry.com).
Subscribe to my Learn To Bead blog (https://blog.landofodds.com).
Visit Land of Odds online (https://www.landofodds.com)for all your jewelry making supplies.
Enroll in my jewelry design and business of craft video tutorials online.
Add your name to my email list.
Discover more from Warren Feld Jewelry
Subscribe to get the latest posts sent to your email.

Leave a comment