Beading requires a lot of mind-body coordination. That takes work. It is work.
Calisthenics are exercises you can do to improve and tone your mind-body coordination when bead weaving.
You have to be able to get from your fingers to the needle to the beads, back along the thread to the needle to the fingers, hands, arms, eyes, mind. And then again. And again. Over and over, one more time. You need to get into a rhythm. All these working parts need to be working. No time for cramping. No time to get tired. No time to lose concentration.
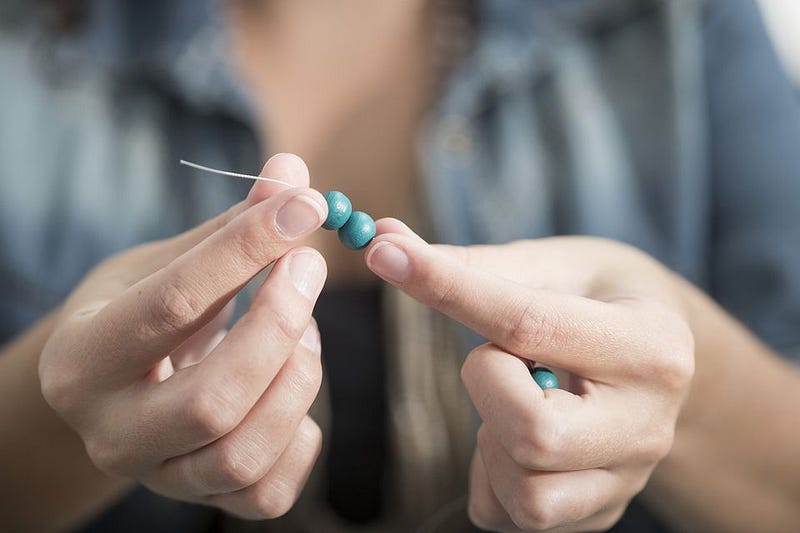
A rhythm. Needle, pick up bead, pull down along thread, check the tension, pick up a bead, pull down along thread, check the tension, pick up a bead….
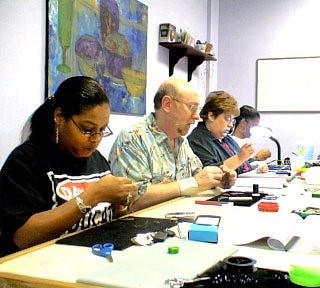
I noticed that different instructors had various techniques and strategies for maintaining this rhythm. Yes, music was involved sometimes. Othertimes simple meditation or creative reading and discourse. Some people had some stretching exercises that they did. Others tested themselves before proceeding with their big project. Still others did small things to reconfirm their learning.
Throughout this Series, I introduce some of the beading calisthenics that I experienced along the way. If you want to gather materials up so that you can follow along with these calisthenics, here’s the list.
MATERIALS NEEDED FOR ALL THE CALISTHENIC EXERCISES (SUPPLY LIST):
notebook, pencil 1 tube each of Japanese 11/0 seed beads in gray, 3 different colors of orange, black, white, any other 4 colors 1 tube each of Japanese 8/0 seed beads in gray or silver, black, white, orange, any other 4 colors 1 tube each of Japanese 6/0 seed beads in gray or silver, black, white, orange, any other 4 colors 5 gray-scale colors of delicas or 11/0 seed beads Nymo D or C-Lon D thread in black Nymo D or C-Lon D thread in yellow two toggle clasps .018” or .019” flexible cable wire assorted 4mm, 6mm and 8mm beads in various coordinating colors, including grays and oranges in your mix, as well big bowl and a bowl-full of assorted beads Size 10 English beading needles Bees wax scissors beading dishes or trays any kind of graph paper work surface or pad colored pencils a few clasps, (toggles are easy to work with) some crimp beads crimping pliers
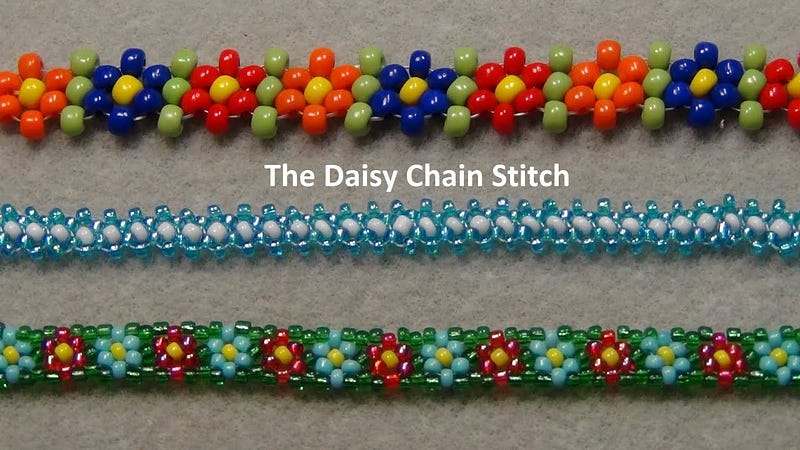
BEADING CALISTHENICS #10: Daisy Stitch Expansion
The challenge here is to see how many variations you can construct using the simple daisy chain stitch.
Simplest daisy chain: A stem and a flower with a center bead, then a stem and flower w/center, and so forth.
Start with a line of 5 beads.
Add 5 more beads to your thread. Make the 5th bead a different color. This is your “flower set”. The 5th bead is your center point.
Make a loop by going back through the first of these 5 beads in the set.
Add two more beads to the flower set, and bring the needle through 4th bead in that original set of 5.
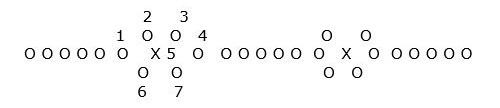
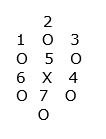
So the daisy pattern goes: BEAD 1 to 2 to 3 to 4 to 5 (flower center point bead marked by X) back to 1 to 6 to 7 back to 4 and out.
Pull tight.
Add another line of 5 beads. Continue.
Try the daisy chain above without the stem, so that each flower set is interconnected by one bead — # 4 (which becomes #1 in the next flower). Make your 5th bead a different color.
Next, look at the modified daisy chain pattern below. Try another interconnected daisy pattern, where we would connect each subsequent flower by two beads, instead of one. Here we would make the first daisy’s 3 and 4 become the next daisy’s 1 and 6.
This would go: 1 to 2 to 3 to 4 to 5 (flower center) to 1 to 6 to 7 to 4 up through 3 and out. Then 3 becomes 1 in the next daisy link. The pattern continues in the second link as 1 to 2 to 3 to 4 to 5 (flower center) to 1 to 6 to 7 to 4 up through 3 and out. Then 3 becomes 1 again.
Try the same pattern, this time making the 2nd, 5th and 7th bead the same color, but different than the others.
Try again, making the 1st, 5th and 4th beads the same color, but different than the others.
Beading requires a lot of mind-body coordination. That takes work. It is work.
Calisthenics are exercises you can do to improve and tone your mind-body coordination when bead weaving.
You have to be able to get from your fingers to the needle to the beads, back along the thread to the needle to the fingers, hands, arms, eyes, mind. And then again. And again. Over and over, one more time. You need to get into a rhythm. All these working parts need to be working. No time for cramping. No time to get tired. No time to lose concentration.
A rhythm. Needle, pick up bead, pull down along thread, check the tension, pick up a bead, pull down along thread, check the tension, pick up a bead….
I noticed that different instructors had various techniques and strategies for maintaining this rhythm. Yes, music was involved sometimes. Othertimes simple meditation or creative reading and discourse. Some people had some stretching exercises that they did. Others tested themselves before proceeding with their big project. Still others did small things to reconfirm their learning.
Throughout this Series, I introduce some of the beading calisthenics that I experienced along the way. If you want to gather materials up so that you can follow along with these calisthenics, here’s the list.
MATERIALS NEEDED FOR ALL THE CALISTHENIC EXERCISES (SUPPLY LIST):
notebook, pencil 1 tube each of Japanese 11/0 seed beads in gray, 3 different colors of orange, black, white, any other 4 colors 1 tube each of Japanese 8/0 seed beads in gray or silver, black, white, orange, any other 4 colors 1 tube each of Japanese 6/0 seed beads in gray or silver, black, white, orange, any other 4 colors 5 gray-scale colors of delicas or 11/0 seed beads Nymo D or C-Lon D thread in black Nymo D or C-Lon D thread in yellow two toggle clasps .018” or .019” flexible cable wire assorted 4mm, 6mm and 8mm beads in various coordinating colors, including grays and oranges in your mix, as well big bowl and a bowl-full of assorted beads Size 10 English beading needles Bees wax scissors beading dishes or trays any kind of graph paper work surface or pad colored pencils a few clasps, (toggles are easy to work with) some crimp beads crimping pliers
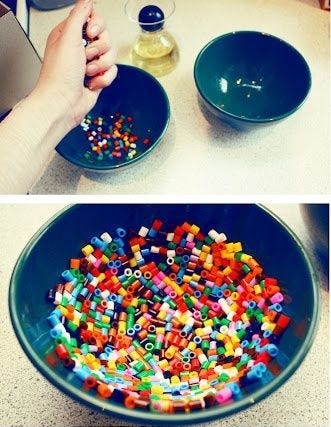
BEADING CALISTHENICS #9: Bead Massage
Fill a large bowl with beads of any sort and size. Put your hands into the beads, and squeeze, let go, let the beads run over your hands, feel them in your hands, squeeze them in your hands.
Start to squeeze them in your hands and through your fingers starting with your pinkies, and working across your hand slowly until you get to your thumbs and forefingers, and squeeze them through these. Start again at your pinkies.
Put your palm flat onto the top surface of the bowl of beads. Push down. Then make a fist, and let the beads run through your fingers.
Beading requires a lot of mind-body coordination. That takes work. It is work.
Calisthenics are exercises you can do to improve and tone your mind-body coordination when bead weaving.
You have to be able to get from your fingers to the needle to the beads, back along the thread to the needle to the fingers, hands, arms, eyes, mind. And then again. And again. Over and over, one more time. You need to get into a rhythm. All these working parts need to be working. No time for cramping. No time to get tired. No time to lose concentration.
A rhythm. Needle, pick up bead, pull down along thread, check the tension, pick up a bead, pull down along thread, check the tension, pick up a bead….
I noticed that different instructors had various techniques and strategies for maintaining this rhythm. Yes, music was involved sometimes. Othertimes simple meditation or creative reading and discourse. Some people had some stretching exercises that they did. Others tested themselves before proceeding with their big project. Still others did small things to reconfirm their learning.
Throughout this Series, I introduce some of the beading calisthenics that I experienced along the way. If you want to gather materials up so that you can follow along with these calisthenics, here’s the list.
MATERIALS NEEDED FOR ALL THE CALISTHENIC EXERCISES (SUPPLY LIST):
notebook, pencil 1 tube each of Japanese 11/0 seed beads in gray, 3 different colors of orange, black, white, any other 4 colors 1 tube each of Japanese 8/0 seed beads in gray or silver, black, white, orange, any other 4 colors 1 tube each of Japanese 6/0 seed beads in gray or silver, black, white, orange, any other 4 colors 5 gray-scale colors of delicas or 11/0 seed beads Nymo D or C-Lon D thread in black Nymo D or C-Lon D thread in yellow two toggle clasps .018” or .019” flexible cable wire assorted 4mm, 6mm and 8mm beads in various coordinating colors, including grays and oranges in your mix, as well big bowl and a bowl-full of assorted beads Size 10 English beading needles Bees wax scissors beading dishes or trays any kind of graph paper work surface or pad colored pencils a few clasps, (toggles are easy to work with) some crimp beads crimping pliers
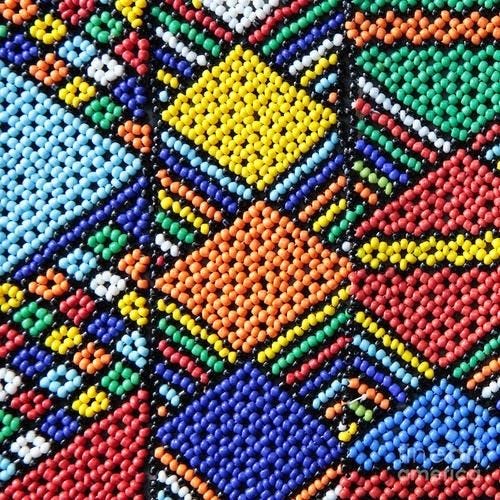
BEADING CALISTHENICS #8: Speaking With Beads
Zulu Beadwork
During Apartheid in South Africa, there were those Zulu tribes that adopted Christianity and identified with the colonialists, and there were those tribes that did not. The tribes that did not created a very elaborate communication system using beads.
Besides what colors were next to each other, they used a lot of triangles in their patterns. It was important if the triangle faced up or down, and again what the colors were. With their beadwork, they could “say” something very general, like “I’m mad at the world,” or something very specific, like “I’d like to get together with you tomorrow night at eight, but not before I’ve met with your brother.”
The challenge here is to create your own symbolic communication system using beads and their patterning within a piece of jewelry.
First write a sentence or paragraph about something that you will want to reduce to symbols, and illustrate by constructing a necklace.
Second develop a cipher: This would be a list of each symbol and its meaning or referent. For example, “red” might stand for “women” and “blue” might stand for “men”. A diagonal line leaning left might be “safety”, and one leaning right might be “danger.” Someone using your cipher should be able to make sense of your beadwork and what statement you are trying to make with it.
Third, using graph paper and colored pencils, sketch out what your piece would look like, in order to express the statement you want to make. Have a friend use your cipher and see if they can “read” your piece of jewelry, as drawn on the graph paper.
Beading requires a lot of mind-body coordination. That takes work. It is work.
Calisthenics are exercises you can do to improve and tone your mind-body coordination when bead weaving.
You have to be able to get from your fingers to the needle to the beads, back along the thread to the needle to the fingers, hands, arms, eyes, mind. And then again. And again. Over and over, one more time. You need to get into a rhythm. All these working parts need to be working. No time for cramping. No time to get tired. No time to lose concentration.
A rhythm. Needle, pick up bead, pull down along thread, check the tension, pick up a bead, pull down along thread, check the tension, pick up a bead….
I noticed that different instructors had various techniques and strategies for maintaining this rhythm. Yes, music was involved sometimes. Othertimes simple meditation or creative reading and discourse. Some people had some stretching exercises that they did. Others tested themselves before proceeding with their big project. Still others did small things to reconfirm their learning.
Throughout this Series, I introduce some of the beading calisthenics that I experienced along the way. If you want to gather materials up so that you can follow along with these calisthenics, here’s the list.
MATERIALS NEEDED FOR ALL THE CALISTHENIC EXERCISES (SUPPLY LIST):
notebook, pencil 1 tube each of Japanese 11/0 seed beads in gray, 3 different colors of orange, black, white, any other 4 colors 1 tube each of Japanese 8/0 seed beads in gray or silver, black, white, orange, any other 4 colors 1 tube each of Japanese 6/0 seed beads in gray or silver, black, white, orange, any other 4 colors 5 gray-scale colors of delicas or 11/0 seed beads Nymo D or C-Lon D thread in black Nymo D or C-Lon D thread in yellow two toggle clasps .018” or .019” flexible cable wire assorted 4mm, 6mm and 8mm beads in various coordinating colors, including grays and oranges in your mix, as well big bowl and a bowl-full of assorted beads Size 10 English beading needles Bees wax scissors beading dishes or trays any kind of graph paper work surface or pad colored pencils a few clasps, (toggles are easy to work with) some crimp beads crimping pliers
BEADING CALISTHENICS #7: Composition in Gray and Gray
5 gray-scale colors of delicas or 11/0 seed beads gray colored Nymo or C-lon thread, size D yellow colored Nymo or C-lon thread, size D
You can use an existing peyote, brick stitch or loom pattern, or create your own. Try to use or create a pattern that is about 3 inches square. Assign your colors using your 5 gray-scale colors of delicas or 11/0 seed beads.
Evaluate your resulting bead-weaving:
To what extent have you been able to create obvious or desired boundaries between sections or forms within the piece?
To what extent have you been able to create a sense of dimensionality, or forward/receding qualities?
To what extent have you had control over the lines, forms, sections and other design elements, using only gray?
To what extent have you been able to achieve an energy/vitality within the piece, as if it had been multi-colored?
Additional Exercises:
1. Repeat the pattern, using your 5-gray-scale bead colors, and use a bright yellow Nymo or C-Lon Size D thread
2. Repeat the pattern, and substitute a rich colored blue or red bead for one of the grays, plus the other original 4 colors of gray, and the gray Nymo or C-Lon thread
Beading requires a lot of mind-body coordination. That takes work. It is work.
Calisthenics are exercises you can do to improve and tone your mind-body coordination when bead weaving.
You have to be able to get from your fingers to the needle to the beads, back along the thread to the needle to the fingers, hands, arms, eyes, mind. And then again. And again. Over and over, one more time. You need to get into a rhythm. All these working parts need to be working. No time for cramping. No time to get tired. No time to lose concentration.
A rhythm. Needle, pick up bead, pull down along thread, check the tension, pick up a bead, pull down along thread, check the tension, pick up a bead….
I noticed that different instructors had various techniques and strategies for maintaining this rhythm. Yes, music was involved sometimes. Othertimes simple meditation or creative reading and discourse. Some people had some stretching exercises that they did. Others tested themselves before proceeding with their big project. Still others did small things to reconfirm their learning.
Throughout this Series, I introduce some of the beading calisthenics that I experienced along the way. If you want to gather materials up so that you can follow along with these calisthenics, here’s the list.
MATERIALS NEEDED FOR ALL THE CALISTHENIC EXERCISES (SUPPLY LIST):
notebook, pencil 1 tube each of Japanese 11/0 seed beads in gray, 3 different colors of orange, black, white, any other 4 colors 1 tube each of Japanese 8/0 seed beads in gray or silver, black, white, orange, any other 4 colors 1 tube each of Japanese 6/0 seed beads in gray or silver, black, white, orange, any other 4 colors 5 gray-scale colors of delicas or 11/0 seed beads Nymo D or C-Lon D thread in black Nymo D or C-Lon D thread in yellow two toggle clasps .018” or .019” flexible cable wire assorted 4mm, 6mm and 8mm beads in various coordinating colors, including grays and oranges in your mix, as well big bowl and a bowl-full of assorted beads Size 10 English beading needles Bees wax scissors beading dishes or trays any kind of graph paper work surface or pad colored pencils a few clasps, (toggles are easy to work with) some crimp beads crimping pliers
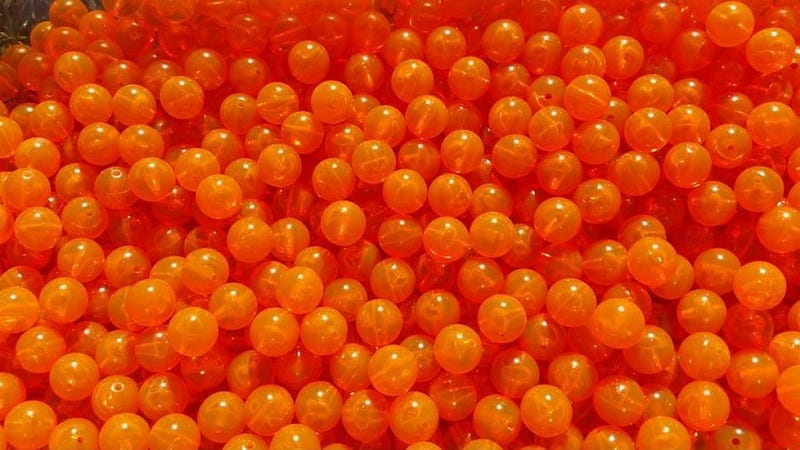
BEADING CALISTHENICS #6: Aren’t You Glad You Used Orange
Orange is a difficult color for most people to work with. So this challenge is a simple bead stringing one.
Create an appealing, satisfying necklace, using at least 30 or more 4–6mm beads in orange, and 30 or more 4–6mm beads in each of two other colors.
Stand back from your piece and examine it. If you added or subtracted any one color, could you make the necklace more satisfying?
What makes the particular combination that you ended up with the best combination?
Beading requires a lot of mind-body coordination. That takes work. It is work.
Calisthenics are exercises you can do to improve and tone your mind-body coordination when bead weaving.
You have to be able to get from your fingers to the needle to the beads, back along the thread to the needle to the fingers, hands, arms, eyes, mind. And then again. And again. Over and over, one more time. You need to get into a rhythm. All these working parts need to be working. No time for cramping. No time to get tired. No time to lose concentration.
A rhythm. Needle, pick up bead, pull down along thread, check the tension, pick up a bead, pull down along thread, check the tension, pick up a bead….
I noticed that different instructors had various techniques and strategies for maintaining this rhythm. Yes, music was involved sometimes. Othertimes simple meditation or creative reading and discourse. Some people had some stretching exercises that they did. Others tested themselves before proceeding with their big project. Still others did small things to reconfirm their learning.
Throughout this Series, I introduce some of the beading calisthenics that I experienced along the way. If you want to gather materials up so that you can follow along with these calisthenics, here’s the list.
MATERIALS NEEDED FOR ALL THE CALISTHENIC EXERCISES (SUPPLY LIST):
notebook, pencil 1 tube each of Japanese 11/0 seed beads in gray, 3 different colors of orange, black, white, any other 4 colors 1 tube each of Japanese 8/0 seed beads in gray or silver, black, white, orange, any other 4 colors 1 tube each of Japanese 6/0 seed beads in gray or silver, black, white, orange, any other 4 colors 5 gray-scale colors of delicas or 11/0 seed beads Nymo D or C-Lon D thread in black Nymo D or C-Lon D thread in yellow two toggle clasps .018” or .019” flexible cable wire assorted 4mm, 6mm and 8mm beads in various coordinating colors, including grays and oranges in your mix, as well big bowl and a bowl-full of assorted beads Size 10 English beading needles Bees wax scissors beading dishes or trays any kind of graph paper work surface or pad colored pencils a few clasps, (toggles are easy to work with) some crimp beads crimping pliers
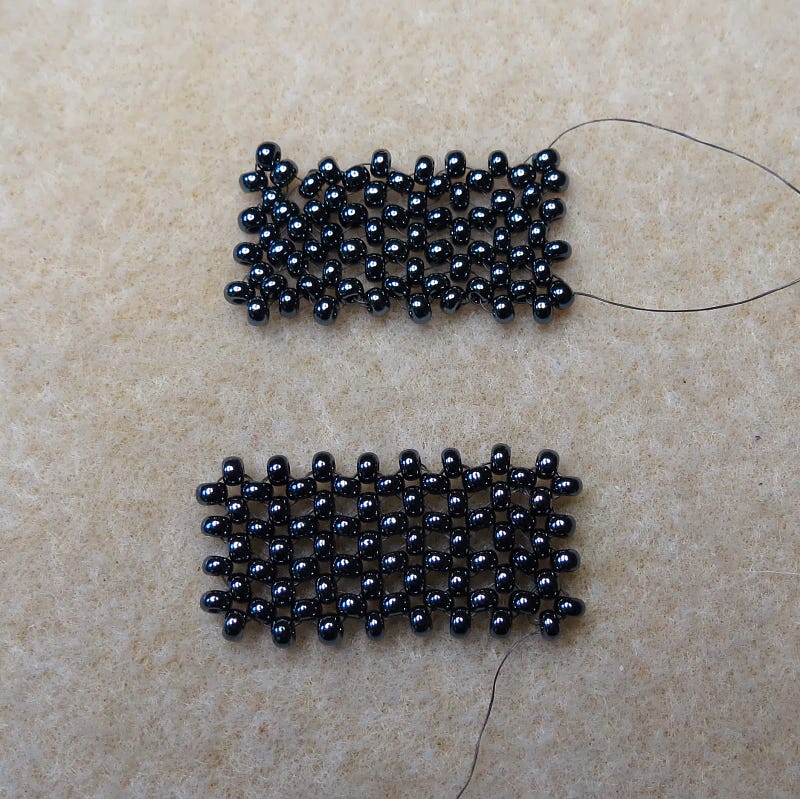
The goal here is to learn a little about managing thread tension.
Pick a favorite bead weaving stitch, such as Peyote, Brick or Ndbele (Herringbone). Plan out how to make a flat length of the weave, about ½” wide and 6” long. You can also do 6 separate pieces about ½” wide and 1” long.
For the first inch, keep a tight tension. For the 2nd inch, make the tension tighter. For the 3rd inch, make it even tighter. For the tightest tension, you might even want to reinforce your stitching, by going through each bead again and again with your thread.
For the fourth inch, try to get a tension a little looser than you typically use. Then the next inch, get even looser. For your final inch, make this the loosest of all.
Now pick a stitch like the Chevron Stitch or the Right Angle Weave Stitch. Work it for a length of 3–4”. These stitches start out very loose.
What different kinds of strategies can you employ to tighten the tension? — Reinforcement? Reinforcement after each small segment of stitches? Or Reinforcement after you’ve completed the whole piece? Changing the type of stringing material you are using? Stitching over a solid form, such as a dowel, pencil or straw or vase or ball? Adding additional beads at key joints? There are these and lots of possibilities. Try them out.
Beading requires a lot of mind-body coordination. That takes work. It is work.
Calisthenics are exercises you can do to improve and tone your mind-body coordination when bead weaving.
You have to be able to get from your fingers to the needle to the beads, back along the thread to the needle to the fingers, hands, arms, eyes, mind. And then again. And again. Over and over, one more time. You need to get into a rhythm. All these working parts need to be working. No time for cramping. No time to get tired. No time to lose concentration.
A rhythm. Needle, pick up bead, pull down along thread, check the tension, pick up a bead, pull down along thread, check the tension, pick up a bead….
I noticed that different instructors had various techniques and strategies for maintaining this rhythm. Yes, music was involved sometimes. Othertimes simple meditation or creative reading and discourse. Some people had some stretching exercises that they did. Others tested themselves before proceeding with their big project. Still others did small things to reconfirm their learning.
Throughout this Series, I introduce some of the beading calisthenics that I experienced along the way. If you want to gather materials up so that you can follow along with these calisthenics, here’s the list.
MATERIALS NEEDED FOR ALL THE CALISTHENIC EXERCISES (SUPPLY LIST):
notebook, pencil 1 tube each of Japanese 11/0 seed beads in gray, 3 different colors of orange, black, white, any other 4 colors 1 tube each of Japanese 8/0 seed beads in gray or silver, black, white, orange, any other 4 colors 1 tube each of Japanese 6/0 seed beads in gray or silver, black, white, orange, any other 4 colors 5 gray-scale colors of delicas or 11/0 seed beads Nymo D or C-Lon D thread in black Nymo D or C-Lon D thread in yellow two toggle clasps .018” or .019” flexible cable wire assorted 4mm, 6mm and 8mm beads in various coordinating colors, including grays and oranges in your mix, as well big bowl and a bowl-full of assorted beads Size 10 English beading needles Bees wax scissors beading dishes or trays any kind of graph paper work surface or pad colored pencils a few clasps, (toggles are easy to work with) some crimp beads crimping pliers
BEADING CALISTHENICS #4: Two-Needle Race Up The Ladder
For each person:2 size #10 English beading needles Nymo D or C-Lon D thread Size 8/0 Japanese seed beads
Here, you need two or more people, or you can compete against yourself. This is a race.
We are going to use two needles and one length of thread to work up through the ladder stitch.
The ladder technique: Double your length of thread. Thread a needle on the end of each side. Pick up the same number of beads on the two needles. Pass the needles in opposite directions through the top beads on each needle. Pull the tension tight. For your first loop (or rung), you’ll need one extra bead on each needle, than for subsequent loops (rungs).
You might start with 4 beads on each needle for the first rung, then 3 beads on each needle for each additional run. Pick up 4 on each needle, crossover. Pull the tension tight. Pick up 3 on each needle, crossover. Pull the tension tight. Keep repeating with 3 beads on each needle.
The ladder looks like this:
Run the race to see who can be the first to make a ladder that is 12 inches long.
Beading requires a lot of mind-body coordination. That takes work. It is work.
Calisthenics are exercises you can do to improve and tone your mind-body coordination when bead weaving.
You have to be able to get from your fingers to the needle to the beads, back along the thread to the needle to the fingers, hands, arms, eyes, mind. And then again. And again. Over and over, one more time. You need to get into a rhythm. All these working parts need to be working. No time for cramping. No time to get tired. No time to lose concentration.
A rhythm. Needle, pick up bead, pull down along thread, check the tension, pick up a bead, pull down along thread, check the tension, pick up a bead….
I noticed that different instructors had various techniques and strategies for maintaining this rhythm. Yes, music was involved sometimes. Othertimes simple meditation or creative reading and discourse. Some people had some stretching exercises that they did. Others tested themselves before proceeding with their big project. Still others did small things to reconfirm their learning.
Throughout this Series, I introduce some of the beading calisthenics that I experienced along the way. If you want to gather materials up so that you can follow along with these calisthenics, here’s the list.
MATERIALS NEEDED FOR ALL THE CALISTHENIC EXERCISES (SUPPLY LIST):
notebook, pencil 1 tube each of Japanese 11/0 seed beads in gray, 3 different colors of orange, black, white, any other 4 colors 1 tube each of Japanese 8/0 seed beads in gray or silver, black, white, orange, any other 4 colors 1 tube each of Japanese 6/0 seed beads in gray or silver, black, white, orange, any other 4 colors 5 gray-scale colors of delicas or 11/0 seed beads Nymo D or C-Lon D thread in black Nymo D or C-Lon D thread in yellow two toggle clasps .018” or .019” flexible cable wire assorted 4mm, 6mm and 8mm beads in various coordinating colors, including grays and oranges in your mix, as well big bowl and a bowl-full of assorted beads Size 10 English beading needles Bees wax scissors beading dishes or trays any kind of graph paper work surface or pad colored pencils a few clasps, (toggles are easy to work with) some crimp beads crimping pliers
BEADING CALISTHENICS #3: Head Turning / Turning Beads
Enough 4mm-8mm beads to make an 18” necklace Nymo D or C-Lon D thread .019” or .018” thick flexible cable wire, such as Soft Flex or Flexrite 2 toggle clasps
Using any sized and color beads, string an 18” necklace using Nymo D or C-Lon D thread and a toggle clasp.
Using the same number, size and color beads, string an 18” necklace using .018” or .019” flexible cable wire, crimp beads and a toggle clasp.
Put on the necklace strung on the thread. Bend over as if you were picking up something off the ground. Stand straight, then twist your body to the left. Note the positioning of the clasp. Note how the necklace feels on, and feels when you move. Take the necklace off.
Put on the necklace strung on the cable wire. Again, bend down as if you were picking up something off the ground. Stand straight, then twist your body to the left. Note the positioning of the clasp. Note how the necklace feels on, and feels when you move. Take the necklace off.
Typically, when you use needle and thread in stringing, the piece conforms to the body and moves in the same direction as the body.
Typically, when you use cable wire, the piece does not conform to the body, and will move in the opposite direction the body moves in.
Beading requires a lot of mind-body coordination. That takes work. It is work.
Calisthenics are exercises you can do to improve and tone your mind-body coordination when bead weaving.
You have to be able to get from your fingers to the needle to the beads, back along the thread to the needle to the fingers, hands, arms, eyes, mind. And then again. And again. Over and over, one more time. You need to get into a rhythm. All these working parts need to be working. No time for cramping. No time to get tired. No time to lose concentration.
A rhythm. Needle, pick up bead, pull down along thread, check the tension, pick up a bead, pull down along thread, check the tension, pick up a bead….
I noticed that different instructors had various techniques and strategies for maintaining this rhythm. Yes, music was involved sometimes. Othertimes simple meditation or creative reading and discourse. Some people had some stretching exercises that they did. Others tested themselves before proceeding with their big project. Still others did small things to reconfirm their learning.
Throughout this Series, I introduce some of the beading calisthenics that I experienced along the way. If you want to gather materials up so that you can follow along with these calisthenics, here’s the list.
MATERIALS NEEDED FOR ALL THE CALISTHENIC EXERCISES (SUPPLY LIST):
notebook, pencil 1 tube each of Japanese 11/0 seed beads in gray, 3 different colors of orange, black, white, any other 4 colors 1 tube each of Japanese 8/0 seed beads in gray or silver, black, white, orange, any other 4 colors 1 tube each of Japanese 6/0 seed beads in gray or silver, black, white, orange, any other 4 colors 5 gray-scale colors of delicas or 11/0 seed beads Nymo D or C-Lon D thread in black Nymo D or C-Lon D thread in yellow two toggle clasps .018” or .019” flexible cable wire assorted 4mm, 6mm and 8mm beads in various coordinating colors, including grays and oranges in your mix, as well big bowl and a bowl-full of assorted beads Size 10 English beading needles Bees wax scissors beading dishes or trays any kind of graph paper work surface or pad colored pencils a few clasps, (toggles are easy to work with) some crimp beads crimping pliers
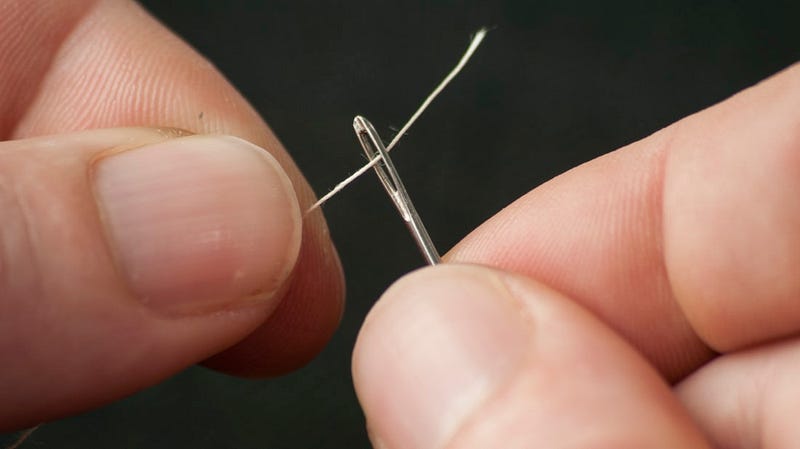
BEADING CALISTHENICS #2: Zen Needle Threading
Take a length of Nymo size D thread and a size #10 English beading needle. Thread the needle the way you are accustomed to doing this. Take the thread end, and thread it again. You may have to trim the tip of the thread.
Now try to thread your needle, this time keeping your eyes closed.
Visualize in your mind what you had just seen with your eyes.
Feel with your hands and body what you had just felt with your hands and body.
Unsuccessful? Then try again. Thread the needle twice with eyes open. Close your eyes. Try again. Visualize. Make your body and mind one with the needle and one with the thread.
Beading requires a lot of mind-body coordination. That takes work. It is work.
Calisthenics are exercises you can do to improve and tone your mind-body coordination when bead weaving.
You have to be able to get from your fingers to the needle to the beads, back along the thread to the needle to the fingers, hands, arms, eyes, mind. And then again. And again. Over and over, one more time. You need to get into a rhythm. All these working parts need to be working. No time for cramping. No time to get tired. No time to lose concentration.
A rhythm. Needle, pick up bead, pull down along thread, check the tension, pick up a bead, pull down along thread, check the tension, pick up a bead….
I noticed that different instructors had various techniques and strategies for maintaining this rhythm. Yes, music was involved sometimes. Othertimes simple meditation or creative reading and discourse. Some people had some stretching exercises that they did. Others tested themselves before proceeding with their big project. Still others did small things to reconfirm their learning.
Throughout this Series, I introduce some of the beading calisthenics that I experienced along the way. If you want to gather materials up so that you can follow along with these calisthenics, here’s the list.
MATERIALS NEEDED FOR ALL THE CALISTHENIC EXERCISES (SUPPLY LIST):
notebook, pencil 1 tube each of Japanese 11/0 seed beads in gray, 3 different colors of orange, black, white, any other 4 colors 1 tube each of Japanese 8/0 seed beads in gray or silver, black, white, orange, any other 4 colors 1 tube each of Japanese 6/0 seed beads in gray or silver, black, white, orange, any other 4 colors 5 gray-scale colors of delicas or 11/0 seed beads Nymo D or C-Lon D thread in black Nymo D or C-Lon D thread in yellow two toggle clasps .018” or .019” flexible cable wire assorted 4mm, 6mm and 8mm beads in various coordinating colors, including grays and oranges in your mix, as well big bowl and a bowl-full of assorted beads Size 10 English beading needles Bees wax scissors beading dishes or trays any kind of graph paper work surface or pad colored pencils a few clasps, (toggles are easy to work with) some crimp beads crimping pliers
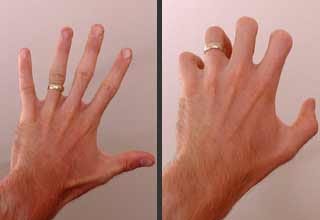
BEADING CALISTHENICS #1: 5-Finger Stretchies
This exercise is used to prevent your fingers from cramping. Often, when beading, you are holding your hand and fingers in a very tight, controlled, sometimes unnatural or uncomfortable position. You should stop periodically, and do 5-Finger Stretchies. This is a wonderful exercise which relaxes the muscles in your hands.
Take one hand and hold it arm out, palm forward. Your arm is parallel to the floor. Your palm, fingers up, is perpendicular to the floor. Tighten every muscle in every finger, and pull each finger inward and downwards towards the point they meet the palm, but don’t touch the palm. Picture making a claw with your pulled back fingers.
Squeeze the tension, release. Squeeze, release. Squeeze, release. Do this rapidly, perhaps 4 squeeze/releases a second. Do this for 10 seconds.
Many beaders love to bead, but lack the time, focus or motivation. They get too busy. They work on several projects at once. They end up with a lot of unfinished projects. Often achieving success gets too frustrating. Paralyzing. There are too many competing demands.
Beading and craft projects can take a long time. You have to maintain your interest over this extended period.
Most of us are like this. So I wanted to know what kinds of things do you do to increase your patience. How do you construct and manage the situations you are in — with all these competing demands for your time and energy — so that you can bead?
Are there some strategic short-cuts you take, when beading or designing, so you can speed things up?
What are your Patience Boosters?
“When I'm working my "day" job, I have a 3 X 5 note pad I carry with me and use it to write or draw ideas until I can get back to the beads.
When I get home I fix supper and bead until bed time. Then on Saturday I pick any projects that I want to get finished and do completion work then.
I find that projects in the "Lost interest category" never get finished and every so often I cut them up and reclaim the beads.”
Infuriating! That’s how many people, beginners and advanced alike, feel when they try to understand patterns and instructions.
Know up-front that most patterns are poorly drawn, and most instructions are poorly written. The instructors who write these often leave out critical steps — especially for new beaders and jewelry makers who are unfamiliar with many of the things these instructors assume that you know. Most often, they leave out critical information showing you the pathway, and how to negotiate that pathway, from where you are to where you are going next. It’s obvious to the instructor. But not so obvious to you.
In patterns, this “where-am-I, where-am-I-going-next” information is frequently unclear or omitted. You did Step 1 OK. You understand what Step 2 is about. But you don’t know how to get from Step 1 to Step 2. Othertimes, the patterns are overly complex, often, in the editorial interest of reducing the number of printed pages. Instead of showing a separate pattern or diagram for each step, the editors frequently try to show you three, four, five or more steps in the same diagram. So you have a bird’s nest of lines, and a spider-web’s road map — and you’re no where.
I tell people, that you need to re-write the instructions and re-draw the patterns or diagrams in a way you personally understand. This is very helpful.
Reading Patterns: Usually patterns are organized starting at the bottom with row 1 or step 1, first moving left to right, and then moving up bottom to the top. Othertimes, but less frequenlty, patterns are drawn so that you move in the opposite direction, starting at the top, moving left to right, then working down towards the bottom. When reading a pattern, you first need to locate whether the pattern goes bottom-up or top-down, or left-right or right-left.
Next, determine the directional flow of the work. Are you moving left to right and then right to left? Are you moving left to right, and then flipping the piece over, so you can continue moving left to right? Are you starting in the middle?
Most patterns and instructions are written from the Right-Handed person’s perspective. Right-Handed people usually work counter-clockwise. If you are Left-Handed, you may want to redraw the pattern or rewrite the instructions. Left-Handed people usually work clockwise.
Now, look at all the special symbols on the pattern, if any. Decipher what each one means before you begin your work. If you don’t know what “11/0” or “cylinder bead” means, for example, use the internet or your local bead or craft store, as a resource for finding out.
Clearly delineate, even draw an outline on the pattern itself with a pen, the thread, string or wire path. Be sure whether you are following a straight line path, or not.
Determine if you are creating one line or row at a time, or more than one line or row at a time.
Sometimes it is helpful to use a post-it note and place it right below the row you are working on. This helps you not lose your place.
If the pattern is fuzzy on how you proceed from one step to the next, try to draw in your own pattern, based on the written instructions, or on what you intuitively feel needs to happen next.
To draw your own patterns, you can find several sources of free graph paper on line. Usually the graph paper is available for a wide range of bead weaving stitches and techniques.
Many people who begin to bead want to rush to the finish line. They want to learn everything at once.
They buy beads and parts indiscriminately. They purchase every book they can find. They take classes on anything that interests them or catches their eye, no matter what the skill levels involved. Many people are not unlike a customer of ours — Lulu Betty — who contracted to make almost 50 pieces of complex jewelry, before ever having made even one piece before. She came into the store, and wanted someone to teach her everything — crimping, stringing, needle and thread work, wire working, silversmithing — in 2 hours.
Beading and jewelry making are not things to rush into. These are not things to learn haphazardly. Not everything is something you can easily pick up without having someone else show you.
This is a hobby and avocation that requires you to know a lot of things. You need to know a lot about materials. You need to know a lot about quality issues underlying these materials, and what happens to these materials over time. You need to be mechanical and comfortable using tools to construct things. You need to learn many basic techniques. You need to understand physical mechanics and what happens to all these materials and pieces, when jewelry is worn. You need to be familiar with art theories and their applications. You need to understand people, their psychology, the dynamics of the groups they find themselves in, and their cultural rules which get them through the day. You need to even be a little bit of a party planner, because often jewelry is worn in a specific context or for a specific occasion.
There is so much to learn, that you can’t learn it all at once. And there is so much to bring to bear, when making a piece of jewelry, that it is difficult to access all this information, if you haven’t learned how everything is interrelated and interdependent.
It’s important to learn in an organized, developmental way. Learn a core set of skills. Then learn another set of skills, and how these link back to the core. Then learn yet another set of skills, how they link back to the first set, and then link back to the core. And so forth. Always ask your self how all these things are inter-related and mutually dependent. Only in this way will you begin to know if you are learning the right way, and learning the right things.
There Are Many Styles of Learning
There are many ways to learn beading and jewelry making.
Most people learn by Rote Memory. They follow a set of steps, and they end up with something. They memorize all the steps. In this approach, all the choices have been made for them. So they never get a chance to learn the implications of their choices. Why one bead over another? Why one stringing material over another? How would you use the same technique in a different situation? You pick up a lot of techniques, but not necessarily many skills.
Other people learn Analogously. They have experiences with other crafts, such as sewing or knitting or other craft, and they draw analogies. Such and Such is similar to Whatnot, so I do Whatnot the same way I do Such and Such. This can work to a point. However, beading and jewelry making can often be much more involved, requiring making many more types of choices, than in other crafts. And there are still the issues of understanding the quality of the pieces you use, and what happens to them, both when jewelry is worn, as well as when jewelry is worn over time.
Yet another way people learn is through Contradictions. They see cheap jewelry and expensive jewelry, and analyze the differences. They see jewelry people are happy with, and jewelry people are not happy with, and analyze the differences. They see fashion jewelry looked down upon by artists, and art jewelry looked down upon by fashionistas, and they analyze the differences.
Assimilation is a learning approach that combines Analogous Learning and Learning Through Contradictions. People pursue more than one craft, keeping one foot in one arena, and another foot in the other. They teach themselves by analogy and contradiction. This assumes that multiple media mix, and mix easily. Often, however, this is not true. Usually one medium has to predominate for any one project to be successful. So assimilative learning can lead to confusion and poor products, trying to meet the special concerns and structures of each craft simultaneously. It is challenging to mix media. Often the fundamentals of each particular craft need to be learned and understood in and of themselves.
Constructing Meanings is one last approach to learning a craft. In this approach, you learn groups of things, and how to apply an active or thematic label to that grouping. For example, you might learn about beading threads, such as Nymo, C-Lon and FireLine, and, at the same time, learn to evaluate each one’s strengths and weaknesses in terms of Managing Thread Tension. You might learn about crystal beads, Czech glass beads, and lampwork beads, and then, again concurrently and in comparison, learn the pros and cons of each, in terms of achieving good color blending strategies. You might learn peyote stitch and Ndebele stitch, and how to combine them within the same project.
In reality, you learn a little in each of these ways. The Constructing Meanings approach, what is often referred to as the Art & Design Tradition, usually is associated with more successful and satisfying learning. This approach provides you with the tools for making sense of a whole lot of information — all the information you need to bring to bear to make a successful piece of jewelry, one that is both aesthetically pleasing and optimally functioning.
You usually have to buy more beads than you will use for any particular project. It’s infrequent that you can buy one bead at a time. So you have lots of little bits of little things left over.
Having a little of a lot of different beads might be disconcerting to some. “It’s gotten to the point,” Neva admitted, “where I’m running out of people to give gifts to … to justify my bead stash.” However, for Neva, as well as others, this stash of beads should be seen and treated as treasure. It’s not a burden. It should open up new possibilities for you as you think through new projects and designs.
Your stash can be used in fringes or as embellishment. You can use it to finish off the edges in your pieces. You can use these as spacer beads in bead stringing projects.
You can organize bead swaps with your friends, and trade off part of your stash for that of another’s.
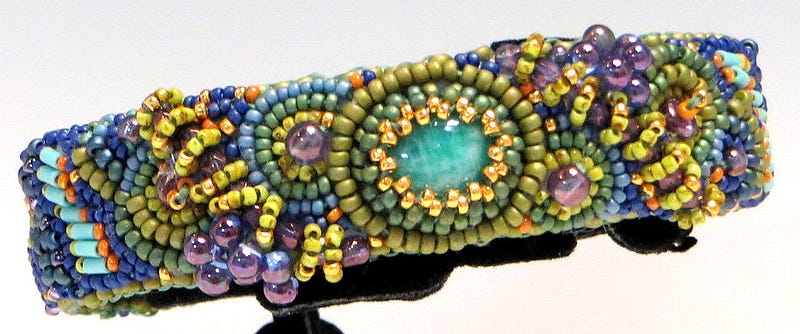
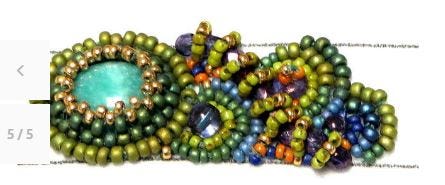
I was so determined to create a project for using up my bead stash, that I even developed a graphic embroidery pattern to assist me. Since I was somewhat new to bead embroidery, this was an accomplishment in and of itself. In my stash, I had a little of everything — 11/0’s, 15/0’s, drops, bugles. But not enough of any one color to make a project with them. I thought and thought and thought what to do.
The result: Hapua Reef Cuff. I laid out a graphic pattern, and colored in each section with beads. And used very few beads of many, many colors. And used up part of my bead stash.
INSPIRATION AND ASPIRATION “In the beginning, there was the idea.”
The words creativity, inspiration and aspiration are often used interchangeably, and I think it’s important that we draw a clearer distinction.
Creative people don’t just sit around and wait for inspiration to strike. Inspiration is not the source of creativity. Rather, inspiration is the motivated response to the creative impulse. Aspiration, in turn, is the motivated response by the artist to actualize inspiration.
Creativity is “a phenomenon where both something new and, at the same time, somehow valuable is created.”
Inspiration is defined as, “the process of being mentally stimulated to do or feel something.”
Aspiration is, “a hope or ambition of achieving something.”
There are many dichotomies. Stimulation versus ambition. Excitement versus action. Idea versus value. And most significantly, external versus internal.
Inspiration is something we seek to ingest from outside. Aspiration is something we cultivate within ourselves.
I have been inspired by an extraordinary number of people over the course of my life. My mentors in college when I was struggling to decide between becoming an archaeologist or a psychologist. In my first job at New Brunswick Tomorrow where I guided a board of health care providers in creating a health plan for the city. In a subsequent job by government officials with a clear vision for health care in Tennessee. Finding inspirations has never been a challenge for me.
But I had never really aspired to be like anyone until I dropped out of the corporate race, and turned to jewelry designing. It had never excited me or got my juices flowing before in the same way. But with jewelry design, I felt I could accomplish these wonderful designs, And, as my aspirations came into fruition, I began to feel that I could shape the field and profession of jewelry design and change the way jewelry makers work in some way. I was filled with aspirations to be heard and to make a difference. The response to my aspirations, from students or people reacting to my written articles, inspired me. If filled me with aspirations, and I had to figure the details out. I had to be very self-directed to continue as a jewelry designer and begin to transform how it is understood as a professional endeavor all its own — apart from craft and apart from art.
INSPIRATION: Becoming One with What Inspires You
Inspirations are sacred revelations you want to share through art and design.
The word inspiration comes from the Latin roots meaning “to breathe into.” But before you can breathe your inspiration into your jewelry, you need to become one with it.
There are these wonderfully exciting, sensually terrific, incredibly fulfilling things that you find as you try to imagine the jewelry you will create. They come from many sources: ideas, nature, images, people, behaviors. They might be realistic or abstract. They may be the particular color or pattern or texture or the way the light hits it and casts a shadow. They may be a need for order over chaos. They may be points of view. They may flow from some inner imagination.
For some reason, these inspirations take on a divine, sacred revelation for you — so meaningful that you want to incorporate them somehow into what you do. A fire in your soul. You want to translate these inspirations into colors, shapes, lines, patterns and textures. You want to impose an organization on them. You want to recapture their energy and power they have had over you. You feel compelled to bring these feelings into ideas, and these ideas into material objects.
There are many challenges to inspiration. That which we call “inspiring” can often be somewhat fuzzy. It might be a feeling. It might be a piece of an idea, or a small spot on an image. You might feel inspired, but, cannot put the What or the Why into words or images. On the surface, it may seem important to you, but unimportant to others. You the artist may not feel in control of the inspiration in that it seems like it is something that is evoked, not necessarily directed, by you.
When inspired, artists perceive new possibilities that transcend that which is ordinary around them. Too often, the artist feels passive in this process. This transcendence does not feel like a willfully generated idea. However, it needs to be.
The successful artist — one who eventually can achieve a level of resonance — is one who is not only inspired by, but also inspired to. This all requires a great deal of metacognitive self-awareness. The artist must be able to perceive the intrinsic value of the inspiring object, and how to extend this value in design, where the piece of jewelry becomes its expression.
Inspiration is motivating. Inspiration is not the source of creativity; creativity does not come from it. Inspiration, instead, should be viewed as a motivational response to creativity. It motivates the artist, through jewelry and its design, to connect this inspiration with others. It serves as a mediator between the self and the anticipated shared understandings of others. The jewelry encapsulates the artist’s ability to make this connection. When the connection is well-made, resonance follows.
But finding inspirations is not only personal, but more importantly, it is an effort to influence others. It is an act of translating the emotions which resonate in you into some object of art which, in turn, will inspire and resonate with others. How does the inspiration occur to you, and how do you anticipate how this inspiration might occur to others?
Too often we lose sight of the importance of inspiration to the authentic performance task of creating jewelry. We operate with the belief that anyone can be inspired by anything. There’s nothing more to it. Moreover, inspiration gets downplayed when put next to the discussion of the effort of making jewelry itself.
But it should not. Inspiration awakens us to new possibilities. It allows us to transcend the ordinary, surface experiences. It propels us to design. In transforms how we perceive what we do and what we can do. Inspiration is not something that should be overlooked just because it is somewhat fuzzy and elusive.
Inspiration is not less important than perspiration. It plays an equal role in the creative process. The artist’s clarity about why something is inspiring, and why this inspiration motivates the artist to respond, will be critical for achieving success, that is resonance.
The Core Aspects of Inspiration
In psychology, inspiration is seen to have three key qualities:
– Evocation
– Transcendence, and
– Approach motivation
Evocation. Inspiration is evoked. It feels spontaneous. Unintentional.
Transcendence: Inspiration transcends the ordinary to the noteworthy. It involves a moment of clarity, or at least a bit of clarity, which makes us aware of new possibilities. The moment itself may be vivid, very emotional, even passionate.
Approach motivation: The person strives to transmit, express or actualize their inspiration. The person, for whatever reason, wants to act on that inspiration.
Inspired people are more open to experience. They are not necessarily conscience about it. It just happens. It isn’t willed. Inspired people appear to be more self-directed. They want to master their work. They do not consider inspiration a competitive sport, at least most don’t. Inspired people focus on the subjective, intrinsic value of an object, not its external, objective worth.
Where Do You Find Inspirations?
Inspirations matter a lot. This may cause you to feel pressure to become inspired and find new topics and projects to work on, and feel helpless when you can’t. But remember, inspirations cannot be willed. They are more spontaneous and transcendent. This does not mean, however, that inspiration is completely out of your control. If you put yourself in situations where you are more likely to find inspiration, you will find inspirations. You always need to be working towards finding it.
1. Look Around You
Notice something different. Focus on something and ask yourself why it exists, in the form that it is in, in the place your find it, in the uses you put to it. What if it wasn’t there? What if it was different? When was the last time you used it? Could something else substitute for it? In your workspace, surround yourself with inspiring images.
2. Go For A Walk
Try to find the things you don’t often see or focus on. Try to declutter your mind, and fill it with new observations. Walk the same path at different times during the day, or when the weather changes. Find other pathways you think are similar or different and walk those, evaluating the similarities or differences.
3. Meet New People
Surround yourself with other inspiring and creative people. Go out of your way to meet them. Talk. Discuss. Dialog. Share an experience. Collaborate. Show genuine interest in what they do, how they do, why they do.
4. Get Lost
Take a wrong turn on the highway. Visit a place you have never been to before. Take it all in. What are your thoughts? Feelings? Emotions? Are you excited, scared, bored, in wonder?
5. Read or Watch Something New and Inspirational
The internet provides all kinds of resources to lose yourself in. Visit a museum. Change the channel on the TV. Check out a bookstore. But deviate from the same-ole, same-ole.
6. Change Your Routine
If you have a schedule, deviate from it. If you are a morning person, try being a night person for a few days. If you like to think and work in one setting, change the setting.
7. Learn Something New
Take a class. Do a tutorial. Try a different technique. Use different materials. Try something you are not good at.
How Does Inspiration Relate To Design?
Jewelry design is an extended process. Some of the process is planned, and some of it is spontaneous. At the beginning of the process we have Inspiration. We make choices, then question our choices, relating inspiration to aspirations to designs. We are critical, in a positive sense, and slowly maintain our attention and work through what is a more extended design process.
What is most important here is that you learn, not only to inspire others by, but how to inspire others to. That is, you want to learn how to translate an inspiration into a design in such a way that the wearer and the viewer are inspired to emotionally connect with the pieces as if they were following and identifying with your own thoughts and feelings.
They don’t simply react emotionally by saying the piece is “beautiful.” The piece conveys more power than that. It resonates for them. They react by saying they “want to touch it“ or want to wear it” or “want to buy it” or “want to make something like it”. They come to feel and see and sense the artist’s hand.
What Is Aspiration?
Aspiration is the motivational basis for wanting to translate your inspiration into a design. To aspire is to rise up to a great plan, an abundance of hope and desire. To aspire is to bring others into this plan, hope and desire. Aspiration is a inspired-related search for possibilities.
There are certain objective aspects to it. The artist is translating the inspiration into concrete concepts, such as color choice, material choice, and the choices of techniques and composition. The concepts are goal-oriented and have universally shared meanings. They are reasonable.
And there are certain subjective aspects to it. It is the artist who wants the thing, and finds pleasure in all this. It is the artist who wants others to experience the emotional content of the inspirations as the artist does. These subjective aspects are rationale.
ASPIRATION: Translating Creativity into A Technical Product Design
Aspiration motivates the artist to actualize inspiration.
Aspiration is where the artist translates inspiration into an expressive design concept. The artist begins to control and regulate what happens next. This involves selecting Design Elements[1] and clustering them to formulate meaningful expressions. The greater value the artist places on resonance, the stronger the aspiration will be to achieve it.
Aspiration is future-oriented. It requires a stick-to-it-ness. The artist must be sufficiently motivated to invest the time, energy and money into designing and making the jewelry that will not necessarily be finished, displayed or sold right away. It may require some additional learning and skills-development time. The artist may need to find a level of creativity within, and discover the kinds of skills, techniques and insights necessary for bringing this creativity to the aspired task at hand.
Aspiration requires the calculus: Is it worth it? It adds a level of risk to the project. It forces the artist to pay attention to the world around her or him. This world presents dynamic clues — what I discuss below as shared understandings — about opportunities, constraints, risks, contingencies, consequences, strategies and goals, and likely successes.
For some artists, motivation primarily is seen as instinctual. Think of seat-of-the-pants. Emergent, not controlled. A search for harmony, balance, rhythm, unity as something that feels right and looks right and seems right with the universe. Expressive, yes. Imaginative, yes. But not necessarily resonant.
Achieving resonance, however, is, for the most part, more than instinctual. It has some deliberate quality to it. It is communicative. It requires a purposeful act on the part of the artist. It is a different type of motivation — intentional. The artist might want to convey a specific emotion. Or advocate for some change. Or illustrate a point of view. The artist may want to entertain or teach. Heal. Attract mates. Propagandize. Where a jewelry’s design is not reflective of an artist’s intent, there can be no resonance.
What Is The Relationship of Aspiration to Resonance?
We achieve Resonance by gaining a comfort and ease in communicating about design. This comfort and ease, or disciplinary fluency, has to do with how we translate our inspirations and aspirations into all our compositional, constructive and manipulative choices. It is empowering. Our pieces resonate. We achieve success.
Resonance, communication, success, fluency — these are all words that stand in place for an intimacy between the designer and the materials, the designer and the techniques, the designer and inspiration. They reflect the designer’s aspirations. They reflect the shared understandings of everyone the designer’s jewelry is expected to touch. They reflect the designer’s managerial prowess in bringing all these things together.
Anticipating Shared Understandings
Shared understandings dictate opportunities, contingencies and constraints.
The question of whether the audience correctly infers the presence of the artist’s inspiration, and the sense of how the artist’s hand comes into play within the design, remains. The answer revolves around a dynamic interaction between artist and audience, as they anticipate understandings they share, and ones they do not.