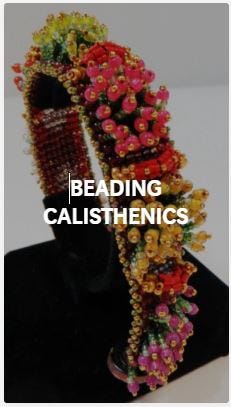
Beading requires a lot of mind-body coordination. That takes work. It is work.
Calisthenics are exercises you can do to improve and tone your mind-body coordination when bead weaving.
You have to be able to get from your fingers to the needle to the beads, back along the thread to the needle to the fingers, hands, arms, eyes, mind. And then again. And again. Over and over, one more time. You need to get into a rhythm. All these working parts need to be working. No time for cramping. No time to get tired. No time to lose concentration.
A rhythm. Needle, pick up bead, pull down along thread, check the tension, pick up a bead, pull down along thread, check the tension, pick up a bead….
I noticed that different instructors had various techniques and strategies for maintaining this rhythm. Yes, music was involved sometimes. Othertimes simple meditation or creative reading and discourse. Some people had some stretching exercises that they did. Others tested themselves before proceeding with their big project. Still others did small things to reconfirm their learning.
Throughout this Series, I introduce some of the beading calisthenics that I experienced along the way. If you want to gather materials up so that you can follow along with these calisthenics, here’s the list.
MATERIALS NEEDED FOR ALL THE CALISTHENIC EXERCISES (SUPPLY LIST):
notebook, pencil 1 tube each of Japanese 11/0 seed beads in gray, 3 different colors of orange, black, white, any other 4 colors 1 tube each of Japanese 8/0 seed beads in gray or silver, black, white, orange, any other 4 colors 1 tube each of Japanese 6/0 seed beads in gray or silver, black, white, orange, any other 4 colors 5 gray-scale colors of delicas or 11/0 seed beads Nymo D or C-Lon D thread in black Nymo D or C-Lon D thread in yellow two toggle clasps .018” or .019” flexible cable wire assorted 4mm, 6mm and 8mm beads in various coordinating colors, including grays and oranges in your mix, as well big bowl and a bowl-full of assorted beads Size 10 English beading needles Bees wax scissors beading dishes or trays any kind of graph paper work surface or pad colored pencils a few clasps, (toggles are easy to work with) some crimp beads crimping pliers
BEADING CALISTHENICS #1: 5-Finger Stretchies
This exercise is used to prevent your fingers from cramping. Often, when beading, you are holding your hand and fingers in a very tight, controlled, sometimes unnatural or uncomfortable position. You should stop periodically, and do 5-Finger Stretchies. This is a wonderful exercise which relaxes the muscles in your hands.
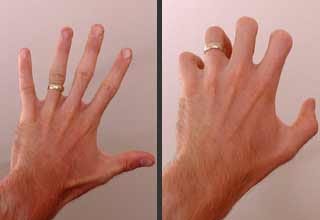
Take one hand and hold it arm out, palm forward. Your arm is parallel to the floor. Your palm, fingers up, is perpendicular to the floor. Tighten every muscle in every finger, and pull each finger inward and downwards towards the point they meet the palm, but don’t touch the palm. Picture making a claw with your pulled back fingers.
Squeeze the tension, release. Squeeze, release. Squeeze, release. Do this rapidly, perhaps 4 squeeze/releases a second. Do this for 10 seconds.
Many beaders love to bead, but lack the time, focus or motivation. They get too busy. They work on several projects at once. They end up with a lot of unfinished projects. Often achieving success gets too frustrating. Paralyzing. There are too many competing demands.
Beading and craft projects can take a long time. You have to maintain your interest over this extended period.
Most of us are like this. So I wanted to know what kinds of things do you do to increase your patience. How do you construct and manage the situations you are in — with all these competing demands for your time and energy — so that you can bead?
Are there some strategic short-cuts you take, when beading or designing, so you can speed things up?
What are your Patience Boosters?
“When I'm working my "day" job, I have a 3 X 5 note pad I carry with me and use it to write or draw ideas until I can get back to the beads.
When I get home I fix supper and bead until bed time. Then on Saturday I pick any projects that I want to get finished and do completion work then.
I find that projects in the "Lost interest category" never get finished and every so often I cut them up and reclaim the beads.”
Many people who begin to bead want to rush to the finish line. They want to learn everything at once.
They buy beads and parts indiscriminately. They purchase every book they can find. They take classes on anything that interests them or catches their eye, no matter what the skill levels involved. Many people are not unlike a customer of ours — Lulu Betty — who contracted to make almost 50 pieces of complex jewelry, before ever having made even one piece before. She came into the store, and wanted someone to teach her everything — crimping, stringing, needle and thread work, wire working, silversmithing — in 2 hours.
Beading and jewelry making are not things to rush into. These are not things to learn haphazardly. Not everything is something you can easily pick up without having someone else show you.
This is a hobby and avocation that requires you to know a lot of things. You need to know a lot about materials. You need to know a lot about quality issues underlying these materials, and what happens to these materials over time. You need to be mechanical and comfortable using tools to construct things. You need to learn many basic techniques. You need to understand physical mechanics and what happens to all these materials and pieces, when jewelry is worn. You need to be familiar with art theories and their applications. You need to understand people, their psychology, the dynamics of the groups they find themselves in, and their cultural rules which get them through the day. You need to even be a little bit of a party planner, because often jewelry is worn in a specific context or for a specific occasion.
There is so much to learn, that you can’t learn it all at once. And there is so much to bring to bear, when making a piece of jewelry, that it is difficult to access all this information, if you haven’t learned how everything is interrelated and interdependent.
It’s important to learn in an organized, developmental way. Learn a core set of skills. Then learn another set of skills, and how these link back to the core. Then learn yet another set of skills, how they link back to the first set, and then link back to the core. And so forth. Always ask your self how all these things are inter-related and mutually dependent. Only in this way will you begin to know if you are learning the right way, and learning the right things.
There Are Many Styles of Learning
There are many ways to learn beading and jewelry making.
Most people learn by Rote Memory. They follow a set of steps, and they end up with something. They memorize all the steps. In this approach, all the choices have been made for them. So they never get a chance to learn the implications of their choices. Why one bead over another? Why one stringing material over another? How would you use the same technique in a different situation? You pick up a lot of techniques, but not necessarily many skills.
Other people learn Analogously. They have experiences with other crafts, such as sewing or knitting or other craft, and they draw analogies. Such and Such is similar to Whatnot, so I do Whatnot the same way I do Such and Such. This can work to a point. However, beading and jewelry making can often be much more involved, requiring making many more types of choices, than in other crafts. And there are still the issues of understanding the quality of the pieces you use, and what happens to them, both when jewelry is worn, as well as when jewelry is worn over time.
Yet another way people learn is through Contradictions. They see cheap jewelry and expensive jewelry, and analyze the differences. They see jewelry people are happy with, and jewelry people are not happy with, and analyze the differences. They see fashion jewelry looked down upon by artists, and art jewelry looked down upon by fashionistas, and they analyze the differences.
Assimilation is a learning approach that combines Analogous Learning and Learning Through Contradictions. People pursue more than one craft, keeping one foot in one arena, and another foot in the other. They teach themselves by analogy and contradiction. This assumes that multiple media mix, and mix easily. Often, however, this is not true. Usually one medium has to predominate for any one project to be successful. So assimilative learning can lead to confusion and poor products, trying to meet the special concerns and structures of each craft simultaneously. It is challenging to mix media. Often the fundamentals of each particular craft need to be learned and understood in and of themselves.
Constructing Meanings is one last approach to learning a craft. In this approach, you learn groups of things, and how to apply an active or thematic label to that grouping. For example, you might learn about beading threads, such as Nymo, C-Lon and FireLine, and, at the same time, learn to evaluate each one’s strengths and weaknesses in terms of Managing Thread Tension. You might learn about crystal beads, Czech glass beads, and lampwork beads, and then, again concurrently and in comparison, learn the pros and cons of each, in terms of achieving good color blending strategies. You might learn peyote stitch and Ndebele stitch, and how to combine them within the same project.
In reality, you learn a little in each of these ways. The Constructing Meanings approach, what is often referred to as the Art & Design Tradition, usually is associated with more successful and satisfying learning. This approach provides you with the tools for making sense of a whole lot of information — all the information you need to bring to bear to make a successful piece of jewelry, one that is both aesthetically pleasing and optimally functioning.
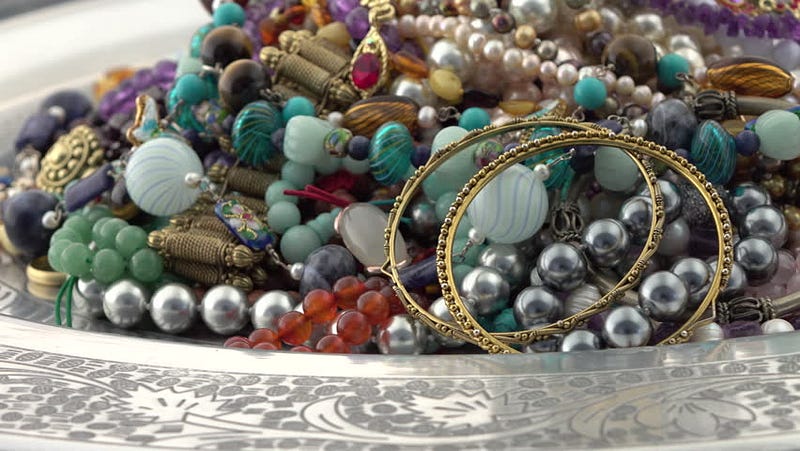
You usually have to buy more beads than you will use for any particular project. It’s infrequent that you can buy one bead at a time. So you have lots of little bits of little things left over.
Having a little of a lot of different beads might be disconcerting to some. “It’s gotten to the point,” Neva admitted, “where I’m running out of people to give gifts to … to justify my bead stash.” However, for Neva, as well as others, this stash of beads should be seen and treated as treasure. It’s not a burden. It should open up new possibilities for you as you think through new projects and designs.
Your stash can be used in fringes or as embellishment. You can use it to finish off the edges in your pieces. You can use these as spacer beads in bead stringing projects.
You can organize bead swaps with your friends, and trade off part of your stash for that of another’s.
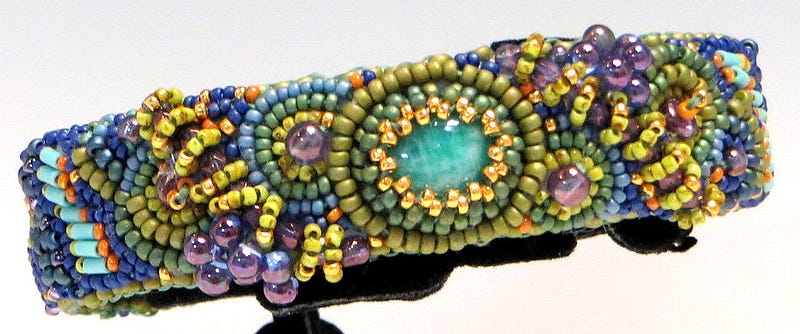
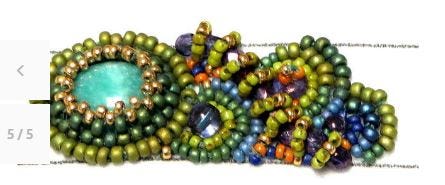
I was so determined to create a project for using up my bead stash, that I even developed a graphic embroidery pattern to assist me. Since I was somewhat new to bead embroidery, this was an accomplishment in and of itself. In my stash, I had a little of everything — 11/0’s, 15/0’s, drops, bugles. But not enough of any one color to make a project with them. I thought and thought and thought what to do.
The result: Hapua Reef Cuff. I laid out a graphic pattern, and colored in each section with beads. And used very few beads of many, many colors. And used up part of my bead stash.
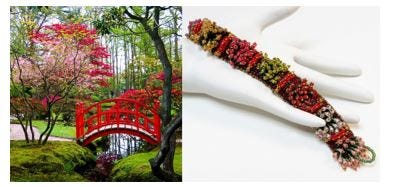
“Japanese Fragrance Garden Bracelet”, piece and inspiration, FELD, 2018
BECOMING THE BEAD ARTIST AND JEWELRY DESIGNER: The Ongoing Tensions Between Inspiration and Form
Abstract: As a jewelry designer, you have a purpose. Your purpose is to figure out, untangle and solve, with each new piece of jewelry you make, how both you, as well as the wearer, will understand your inspirations and the design elements and forms you chose to express them, and why this piece of jewelry is right for them. Not as easy as it might first appear.This involves an ongoing effort, on many levels, to merge voice and inspiration with form. Often challenging, but very rewarding.
BECOMING THE BEAD ARTIST AND JEWELRY DESIGNER: The Ongoing Tensions Between Inspiration and Form
As a jewelry designer, you have a purpose. Your purpose is to figure out, untangle and solve, with each new piece of jewelry you make, how both you, as well as the wearer, will understand your inspirations and the design elements and forms you chose to express them, and why this particular piece of jewelry is right for them. Not as easy as it might first appear.
You will want the piece to be beautiful and appealing. So you will be applying a lot of art theories about color, perspective, composition and the like. You will quickly discover that much about color use and the use of lines and planes and shapes and so forth in art is very subjective. People see things differently. They may bring with them some biases to the situation. Many of the physical materials you will use may not reflect or refract the color and other artistic effects more easily achieved with paints.
You want the piece to be durable. So you will be applying a lot of theories and practices of architects and engineers and mechanical physicists. You will need to intuitively and intrinsically understand what about your choices leads to the jewelry keeping its shape, and what about your choices allows the jewelry to move, drape and flow. You also will be attentive to issues of physical mechanics, particularly how jewelry responds to forces of stress, strain and movement. This may mean making tradeoffs between beauty and function, appeal and durability, desire and acceptance.
You want the piece to be satisfying and accepted by various wearing and viewing audiences. So you will have to have some understanding of the role jewelry plays in different people’s lives. Jewelry is more than some object to them; jewelry is something they inhabit — reflective of soul, culture, status, aspiration. You will recognize that people ascribe the qualities of the jewelry to the qualities of the person wearing it. You will bring to the forefront ideas underlying psychology and anthropology and sociology, and even party planning, while designing your jewelry or introducing it publicly. You may find the necessity to compromise part of your vision for something socially acceptable, or in some degree of conformance with a client’s taste or style.
BECOMING THE BEAD ARTIST AND JEWELRY DESIGNER
Sometimes becoming a designer begins by touching some beads. Or running a strand of pearls through your hand. Or the sight of something perfectly worn around the wrist, or upon the breast, or up near the neck. Or trying to accessorize an outfit. Or finding something for a special occasion.
Jewelry designers are extraordinarily blessed to do what they love for a living. For many, they have turned a hobby into an avocation into a lifestyle.
But it’s not like a regular job. There are many intangibles. Such as, what exactly is creativity and creative thinking? What are all the things that have to come together to recognize that creative spark when it hits you in your heart, gut or head, and how to translate that into something real, with beauty, with function, and with purpose? How do you mesh your views of and desires for aesthetics and functionality with those of your many audiences — wearer, viewer, buyer, seller, collector, exhibiter, teacher and student?
What exactly does it mean to design jewelry, and how do you know it is the right path for you? This is a tough question. You may love jewelry, but not know how to make it. You may get off on creative problem solving or be a color addict but not know what specific techniques and skills you need to learn, in what organized way, with what direction, leading you towards becoming that better jewelry designer. You may wonder what it means and what it takes to be successful as a designer. You may feel the motivation, but not know what the jewelry designer really has to do each day.
You may be taking classes and getting some training, but how do you know when you have arrived? How do you know when you have emerged as a successful professional jewelry designer? And what are your responsibilities and obligations, once you get there?
THERE IS SO MUCH TO KNOW
There is so much to know, and so many types of choices to make. Which clasp? Which stringing material? Which technique? Which beads? Which strategy of construction? Which silhouette? What aesthetic you want to achieve? How you want to achieve it? Drape, movement, context, durability? How to organize and manage the design process?
And this is the essence of this series of articles — a way to learn all the kinds of things you need to bring to bear, in order to create a wonderful and functional piece of jewelry. Whether you are just beginning your beading or jewelry making avocation, or have been beading and making jewelry awhile — time spent with the material in these segments will be very useful. You’ll learn the critical skills and ideas. You’ll learn how these inter-relate. And you’ll learn how to make better choices.
Everyone knows that anyone can put beads and other pieces together on a string and make a necklace. But can anyone make a necklace that draws attention? That evokes some kind of emotional response? That resonates with someone where they say, I want to wear that! or, I want to buy that!? Which wears well, drapes well, moves well as the person wearing it moves? Which is durable, supportive and keeps its silhouette and shape? Which doesn’t feel underdone or over done? Which is appropriate for a given context, situation, culture or society?
True, anyone can put beads on a string. But that does not make them artists or designers. From artists and designers, we expect jewelry which is something more. More than parts. More than an assemblage of colors, shapes, lines, points and other design elements. More than simple arrangements of lights and darks, rounds and squares, longs and shorts, negative and positive spaces. We expect to see the artist’s hand. We expect the jewelry to be impactful for the wearer.
We want to gauge how the designer grows within the craft, and takes on the challenges during their professional lives. This involves an ongoing effort to merge voice and inspiration with form. Often this effort is challenging. Sometimes paralyzing. Always fulfilling and rewarding.
Jewelry design is a conversation. The conversation in ongoing, perhaps never-ending. The conversation is partly internal and partly external. The conversation is partly a reflection about process, refinement, questioning, translating feelings into form, impressions into arrangements, life influences into choice. It touches on desire. It reflects value and values. Aesthetics matter. Architecture and function matters. People matter. Context and situation matter.
Jewelry focuses attention. Inward for the artist. Outward for the wearer and viewer. In many directions socially and culturally and situationally. Jewelry is a voice which must be expressed and heard, and hopefully, responded to.
At first that voice might not find that exact fit with its audience. There is some back and forth in expression, as the jewelry is designed, refined, redesigned, and re-introduced publicly. But jewelry, and its design, have great power. They have the power to synthesize a great many voices and expectations into something exciting and resonant.
JEWELRY DESIGN: An Occupation In Search Of A Profession
Jewelry design is an activity which occupies your time.
How the world understands what you do when you occupy that time, however, is in a state of flux and confusion, and which often can be puzzling or disorienting for the jewelry artist, as well.
Is what you are doing merely a hobby or an avocation? Is it something anyone can do, anytime they want, without much preparation and learning?
Is what you do an occupation? Does it require learning specialized technical skills? Is it something that involves your interaction with others? Is it something you are paid to do?
Or is what you do a profession? Is there a specialized body of knowledge, perspectives and values, not just mechanical skills, to learn and apply? Do you provide a service to the public? Do you need to learn and acquire certain insights which enable you to serve the needs of others?
Are you part of another occupation or profession, or do you have your own? Is jewelry design merely a craft, where you make things by following sets of steps?
Is jewelry design an art, where your personal inspirations and artistic sense is employed to create things of aesthetic beauty for others to admire, as if they were sculptures? Is the jewelry you create to be judged as something separate and apart from the person wearing it?
Or is jewelry design its own thing. Is it a design activity where you learn specialized knowledge, skills and understandings in how to integrate aesthetics and functionality, and where your success can only be judged at the boundary between jewelry and person — that is, only as the jewelry is worn?
The line of demarcation between occupation and profession is thin, often blurred, but for the jewelry designer, this distinction is very important. It feeds into our sense of self and self-esteem. It guides us in the choices we make to become better and better at our craft, art and trade. It influences how we introduce our jewelry to the public, and how we influence the public to view, wear, exhibit, purchase or collect the things we make.
What Does It Mean To Become A Professional?
At the heart of this question is whether we are paid and rewarded either solely for the number of jewelry pieces which we make, or rather for the skill, knowledge and intent underlying our jewelry designs.
If the former, we do not need much training. Entry into the activity of jewelry design would be very open, with a low bar. Our responsibility would be to turn out pieces of jewelry. We would not encumber ourselves too much with art theory or design theory. We would not concern ourselves, in any great depth, and certainly not struggle with jewelry’s psycho-socio-cultural impacts.
If the latter, we would need a lot of specialized training and experience. Entry into the activity of jewelry design would be more controlled, most likely staged from novice to master. Our responsibility would be to translate our inspirations into aspirations into designs. It would also be to influence others viewing our work to be inspired to think about and reflect and emote those things which have excited the artist, as represented by the jewelry itself. And it would also be to enable others to find personal, and even social and cultural, success and satisfaction when wearing or purchasing this piece of jewelry.
To become a professional jewelry designer is to learn, apply and experience a way of thinking like a designer. Fluent in terms about materials, techniques and technologies. Flexible in the applications of techniques and the organizing of design elements into compositions which excite people. Able to develop workable design strategies in unfamiliar or difficult situations. Communicative about intent, desire, purpose, no matter the context or situation within which the designer and their various audiences find themselves. Original in how concepts are introduced, organized and manipulated, and in how the designer differentiates themselves from other designers.
The designs of artisans who make jewelry reflect and refract cultural norms, societal expectations, historical explanations and justifications, psychological precepts individuals apply to make sense of themselves within a larger setting. As such, the jewelry designer has a major responsibility, both to the individual client, as well as to the larger social setting or society, to foster that the ability for the client to fulfill that hierarchy of needs, and to foster the coherency and rationality of the community-at-large.
All this can happen in a very small, narrow way, or a very large and profound way. In either case, the professional roles of the jewelry designer remain the same. Successfully learning how to play these roles — fluency, flexibility, communication, originality — becomes the basis for how the jewelry designer is judged and the extent of his or her recognition and success.
Why People Like To Bead and Make Jewelry
Most people, when they get started beading or making jewelry, don’t have this overwhelming urge to become a star jewelry designer. On the contrary, fame and fortune as a designer are some of the furthest things from their minds. Most people look to jewelry making and beading to fulfill other needs.
Over the years I’ve seen many people pick up beading and jewelry making as a hobby. They are drawn to these for many reasons, but most often, to make fashionable jewelry at a much lower cost than they would find for the same pieces in a Department store, or to repair jewelry pieces they especially love. When you start with the parts, and the labor is all your own, it is considerably less expensive than the retail prices you would find in a store for the same pieces.
Some people want to make jewelry for themselves. Others want to make handmade gifts. Giving someone something of great value, that reflects a personal expression of creativity, and a labor of love — you can’t beat it. And everyone loves jewelry.
When people get into beading and jewelry making, they discover it’s fun. They tap into their inner-creative-self. They see challenges, and find ways to meet them. They take classes. They buy books and magazines. They join beading groups and bead societies and jewelry making collaboratives. They have beading and jewelry making parties with their friends. They scour web-sites on-line looking for images of and patterns for jewelry. They comb the web and the various beading, jewelry-making and craft magazines, looking for sources and resources. They join on-line jewelry and bead boards, on-line forums, on-line web-rings, on-line ezines, groups, and on-line blogs. They take shopping trips to malls and boutiques and like little good Agatha Christies and Sherlock Holmes, they spy, looking for fashions, fashion trends, and fashionistas. They attend traveling bead shows. And every town they visit, they schedule some free time to check out the local bead stores and boutiques.
As people get more into beading and jewelry making, some discover that these avocations are not only sources of artistic self-expression, but also have many meditative qualities. They are relaxing. They take your mind off the here and now, and transport you to a very calming place.
Still, for others, beading and jewelry making become a way to earn some extra income. They might be to supplement what you’re making now. They might be ways to generate some extra dollars after you retire. They might be the start of your own business as a designer of jewelry. They might be a sense of independence and self-reliance. Having someone pay you for something you made is often the hook that gets people addicted to beadwork and jewelry making.
Most people, however, are content just to make jewelry. There are no professional Design paths to pursue. They may realize that they are out there somewhere, but don’t particularly care. Or sometimes they are unfamiliar with or can’t see all the possibilities. Perhaps they get stuck. No mentor, no book, no magazine, no project to entice them or spark an interest in something more than what they are doing now.
For those fewer people, however, who get a whiff of what it means to design jewelry, and jewelry which resonates, well, what a trip they are in for.
Do You Chase The Idea or The Material?
It is important up front to ask yourself, as a jewelry artist, what is more important to you: the piece of jewelry itself, or the reason why it was made? The idea? Or the material object?
The idea is about cause and effect. How the inspiration resulted in choices about colors, materials and techniques. How the artist’s intent is revealed through choices about composition, arrangements and manipulation of design elements. How the jewelry relates to the person and to the body? How the artist anticipates how others will understand whether a piece is finished and successful, and whether the piece incorporates these shared understandings into the choices made about design.
As solely a material object, the jewelry so designed shies away from resonance. It becomes something to be judged apart from the wearer. It too often gets co-opted by global forces tending towards standardization and same-old-same-old designs. The designer’s mastery is barely referenced or attended to. The designers voice is reduced to noise. The very real fear is that, with globalization and standardization, the designer’s voice will no longer be needed.
Jewelry as idea fosters communication and connection between the artist and his or her various audiences. It bridges thinking. It bridges emotion. It bridges social, cultural and/or situational ties. It goes beyond simple adornment and ornamentation. It becomes interactive, and emerges from a co-dependency between artist and audience, reflective and indicative of both.
Analyzing reasons, finding connections, and conceptualizing forms, components and arrangements are the primary functions of jewelry designer survival.
Otherwise, why make jewelry? Why make something so permanent to reflect your inner motivations, efforts, even struggles, to translate inspiration into this object? Why make something wearable, especially when each piece is usually not worn all the time? Why make something that might have such an intimate relationship with the body and mind? Why make something that can have real consequences for the wearer as the jewelry is worn in social, cultural or specific situational settings?
The Challenging Moments
Developing yourself as a jewelry designer has several challenging moments. You want to maintain high expectations and goals for yourself, and see these through. Some challenging moments include the following:
1. Learning your craft and continually growing and developing within your profession
2. Recognizing how jewelry design goes beyond basic mechanics and aesthetics, thus, differs from craft and differs from art, and then learning and working accordingly.
3. Getting Inspired
4. Translating Inspiration into a design
5. Implementing that design both artistically and architecturally by finding that balance between beauty (must look good) and functionality (must wear well)
6. Organizing your work space and all your stuff
7. Managing a design process
8. Introducing your pieces publicly, and anticipating how others (wearer, viewer, seller, marketer, exhibitor, collector, teacher, student, for example) will desire your pieces, as well as judge your pieces as finished (parsimonious) and successful (resonant)
9. Infusing your pieces with a sense of yourself, your values, your aesthetics, your originality
10. Developing a fluency and flexibility when working with new materials, new techniques and technologies, and new design expectations, including well-established ideas about fix-it strategies when confronted with unfamiliar situations
11. Differentiating your jewelry and yourself from other jewelry designers
12. If selling your pieces, then linking up to and connecting with those who will market and buy your pieces
Some Bottom-Line Advice For The Newly Emerging Jewelry Designer
Always keep working and working hard. Set up a routine, and do at least one thing every day.
Find a comfortable place to work in your home or apartment. Develop strategies for organizing the projects, your supplies and your tools, and for keeping things generally organized over time. But don’t overdue the organizing thing. A little chaos can be OK, and even, sometimes, trigger new ideas.
Give yourself permission to play, experiment, go down many paths. Everything you work on doesn’t have to meet the criterion of perfection, be cool, or become the next Rembrandt. A key part of the learning process is trial and error, hypothesis, test, and conclusion. This helps you develop fix-it strategies so that you can overcome unfamiliar or problematic situations, enhancing your skills as a designer.
Don’t let self-doubt and any sense of impending failure take over you, and paralyze you. Designer’s block, while it may happen occasionally, should be temporary. Jewelry projects usually evolve, and involve some give and take, change and rearrangement. Often the time to complete a project can be lengthy, and you have to maintain your interest and inspiration over this extended time period.
Don’t get stuck in a rut. Try new materials. Try new designs. Try new styles. Try to add variation, new arrangements, smart embellishments. Learn new techniques and technologies.
DISCIPLINARY LITERACY AND FLUENCY IN DESIGN An Introduction To This Series of Articles
Abstract: Jewelry Design is an occupation in search of a profession. Long thought merely a craft, or a subset of art, painting and sculpture, we have begun to recognize that Jewelry Design is something more. Jewelry making encapsulates the designer’s anticipation, not only of aesthetic requirements, but also those of function and context, as well. Creating jewelry means understanding how to make strategic design choices at the boundary between jewelry and person. Translating inspirations and aspirations into designs and finished products requires an intuitive, integrative sensitivity to shared understandings brought to the design situation by the artist and all the audiences ultimately invested in the product. The better designer is able to bring a high level of coherence and consistency to the process of managing all this — shared understandings, knowledge and skills, evaluative review, and reflection and adjustment. This is called ‘fluency’ in design. For the jewelry designer, there is a defined set of concepts and principles which revolve around this disciplinary literacy — the professional way of thinking through design, production, communication and critique — and how to be proficient at this. This is what this series of articles is all about.
DISCIPLINARY LITERACY AND FLUENCY IN DESIGN
Jeremy thought that the only thing he could do in life was design jewelry. He loved it. So it was not a question of “if” or “when” or “how”. But he told me it was always important not to get tricked by fashion. It was mandatory not to seek the trendy object. Not to turn away from that odd thing. And to pay very close attention to the details of how jewelry designers think, act, speak and reflect.
I thought about his advice a lot over the years of my own career as a jewelry designer. The disciplined designer needs to be attuned to the discipline way of seeing the world, understanding it, responding to it, and asserting that creative spark within it.
Yet jewelry design does not yet exist as an established discipline. It is claimed by art. It is claimed by craft. It is claimed by design. And each of these more established disciplines offer conflicting advice about what is expected of the designer. How should she think? How should she organize her tasks? How should she tap into her creative self? How should she select materials, techniques and technologies? How should she assert her creativity and introduce her ideas and objects to others? How much does she need to know about how and why people wear and inhabit jewelry? What impact should she strive to have on others or the more general culture and society as a whole?
In this book series, I try to formulate a disciplinary literacy unique and special and legitimate for jewelry designers. Such literacy encompasses a basic vocabulary about materials, techniques, color and other design elements and rules of composition. It also includes the kinds of thinking routines and strategies jewelry designers need to know in order to be fluent, flexible and original. These routines and strategies are at the heart of the designer’s knowledges, skills and understandings related to creativity, elaboration, embellishment, reflection, critique and metacognition.
At the heart of this disciplinary literacy are the strategies designers use to think through and make choices which optimize aesthetics and functionality within a specific context. These enable the designer to create something out of nothing, to translate inspiration into aspiration, and to influence content and meaning in context.
There are four sets of routines and strategies which designers employ to determine how to create, what to create, how to know a piece is finished and how to know a piece is successful. These are,
(1) Decoding
(2) Composing, Constructing and Manipulating
(3) Expressing Intent and Content
(4) Expressing Intent and Content within a Context
You don’t become a jewelry designer to be something.
You become a jewelry designer to do something.
The question becomes: How do you learn to do something?
How do you learn to be fluent, flexible and original in design? And develop an automaticity? And self-direction?
We call this ‘literacy’. For the jewelry designer, literacy means developing the abilities to think like a designer. These include,
o Reading a piece of jewelry. Here you the designer are able to break down and decode a piece of jewelry into its essential graphical and design elements. This aspect of fluency and literacy is very descriptive.
o Writing a piece of jewelry. Here you the designer are able to identify, create or change the arrangement of these design elements within a composition. Fluency and literacy are very analytical.
o Expressing a piece of jewelry. Here you the designer use the design elements and principles underlying any arrangement to convey content and meaning. Fluency and literacy are very interpretive.
o Expressing a piece of jewelry in context. Here you the designer are able to anticipate, reflect upon and incorporate into your own thinking the understandings and reactions of various client groups to the piece, the degree they desire and value the piece, and whether they see the piece as finished and successful. The designer comfortably moves back and forth between the objective and subjective, and the universal and the specific. The designer analyzes contextual variables, particularly the shared understandings as these relate to desire, and in line with that, thus determining value and worth. Fluency and literacy are very judgmental.
Everyone knows that anyone can put beads and other pieces together on a string and make a necklace. But can anyone make a necklace that draws attention? That evokes some kind of emotional response? That resonates with someone where they say, not merely “I like that”, but, more importantly, say “I want to wear that!” or “I want to buy that!”? Which wears well, drapes well, moves well as the person wearing it moves? Which is durable, supportive and keeps its silhouette and shape? Which doesn’t feel underdone or over done? Which is appropriate for a given context, situation, culture or society?
True, anyone can put beads on a string. But that does not make them artists or designers. From artists and designers, we expect jewelry which is something more. More than parts. More than an assemblage of colors, shapes, lines, points and other design elements. More than simple arrangements of lights and darks, rounds and squares, longs and shorts, negative and positive spaces. We expect to see the artist’s hand. We expect the jewelry to be impactful for the wearer. We expect both wearer and viewer, and seller and buyer, to share expectations for what makes the jewelry finished and successful.
Jewelry design is an occupation in the process of professionalization. That means, when the designer seeks answers to things like what goes together well, or what would happen if, or what would things be like if I had made different choices, the designer still has to rely on contradictory advice and answers. Should s/he follow the Craft Approach? Or rely on Art Tradition? Or take cues from the Design Perspective? Each larger paradigm, so to speak, would take the designer in different directions. This can be confusing. Frustrating. Unsettling.
As a whole, the profession has become strong in identifying things which go together well. There are color schemes, and proven ideas about shapes, and balance, and distribution, and proportions. But when we try to factor in the individualistic characteristics associated with the designer and his or her intent, things get muddied. And when we try to anticipate the subjective reactions of all our audiences, as we introduce our creative products into the creative marketplace, things get more muddied still. What should govern our judgments about success and failure, right and wrong? What should guide us? What can we look to for helping us answer the what would happen if or what would things be like if questions?
ESSENTIAL QUESTIONS ABOUT JEWELRY DESIGN WORTH ANSWERING
As you work your way through the articles in this series, it is important to recognize and understand the larger social and professional contexts within which jewelry design is but a part, and your place in it. Towards this end, I have formulated some essential questions every designer needs to have answers for and have deeper understandings about.
(1) Why are there disciplinary conflicts between art and craft, and between art and design?
(2) How do you resolve tensions between aesthetics and functionality within an object like jewelry?
(3) What is jewelry, and what is it for?
(4) Is jewelry necessary?
(5) What does it mean to be successful as a jewelry artist working today?
(6) What does it mean to think like a jewelry designer? How does this differ from thinking like an artist or thinking like a craftsperson?
(7) How does the jewelry designer know when a piece is finished and successful?
(8) How do you place a value on a piece of jewelry?
(9) Why does some jewelry draw your attention, and others do not?
(10) What does it mean to be a contemporary jewelry designer?
Some people kindly refer to their unfinished projects as UFOs (Un-Finished Objects). Others less kindly refer to them as abortions. Let’s just call them un-finished projects.
You’ll find you have a lot of unfinished beading, craft and jewelry making projects. They might be waiting for more supplies, or finding the right color or clasp. They might be waiting for you to learn or re-learn a particular skill or technique. They might be waiting for more time or motivation. You might have discovered another more exciting project to do in your most recent issue of Bead & Button magazine, and want to get to that immediately, even though you haven’t finished your last project.
You might begin a project, and then as you get into it, put it down, pick it up again, find that you forgot what you were going to do in the first place. You might have inadvertently cannibalized some of your other Un-Finished Projects to help you finish a particular project on hand, and then not be able to find these very same UFOs you intended to come back to and finish, having forgotten you cannibalized them.
As one of my friends remarked, “I’m going to have to live a very long time, or else I won’t get anything done!”
People do funny things with their unfinished projects. One woman I know puts them in a clear jar, and let’s them stack up as an artwork in progress. Some people work on them in rotation, with some kind of system, lazy-susan-tray or otherwise. Others take the time to tear them up and reclaim the parts. That’s definitely not me. I leave them laying around, piled up on bead trays. Many people swap them.
I hate people who finish each bead project before starting another. Don’t you?
How can they? How much true-grit can anyone person have, or be allowed to have? Getting a grip on one’s beadwork — Is that really possible? Can you really weed out your unfinished projects, and reclaim your beads, and make clear, definite, timely decisions about which projects you will start, which projects you will finish, and which ones you won’t? Is there a pill for this? Either a stimulant or a cure?
My friend Adonna wrote to me…
“I am so jealous of people who finish things. I have tons of ufo’s and I want to keep learning new stuff. Beaded beads really do fascinate me… like the sparkly wheels. I have clipped the instructions, printed off the net, bought stuff from Halpenny and Ruby Fisch and have yet to sit down in a quiet space and do it. Then there is all the polymer clay ideas. If I had a room like Linda’s…… I’d be paralyzed with what to do FIRST… I guess I have to learn to go to my small room I now have and really get the stuff into separate corners. Beads, sewing, polymer, wire… then put the TV and dvd player in middle on a swivel stand, and close the door.
“I have realized LONG ago, that the fun is in starting something new, the challenges of finding all the pieces to work with, and learning and doing the beginning. When I can visualize the END, I stop and move on. You should see the ufo’s in quilting, doll/bear making, even a few pieces of clothes, and all of the useable incorrect size patterns and not to mention the 1,910+ collectibles.
“Some of the problems in finishing is surely the ‘Now What?’ concept of what to do with it all. I cannot wear all the finished jewelry. Certainly NOT give it away….would rather throw it away or let the executor deal with it at the junk shop than to give it to people who just politely say “thank you” and have no intention of wearing it even once a year.”
Most beaders like to bring their beads wherever they go. Lest they end up in some jail charged with terrorism, today’s air traveling presents special challenges for beading on a plane.
While the rules for what you can and what you cannot bring on a plane seem to vary frequently, you can be sure that scissors, crochet hooks, knitting needles, and many hardware tools, will tend to get you pulled over for a major search, and maybe a major loss of these as well.
Dental floss containers are good substitutes for scissors. And they hold your bobbin of thread in a good, tight way, as well. Supposedly, if your scissors are blunt-ended, they are OK.
Circular knitting needles are usually acceptable. Straight needles made of wood, plastic, or bamboo stand a better chance than metal ones.
Bamboo crochet hooks won’t get taken up.
Keep your beads tightly packaged, and your projects small. You don’t want your beads flying all over the plane. And the seats and tray tables are tight and small.
In case your stuff gets confiscated, bring with you a stamped, self-addressed envelop, so you can have these mailed back to you, instead of tossed in the garbage.
Try to get an EXIT row — more leg room.
Soft tackle boxes make excellent carry-on luggage.
You may want to ship your heavy duty tools and materials to your destination ahead of time, instead of playing the odds of bringing them onto a plane.
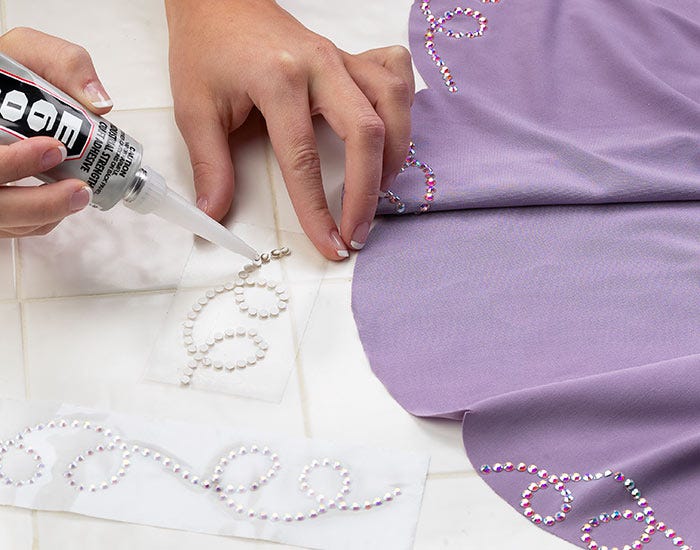
There are glue-on rhinestones and hot-fix rhinestones. They are equally as good.
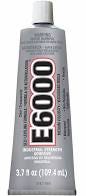
For glue-on, prefer E6000 glue. Other glues either don’t hold well, or can ruin rhinestones.
When we use E6000 with rhinestones, we put a little drop of glue on the end of a pin.
Then we touch the glue to the back of the rhinestone.
We maneuver the pin-glue-rhinestone over the place where we want the stone to be.
Then we push the rhinestone in place with our finger, and simultaneously pull the pin away from the stone.
We rub the stone and around the stone with our finger or the pin to get any excess glue off.
Before it dries, E6000 rubs off like rubber cement.
E6000 takes 10 minutes to begin to set, so you can move things around for 10 minutes to get them to the position you want. At 20 minutes, the consistency is like rubber cement. You can use your finger or a tweezer and easily remove the excess glue. E6000 takes 24 hours to fully set.
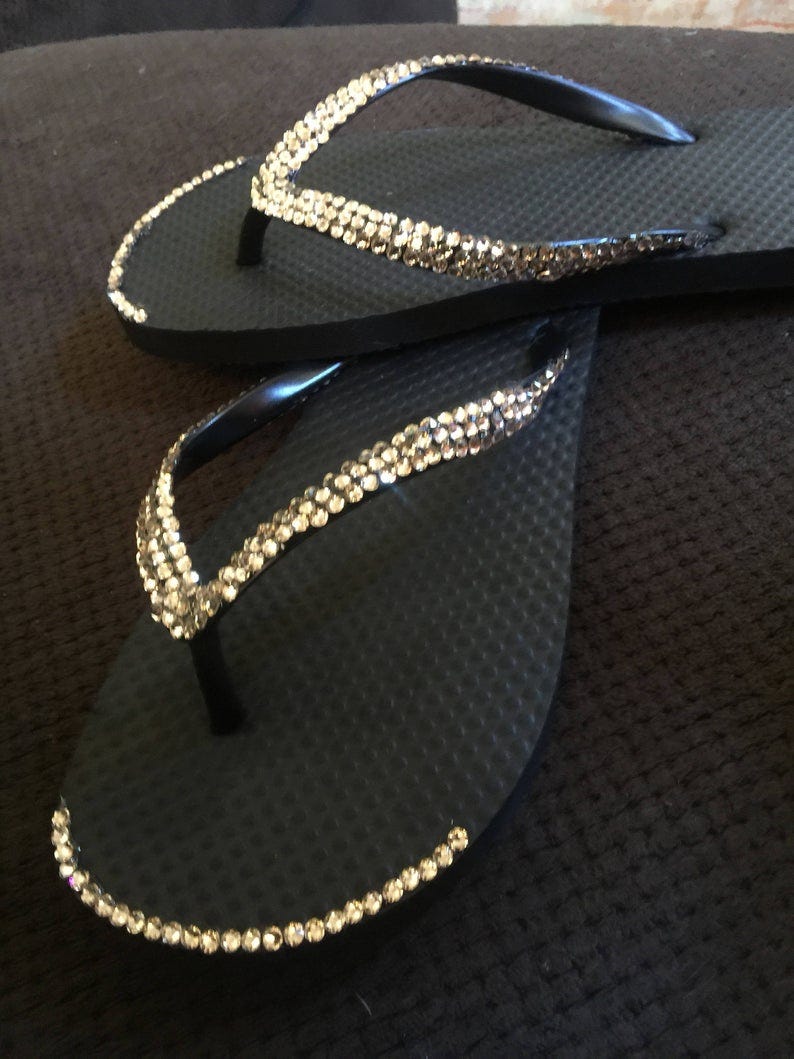
WHEN YOU DON’T WANT THAT POP!… Gluing Rhinestones to Flip Flops (or other Oily Surface)
Flip Flops are a fashion statement — especially when decorated with bright, shiny Austrian crystal rhinestones. Unfortunately, the rhinestones will pop off easily, if the surface of the flip flops isn’t treated first. You see, the rubber flip flops are very oily, and glue will not stick to them very long.
I suggest going to your local hardware store. Buy a can of wood-deck water-proofing sealant, and paint it on your flip flops. Let them dry. Then glue your rhinestoneson. I suggest using a glue like E6000 or Beacon 527.
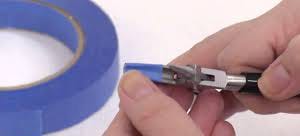
If you feel you are scratching up your pieces with your pliers, you can do one of two things.
You can replace your pliers with nylon tipped ones. This solves the scratching issues, but sometimes you don’t feel you have the same control over these, as you do with regular pliers. They tend to slip too easily when you are using them.
Or, you can take some duct tape, and tape over the jaws of your pliers. You can do this to your chain nose pliers, flat nose pliers, round nose pliers, and the like.
Since the duct tape is thin, you don’t lose that “feel”, as you manipulate the pliers with your hand.
WHEN THE CORD DOESN’T COME WITH A NEEDLE… What Should I Do?
The Griffin bead cord, both nylon and silk, comes with a needle attached to the end of the cord. This makes it easier to string. It also makes it easier, when knotting, to use a thicker cord and get a larger knot.
However, many bead cord products, yarns, and other thicker cords come on spools and do not have needles attached. What do you do in this case?
First, there are needles that work in this situation. There are two kinds of needles to use with bead cord, and you would probably want to have both on hand.
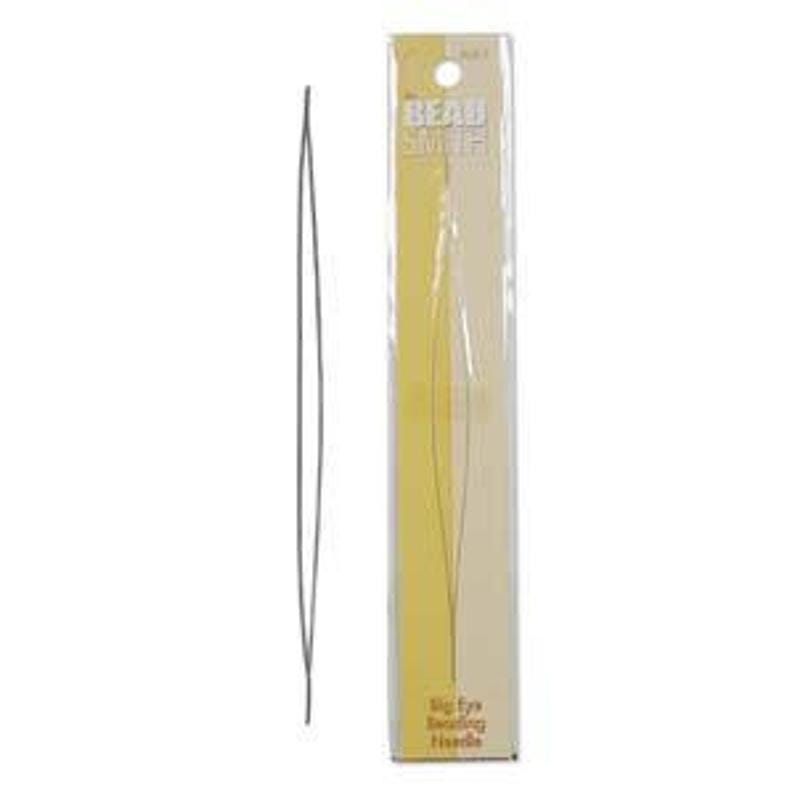
The first is called a Big Eye Needle. You wedge the end of the cord at one end of the needle, and that becomes your trailing end.
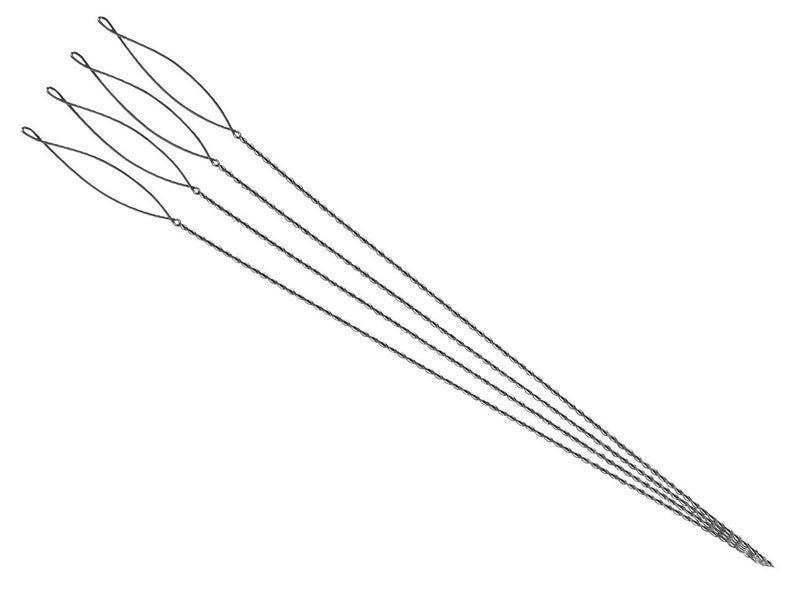
Twist Wire Needle (ska Collapsible Eye Needle)
The other is called a Twist Wire Needle (also known as a Collapsible Eye Needle). A medium size in this needle would probably work fine. Both needles have short life-spans, so you would need to have a bunch on hand at any one time.
Another thing people do with the nylon bead cord is either use superglue on one end, or take a bic lighter to one end to melt it. This makes the end stiff. Then you take a razor blade and cut the very end at an angle, so you have a “needle” at the end of the cord.
One final thing that people do. They take 26 gauge or 28 gauge wire, cut a 6–8″ piece, bend it in half, making a V-end. They wedge their stringing material into the V-end, and use this like a needle.
Bead shows travel across the country, back and forth, and come to many of the mid-sized and larger cities and towns across the US, as well as some smaller places.
Bead shows showcase many vendors who sell beads, gemstones, cabochons, findings, books, supplies, and other things related to beading and jewelry making. Some are small and may have 20 vendors; others are very large and have hundreds of vendors. The bead show of all bead shows occurs in Tucson, Arizona every January/February, with a smaller, though not by any means ‘small’, repeat in September.
The bead shows are there to overwhelm you with choices, and get you to part with all your money — the money you brought with you, that you found hidden away under the pillows in your couch, or planned to use to buy something else in the future. Very ENTICING. Fun. Exciting. Thrilling. Exhausting. This is one of those settings where you could easily use the phrase, “the energy in the room was palpable.”
I remember my first bead show visit. There were beads everywhere. I couldn’t catch my breath. I didn’t know where to start.
To get through these shows, to be sure you’ve seen the most important stuff for you, and to be sure you survive with some change left over for buying dinner, I offer a few tips:
o Wear comfortable shoes
o Bring copies of your tax form, if you buy wholesale
o Have a mix of cash, checks and credit cards. Some vendors might take cash, but not checks or credit cards. Others some different arrangement.
o Bring a tote bag.
o Bring a small ruler or gauge
o Wear your glasses. You might also bring a magnifier.
o Bring a small notebook and pen.
o Bring a bottle of water.
Do a Walk-Through first. Get the lay of the land, so to speak.
Set a budget and stick to this budget.
Collect business cards from all the vendors. If they have a website, be sure you leave with that information.
Ask the vendors you bought things from how you can re-order items from them.
Ask the vendors you bought things from when they might expect to be back in your town.
Especially if you are buying something directly from an artist, such as a lampwork artist, take some time to talk and get to know that person. You’ll learn a lot. It’s not often you get direct access to artists.
Play close attention to the quality of what you are buying. At these shows, quality varies widely. The prices of things are often lower than what you would find in your local bead store — but the quality might vary too.
A really good artist will wax their beading thread (Nymo, C-Lon, One-G) or cable thread (Fireline). Even if the thread says it’s been pre-waxed, you want to re-wax this thread.
We wax our thread to make it strong, less likely to fray, to straighten and stretch it a bit before using, to waterproof and protect the thread from weird body chemistries as well as cosmetics, perfumes and perfume oils and hair sprays, and pollutants in the air, to glide through the beads better, and to fill in the jagged edges of the hole of a bead to make it less likely to cut the thread.
There are different types of threads and conditioners.
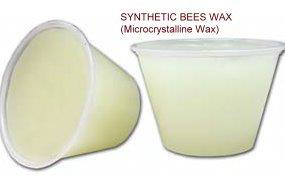
The primary choices are among pure beeswax, synthetic beeswax (also called microcrystalline wax), and a thread conditioner, like Thread Heaven. I suggest you always use beeswax, either pure or synthetic. I do not recommend a thread conditioner.
Thread conditioners reduce the chances your thread will get tangled or knotted up while you are weaving or stringing with it. It reduces the static electricity that builds up each time you pull the thread or cable thread through a bead. But it doesn’t have any of the positive impacts that wax does. It’s an either or choice. So I choose wax.
The synthetic wax is a little more expensive than the pure wax, but I prefer it. The synthetic does everything the pure one does, only better.
Waxing the thread takes very little time, and it can add years to the life of your bead art. Regular bees wax will protect your thread for 150 years. Synthetic bees way many more times this.
When waxing, we pull our thread through the wax two times. Then we take our two fingers, pinching the thread, and slowing moving down the full length of our thread. Our body temperature melts the wax into the thread. Our fingers also knock off any excess wax on the thread. Always pull by the thread, not by your needle, when waxing.
To feel the effects of waxing, try this:
Take an arm’s length (about 6 feet) of Nymo D or C-Lon D Thread it onto a Size #10 English beading needle.
Double it up, so that you now have your length of thread in half, with two equal lengths extending from either side of your needle’s eye hole.
At the needle end, wrap the thread around your forefinger a couple times. When we pull the thread through the wax, we want to pull by the thread, and NOT by the needle.
Wax the thread twice, then take your two fingers and go down the thread, allowing your body temperature to melt the wax into the thread.
Now un-double your thread.
Move your needle up to one end, leaving about an 8–10” tail.
Take your two fingers, pinching the thread, and feel down the length of the thread to find the area that was wrapped around your finger, and did not get waxed. Your fingers will slip.
Now wax two more times from that area on down.
Pinch your thread at one end, moving your fingers down the length to melt the wax into the thread.
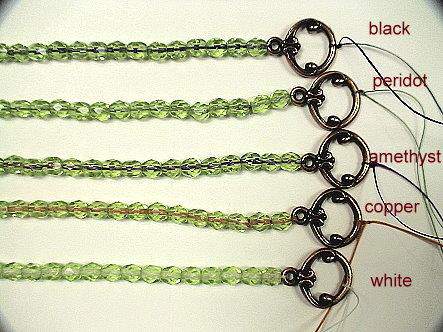
Thread color affects the viewer’s perception and evaluation of the piece.
People see the thread at the knots. They subconsciously see the threads between each bead. If you are using transparent or translucent beads, the thread color will affect the color of these beads. You can do the same piece using different colored threads, and each of these pieces will look very different.
Black always works. Can’t see the knots, only shadows. This makes your piece seem older, richer, more traditional. It gives your piece a patina.
White makes your pieces brighter, sharper, more contemporary looking.
Colors: Most people select a color that is the same or similar to the predominant color in the piece. In this case, there is no color affect. However, you can pick contrasting or complimentary colors, such as using an amethyst colored thread to string peridot colored beads. You can also change the colors of your thread as you work thru your piece.
There are many types of stringing materials to choose from. Each has its own pros and cons. These types include,
o Beading Thread o Flexible Nylon Coated Cable Wires o Cable Threads (a hybrid between the cable wires and the beading threads, such as FireLine) o Bead Cord o Elastic String o Hard Wire
The primary choice is between needle and thread vs. cable wire.
You always get your best design or functional outcome with needle and beading thread. Projects strung on thread always take the shape of your body, so they move with the body, drape the best, feel the best. Needle and thread, however, is very involved — you have to use a needle, you have to wax the thread, you typically go through each bead at least 3 times. If you are trying to sell your pieces, it is almost impossible to get your labor out of a needle and thread project.
Flexible, nylon coated Cable Wires are much simpler and quicker to use. But the outcomes tend to be stiff, not move as well, or drape as well. However, by adding support systems, such as rings and loops, within your piece — ways to increase jointedness — you can make your cable wire project function a little more closely to that of needle and thread.
In terms of other stringing materials, cable threads (such as FireLine) often offer a good compromise between the functional qualities and marketing concerns of needle/thread and cable wire projects.
Bead Cords are threads braided together so they look pretty. Bead Cord is used when you want your stringing materials to show, such as when putting knots between beads, or doing something like a Tin-Cup necklace, where you have a cluster of beads, and the cord shows, another cluster of beads, the cord, and so forth. Bead Cord trades off durability for visual appearance. If you were covering the whole string with beads, you would not want to use bead cord.
Elastic String is very popular, and avoids the issues of attaching clasps; however, it is not a durable product and loses its “memory” over time.
A last choice is hard wire. Hard wire is not a stringing wire. You can’t put a strand of beads on hard wire and attach a clasp; the metal wire will bend, kink and break from bending back and forth. Hard wire is used to create structural components, chains or shapes, which you can begin to link up, that is, build in support systems, in order to construct a bracelet or necklace.
Basic Steps: Using Needle and Thread to String Beads
Needle/Thread Bead stringing is a technique for securing a clasp to beads strung on beading thread or cable thread. Here you tie knots to secure your beadwork to your clasp. The process is relatively simple and requires only a little practice.
Successful Needle/Thread Bead Stringing requires that you understand the following: 1. Which threads or cable threads are best for which projects 2. Which needles work best 3. How to wax your thread 4 . How the materials you use affect your success 5 . The mechanical process itself, how it works, why it works, and why we do each step
THE BASIC STEPS:
With needle and thread, you always go through your beads 3 times. In a bead strung piece,that means you are going to take your needle and thread back and forth 3 times.
In fact, we are going to do everything in 3’s. We are going to go back and forth 3 times. As we get to each end,we are going to tie 3 knots.
Create your pattern.
2. You would cut your thread — about 6′ (a wingspan).
3. Lay out all your beads and the clasp assembly parts on the bead board or some other work surface, in the order they are to be used.
4. Thread your needle.
5. Wax your thread.
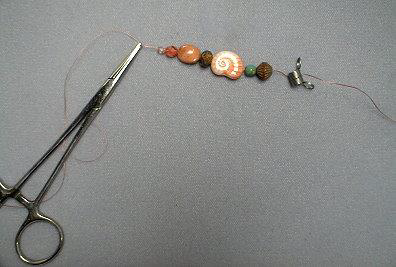
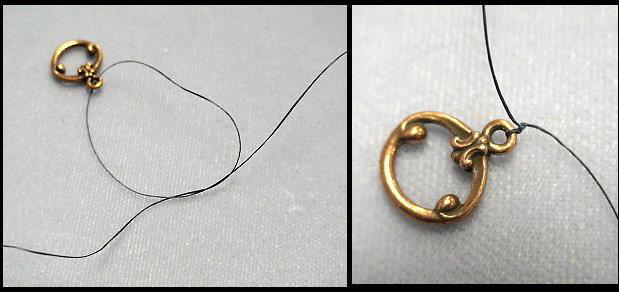
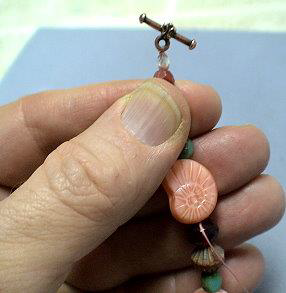
6. You would attach the largest part of your clasp — with Toggles, this is the ring — on one end, tying three overhand knots, and leaving a 8–10″ tail.
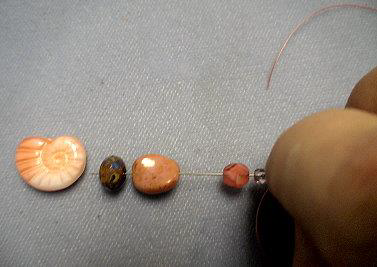
7. Slide on your beads, following the pattern.
NOTE: We only slide the beads over the thread spine, not the tail. With needle/thread work, we deal with the tails at the very end. They will be annoyingly in the way until then.
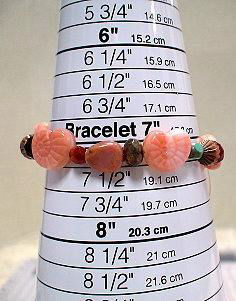
8. Determine the fit — both length and ease — by clamping or holding with your fingers the open end, and encircling a sizing cone or someone’s wrist with your bracelet. Remember here that the other end of the clasp will add another 1/2″ to this length.
Adjust the number or patterning of beads, if necessary.
NOTE: You need to make all your size and patterning adjustments BEFORE you attach the 2nd part of the clasp.
9. Tie off the other clasp-component — with the Toggle, this is the bar — making three knots.
10. Bring your needle/thread back to the ring side, and tie three more knots.
11. Bring your needle/thread one more time back to the bar side.
12. Tie three more knots.
13. Bring your needle/thread back through towards the ring about 1 1/2″ to 2″.
14. Tie 3 more knots.
15. Finishing off the tail. We want to see if we can pop any excess threads or knots which are showing back into the hole of that first bead.
Pinch the beads under the clasp and pull away from you while you grasp your thread and pull this towards you. Sometimes you will feel or see a pop.
Trim the tail.
16. Thread the tail on the other side of the bracelet onto a needle, and repeat these last two steps.
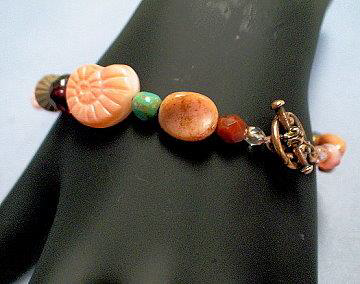
HOW TO USE NEEDLE AND THREAD To String a Bracelet, Including How to Wax Your Thread
There are many different types of stringing materials. The best outcomes are achieved using needle and thread. Beading threads are nylon. Most are shaped like a thin ribbon, rather than round, like sewing thread. Most are bonded, rather than twisted, fibers, which adds a lot of what is called “abrasion resistance.”
With beading threads, your stringing will be the strongest, it will last a long time, it will feel supple and soft, and it will drape and wear the best. It will take the shape of the body, and move the best with the body. These jewelry qualities are referred to as “ease.” Needle/Thread projects have a natural ease to them. Achieving good ease is much more problematic with other stringing materials.
With needle and thread, you tie knots to secure your clasps. Prominent beading threads including Nymo, C-Lon and One-G. One thread, Silamide is a pre-waxed thread and it is twisted, rather than bonded, which means it has no abrasion resistance. Although it is pre-waxed and little easier to manipulate through your beads, I don’t recommend it. I’m not big on anything that breaks easily.
Using needle and thread does add a lot of time to the creation of a piece. You have to use a needle, which can be awkward. You need to wax your thread, which takes more time. You need to go through your piece THREE times. If you are selling your pieces, very often it is difficult to recoup your labor costs, when using needle and thread. In this case, people often revert to using a cable wire as their stringing material.
Bead Stringing with cable wires goes very quickly and is easy to do. The cable wire is stiff enough to be its own needle. You don’t wax. You only have to go through your piece ONE time. The better cable wires are very strong. There is a stiffness to them that makes the pieces not feel as good when worn, in comparison to thread. You also have to use a crimp bead to hold the cable wires in place, and this is a weaker and somewhat riskier design element than tying a knot in the Clasp Assembly. Cable wire brands that I like include Soft Flex and Flexrite.
Pieces done on cable wire move in the opposite direction that your body moves. If I wear a needle/thread bracelet on my wrist, and move my wrist to the left, the bracelet will move with me. If I wear a cable wire bracelet on my wrist, and move my wrist to the left, the bracelet will actually move in the opposite direction to the right. The cable wire bracelet does not conform to and take the shape of your wrist, when worn. This becomes a major design problem not always dealt with easily.
Another alternative to beading thread is to use a hybrid cable thread, such as FireLine or PowerPro or Spiderwire. Cable threads are threads braided together and encased in nylon. Originally these were used as fishing line and adapted by craftspersons for stringing and weaving. You use needles with these cable threads, but you only have to go through your piece one time, instead of 3 times, as you do with thread. You can go through your piece more than once to make your piece stiffer, but you don’t have to. You do not have to wax these cable threads. You can wax them, however, if you want, to increase your thread tension, and add more security against the sharp bead-holes cutting the cable thread.
The cable thread pieces are stiffer than the regular beading threads, but drape better than the cable wires. You tie knots with the cable threads, like with regular beading threads, to secure your clasp. Since you still rely on a needle, using the cable threads goes more slowly than using the cable wires. The PowerPro is a little awkward to use. I really like the FireLine and Spiderwire.
Threads (nylon beading thread)
There are many types and brands of beading threads, each with some pros and each with some cons.
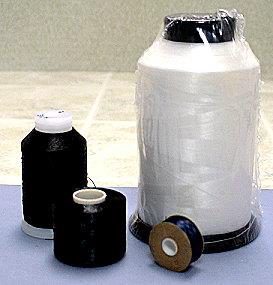
The original nylon beading thread is Nymo. Nymo was first developed by the shoe industry to attach the bottom of your shoe to the top of your shoe. It is widely used in upholstery. In the 1980s and earlier, if you wanted to buy Nymo, you bought it on a gigantic wheel — a five lifetime’s supply for us. As beading got more popular, Nymo packaged their thread on smaller and smaller entities, starting with a cone (a little bigger than a fist), then a spool (a little bigger than a thumb), and then a small bobbin. More recently the spool has been replaced by a large bobbin.
It turns out that the company could not get the same product onto a small bobbin. So, the thread on the small bobbin is weaker than the thread on the large bobbin, spool and cone. However, usually only white and black colors are available on the entities larger than the small bobbin.
Nymo is very strong. I suggest, if you have never worked with Nymo, to cut off about a 3 foot length, and try to pull on it and break it between your hands. It will break, but you’ll feel how tough it is. And in bead stringing, we typically go through each bead at least 3 times, so you have 3 thicknesses of this thread inside your piece.
When they make Nymo thread, it is a beige color. To make black, they dye the thread. The black dye tightens the thread, and makes it stronger. To make white, they bleach the thread. The bleach weakens the thread, so white is weaker than black. To make a color thread, they first bleach the thread white and then add a color dye. These color dyes further weaken the thread. So colors are weaker than white, and thus weaker than black. The colors of the thread, however, are consistent from batch to batch.
Nymo comes in many sizes. From smallest to largest, these include: OO, O, A, B, D, F, and G. The most popular and most often used size is D.
C-Lon is a newer thread. When they make C-Lon, whatever color it is, that is the color the thread starts as. So, all the colors AND the white AND the black are equally as strong. However, the color from batch to batch will vary, sometimes widely. Overall, we like C-Lon better, particularly for the white and the colors. Black C-Lon is equivalent in strength to the Black Nymo. For everything else, it is stronger. One drawback to C-Lon is that the ends of the thread fray easily, making it more difficult to get your thread into the eye-hole of the needle, than with Nymo. C-Lon only comes in two sizes — AA (smallest) and D (thickest).
ONE-G is a premium beading thread and is similar in strength to C-Lon. I think its best attribute is that it has a spring-i-ness to it, that makes it much less tiring to use, than Nymo or C-Lon. ONE-G only comes in size D and only in about 12 colors.
Silamide is a pre-waxed thread. The pre-waxing allows the thread to get less tangled up when you use it. However, Silamide breaks very easily, so I don’t recommend it. Why put in all that time into a project if there is a good chance your thread will break?
Beading thread is shaped flat like a ribbon. Sewing thread is shaped round. Sewing threads are not strong enough to use in beadwork.